Pruning
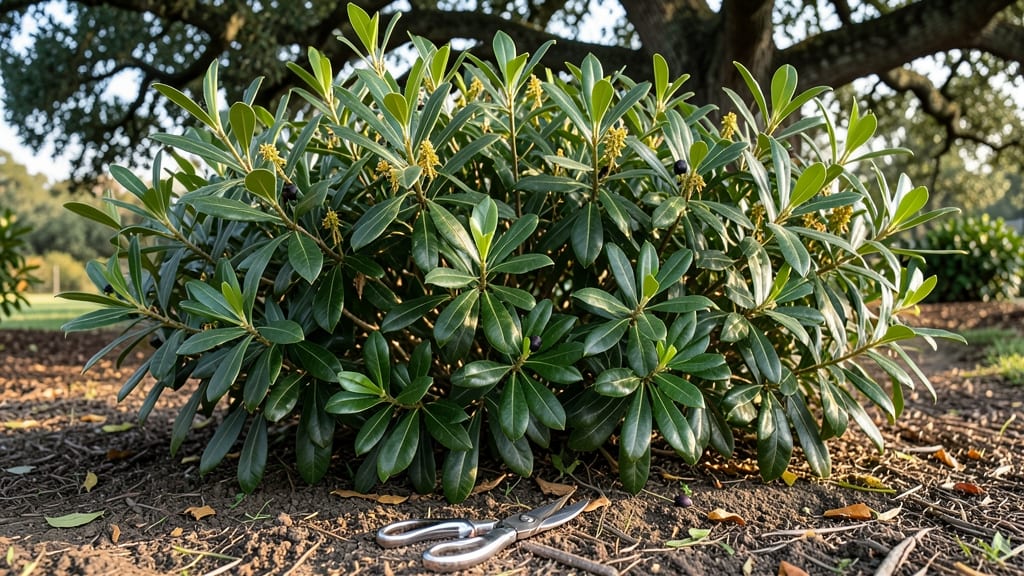
Bay tree maintenance isn’t about complicated schedules—it’s about three simple cuts that keep your tree lush and productive year after year. 🌿 I learned this the hard way after letting mine grow wild, only to watch it shed needles and look ragged by winter.
The secret isn’t frequency; it’s timing and technique.
Your bay tree thrives on pruning in late winter or early spring, right before new growth starts. Grab sharp pruners and trim back any dead, crossing, or overly long branches—never more than a third of the tree at once.
Indoor trees need less drastic cuts, while outdoor varieties can handle a little more shaping. Water deeply after pruning to help it recover.
You’ll notice the difference in just a few weeks: shiny new leaves, a denser shape, and fewer pests hiding in overgrown branches. The tree stays compact, produces more fragrant foliage, and even blooms better. Plus, it’s easier to harvest leaves for cooking when the branches are well-maintained.
Whether your bay tree lives in a sunny kitchen window or a sheltered garden bed, these same principles apply. The key is consistency—just a little attention a few times a year keeps it healthy for decades. Let’s get those pruners ready!
📚 In This Guide
- What you need
- Instructions
- Tips and common mistakes
- Wrapping up and next steps
What you need
- ● Pruning shears – Sharp, bypass-style shears (4-6" blades) for clean cuts. Pro tip: 💡 Sanitize with rubbing alcohol before use!
- ● Hand pruners – For smaller branches (2-3" blades). Opt for ergonomic grips for comfort.
- ● Loppers – Heavy-duty (8-10" blades) for thicker stems (½" or larger).
- ● Gloves – Sturdy, cut-resistant gloves (gardening or pruning-specific) to protect hands.
- ● Disposable pruning bags – 3-5 gallon capacity to collect trimmings (or a bucket lined with a trash bag).
- ● Rubbing alcohol (70% isopropyl) – Small bottle (4 oz) for sterilizing tools between cuts.
- ● Hose with nozzle – For rinsing tools and cleaning sap off leaves.
- ● Extension pole – 3-5 ft telescoping pole with shears for high branches.
- ○ Tree wound dressing – Pruning sealant (optional; some gardeners skip this for bay trees).
- ● Notebook & pen – To sketch your tree’s shape or track pruning dates.
- ● Safety glasses – If dealing with large, thorny branches.
- ○ Mulch (optional) – 2-3 inches of organic mulch (e.g., wood chips) to retain moisture.
Step-by-Step instructions for year-round bay tree care
Keeping your bay tree thriving takes just three focused cuts—no complicated routines here.
✂️ Step 1: Prune for Shape in Late Winter
Wait until late winter (just before new growth starts) to give your bay tree its first cut. This is when the tree is dormant, and you can see its natural shape clearly. I like to start by removing any dead or crossing branches first—these are easy to spot because they’re brown or growing inward.
Use clean, sharp pruning shears to make your cuts at a 45-degree angle, about ¼ inch above a leaf node. This encourages new growth to sprout from the right spot. If your tree looks leggy, trim back the longest stems by about ⅓ to encourage bushier growth. You’ll see fresh green buds forming within a few weeks—that’s your sign the pruning worked.
🌿 Step 2: Thin Out Crowded Foliage in Early Summer
In early summer, focus on thinning out the interior branches to improve airflow. Bay trees can get dense, and too much shade inside the canopy leads to yellowing leaves and pests. Look for branches that are rubbing against each other or growing straight into the center—they’re the first to go.
Make your cuts just above a set of leaves or a small side branch. Avoid cutting into old wood, as bay trees heal slowly from deep wounds. After trimming, step back and check if light can now reach the inner leaves. You’ll notice the tree’s shape opens up, and new growth will fill in the gaps naturally over the season.
✂️ Step 3: Lightly Trim for Harvest in Fall
As fall approaches, your bay tree will start producing new growth that’s perfect for harvesting. Focus on trimming the outermost tips of branches, leaving at least 3-4 leaves on each stem. This encourages the tree to produce fresh, tender growth for your kitchen—bay leaves are best harvested when they’re still bright green and flexible.
After harvesting, give the tree a light trim to remove any yellowed or damaged leaves. These won’t regrow and can harbor pests over winter. A final shape-up now keeps the tree looking tidy and ready for dormancy. If your bay tree is outdoors, bring it inside before the first frost—these trees aren’t cold-hardy and will thank you with lush new growth come spring.
Tips & tricks for perfect year-round bay tree care
Here's what nobody tells you about keeping your bay tree looking its best—these tricks save time and prevent common mistakes.
Timing is Everything: Late winter pruning in Step 1 works because the tree is dormant, making it easier to see the natural shape. I've learned the hard way that pruning too early can stimulate unwanted growth before spring. Wait until you see the first signs of budding—usually around February in most climates. This timing ensures you're cutting back old growth while preserving new energy for the season ahead.
The Technique That Changed Everything: When making your 45-degree cuts in Step 1, don't just guess—use a small ruler or measuring tape to verify you're cutting exactly ¼ inch above the leaf node. This precise measurement makes all the difference in encouraging new growth. I used to eyeball it and would end up with uneven regrowth. For thicker branches, make two cuts: one to remove the branch and a second to create your clean 45-degree angle.
Seasonal Insight: Early summer thinning in Step 2 isn't just about aesthetics—it's about airflow. I've noticed that bay trees with good airflow develop fewer yellow leaves and pest issues. When checking for light penetration after trimming, stand back about 5 feet from the tree. If you can see through the canopy to the other side, you've done enough. This simple check prevents over-trimming while ensuring the tree stays healthy.
Harvesting Wisdom: The 3-4 leaves rule in Step 3 is crucial for future harvests. I used to take too many leaves, which weakened the tree's ability to produce new growth. Remember that each leaf you harvest represents stored energy for next year's production. For kitchen use, harvest leaves in the morning when their essential oils are at their peak concentration—this makes them more flavorful for your cooking.
Pro Tips for Bay Tree Maintenance
- Here's what nobody tells you about keeping your bay tree looking its best—these tricks save time and prevent common mistakes.
- Timing is Everything: Late winter pruning in Step 1 works because the tree is dormant, making it easier to see the natural shape.
- The Technique That Changed Everything: When making your 45-degree cuts in Step 1, don't just guess—use a small ruler or measuring tape to verify you're cutting exactly ¼ inch above the leaf node.
Frequently asked questions
How often should I prune my bay tree?
Prune your bay tree lightly twice a year: once in late winter or early spring (to shape and encourage new growth) and again after flowering (to maintain density). Avoid heavy pruning in fall—it stresses the tree before winter dormancy. Focus on removing dead or overcrowded branches first!
Can I prune my bay tree at any time of year?
While bay trees are resilient, timing matters. Prune in spring or summer for best results—this is when the tree is actively growing. Avoid heavy cuts in late fall or winter, as new growth may struggle to harden off before cold weather. A light trim to remove dead wood in winter is fine, but save major shaping for warmer months.
What’s the best way to prune bay tree branches without harming the plant?
Use clean, sharp pruners to make cuts just above a leaf node (the bump where leaves attach) at a 45-degree angle. Avoid tearing branches—this invites disease. Sterilize tools with rubbing alcohol between cuts, and never leave stubs. For thicker branches, cut in stages to prevent sap bleeding (though bay trees handle this better than some plants).
My bay tree leaves are yellowing—is it overwatering or pruning-related?
Yellow leaves usually signal overwatering, but pruning can stress the tree if done poorly. Check soil moisture first—bay trees prefer well-draining soil and hate soggy roots. If pruning was recent, yellowing may be temporary shock. Adjust watering (let topsoil dry between waterings) and avoid fertilizing until the tree recovers. Prune only to remove damaged leaves.
Can I grow a bay tree indoors year-round, or does it need outdoor conditions?
Bay trees thrive indoors with bright, indirect light (near a south or west window) but need seasonal outdoor time for optimal health. In spring/summer, move it outside for a few hours daily to boost growth. In winter, keep it indoors away from drafts. If indoor conditions are poor (low light, dry air), growth may slow—prune lightly to maintain shape and health.
What’s a good alternative if my bay tree isn’t cooperating with pruning?
If your bay tree struggles with pruning (e.g., slow recovery, pests), try these low-maintenance alternatives: Lavender (drought-tolerant, fragrant), Rosemary (hardy, versatile), or Olive trees (similar Mediterranean needs). For a bay-like aroma, opt for California bay (Umbellularia californica), which is more forgiving with pruning.
Wrapping up and next steps
Mastering bay tree maintenance isn’t just about keeping your plant alive—it’s about unlocking its full potential with just three simple cuts a year! 🌿 Whether you’re trimming for shape, health, or harvest, consistency is your best friend.
Start small, observe your tree’s response, and soon you’ll have a thriving, aromatic centerpiece that rewards both your garden and your kitchen.
Ready to take the next step? Grab your pruners, schedule your first trim, and watch your bay tree flourish! 🌱