Pruning
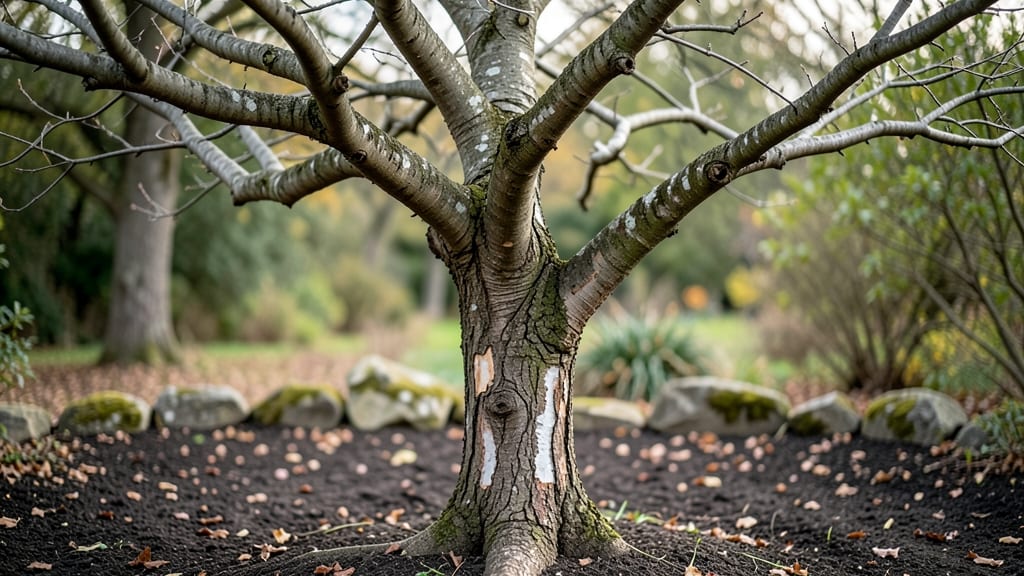
A strong cherry tree trunk isn’t just about looks—it’s the foundation for decades of fruit and shade. ✨ I’ve pruned enough cherry trees to know that a sturdy trunk starts with the right cuts, the right timing, and a sharp eye for structural problems.
The first step isn’t about removing branches—it’s about understanding how the trunk grows and where to guide it.
Most people skip trunk maintenance until they see cracks or splits, but the best time to shape a cherry tree trunk is early spring, when the tree is just waking up. You’ll need clean pruning shears, a ladder (for taller trees), and a little patience—no rushing.
The goal isn’t to carve the trunk like a sculpture but to remove weak growth, water sprouts, and any branches growing straight down (which compete with the trunk for energy).
What you’re really after is a straight, unobstructed trunk that supports the tree’s weight and resists disease. A well-pruned trunk stays upright, develops a smooth bark texture, and sends out strong branches.
Over time, this means fewer structural failures, more fruit production, and a tree that looks like it belongs in a park, not a backyard.
Even the best-pruned trunk needs regular check-ups. Watch for signs like peeling bark, oozing sap, or fungal growth—these are red flags. Addressing them early keeps your tree healthy for years. Ready to get started? Let’s make that trunk the backbone of your orchard.
📚 In This Guide
- What you need
- Instructions
- Tips and common mistakes
- Wrapping up and next steps
What you need
- ● Pruning shears: Bypass pruners (sharp, clean, and sterilized with rubbing alcohol to prevent disease). Size: 6–8 inches for small branches.
- ● Loppers: For thicker branches (½–1½ inches). Quantity: 1 pair.
- ● Hand saw: For stubborn, larger limbs (2–4 inches). Type: Pruning saw with a curved blade.
- ● Ladder: Extendable or sturdy step ladder (height depends on tree size). Safety note: Use a non-slip surface.
- ● Gloves: Heavy-duty, cut-resistant gloves (e.g., leather or synthetic mesh). Why? Protects from thorns and rough bark.
- ○ Disposable pruning sealant: Optional but helpful for sealing large cuts (e.g., Tree Seal or pruning wax). Quantity: Small jar.
- ● Rubbing alcohol (70%+) or bleach solution: For sterilizing tools between cuts. Mix: 1 part bleach to 9 parts water.
- ● Heavy-duty trash bags: For collecting pruned branches. Quantity: 2–3 bags (or a wheelbarrow for large debris).
- ○ Sharpie or marker: To label cuts if training young branches (optional).
- ● Timing: Prune during dormant season (late winter/early spring) for best results. Avoid pruning in fall (disease risk!).
- ● Weather: Choose a dry, calm day—no rain or wind for 24 hours before/after.
- ● Tree age: Young trees (1–3 years) need light pruning; mature trees may require structural cuts.
- ● Safety gear: Safety glasses (in case of debris) and sturdy shoes (no sandals!).
- ● Tree health check: Inspect for diseases (e.g., bacterial canker) or pests before pruning. Report issues to a local arborist if severe.
- ● 🔥 Sharpen your tools first! Dull blades tear bark, inviting infections.
- ● ✨ Use a pruning rope or spreader for large branches to avoid bark damage when pulling.
- ● 🌡️ Work in layers: Remove small branches first, then tackle larger ones.
- ● 📝 Sketch a plan: Outline your cuts on paper before climbing the ladder!
Step-by-step guide to pruning a cherry tree for strong, straight growth
Your cherry tree's trunk is its foundation—prune it right, and you'll avoid weak forks and crooked growth for years.
🌱 Step 1: Assess the Trunk and Branches in Late Winter
Start when the tree is dormant, between late February and early March, before buds swell. Look for branches growing at sharp angles (less than 45 degrees) or rubbing against each other—these are your first targets. Run your hand along the trunk to feel for any rough bark where branches might be competing for space.
Use a pruning saw for branches thicker than ½ inch and bypass pruners for thinner ones. I always sanitize my tools with 70% rubbing alcohol first—old pruning wounds can harbor bacterial cankers that spread like wildfire in cherry trees.
✂️ Step 2: Remove Competing Leaders and Weak Branches
Find the strongest central leader—the straightest, thickest upward-growing branch. Cut out all other vertical stems at their base, making clean cuts just outside the branch collar. If you leave a stub, it’ll rot and attract pests. Here’s the thing—cherry trees hate competition, and removing weak leaders now prevents forking later.
Next, prune branches growing inward at steep angles. Aim for an open vase shape with branches spreading outward. The goal is sunlight and air circulation reaching the center. If a branch is crossing another, remove the weaker of the two—always cut back to a healthy bud or lateral branch.
☀️ Step 3: Thin Out Crowded Branches for Airflow
Step back and visualize the tree’s canopy. You want 6-8 inches of space between branches to prevent fungal diseases like brown rot. Start at the bottom and work upward, removing every other branch if they’re too close together. Cherry trees produce fruit on spurs, so you’re not sacrificing harvests—just improving fruit quality.
Watch for water sprouts—those fast-growing, vertical shoots that pop up along the trunk. They steal energy from fruit production. Snip them off at the base as soon as you spot them. Real talk: These pop up all summer, so check monthly.
🪴 Step 4: Shape the Trunk for Structural Strength
If your tree’s trunk has a weak crotch (where a branch meets the trunk at a sharp angle), you can’t fix it now—but you can prevent future problems. Prune branches so they’re no thicker than ⅓ the diameter of the trunk at their point of attachment. This keeps the tree balanced and reduces the risk of splitting during storms.
For young trees, gently tie the central leader to a stake if it’s bending. Use a soft tree tie (not wire) and check it monthly—too-tight ties strangle the bark. The trunk should grow straight and sturdy, not leaning toward light or wind.
⏰ Step 5: Monitor and Maintain Through the Growing Season
After the initial prune, check your tree every 4-6 weeks for new water sprouts or crossing branches. Summer pruning is minimal—just remove suckers and any branches that look diseased. Avoid heavy pruning in summer; it stresses the tree and invites pests.
Here’s the moment that matters: In late winter of the next year, repeat the process. Cherry trees respond best to gradual pruning—never remove more than 25% of the canopy in one season. You’ll see stronger growth, fewer forks, and a trunk that holds up for decades.
Tips & tricks for pruning a cherry tree trunk
These little details make all the difference between a tree that grows strong and straight—and one that struggles with weak forks and crooked branches.
Timing is Everything: That late February to early March window is critical because cherry trees are dormant, which means they heal faster and are less stressed. If you prune too early, you risk frost damage to fresh cuts, and if you wait too long, buds will start swelling, making the tree more vulnerable to disease. I’ve learned this the hard way after seeing pruning wounds take months to heal when done too late.
Tool Prep Prevents Problems: Sanitizing your pruning saw and bypass pruners with 70% rubbing alcohol isn’t just about cleanliness—it’s about preventing bacterial cankers from turning into full-blown infections. I keep a small spray bottle of alcohol in my tool bag and spritz tools between cuts, especially when working on older trees with existing wounds. Trust me on this: A few seconds of prep now saves hours of cleanup later.
Visualize the Vase Shape: When you’re thinning branches in Step 3, step back every few cuts to visualize the open vase shape. The goal is sunlight reaching the center of the tree—this isn’t just about looks, it’s about fruit quality. I use a simple trick: Hold a flashlight at the center and see where shadows fall. Those are your problem spots. The 6-8 inch spacing between branches isn’t arbitrary; it’s what creates that perfect balance of air circulation and sunlight penetration.
Summer Maintenance Matters: Those monthly checks for water sprouts might feel tedious, but they’re the secret to long-term strength. I set a calendar reminder for every 4-6 weeks because summer growth happens fast, and what starts as a tiny sprout can become a major energy drain in just a few weeks. A quick 10-minute walk around your tree with pruners in hand prevents future headaches—and keeps your tree’s energy focused on fruit production instead of unnecessary growth.
Pro Tips for Cherry Tree Trunk
- These little details make all the difference between a tree that grows strong and straight—and one that struggles wit...
- Timing is Everything: That late February to early March window is critical because cherry trees are dormant, which me...
- Tool Prep Prevents Problems: Sanitizing your pruning saw and bypass pruners with 70% rubbing alcohol isn’t just about...
Frequently asked questions
Got questions about pruning your cherry tree trunk for optimal growth? Here are some common concerns and straightforward answers to keep your tree thriving:
When is the best time to prune a cherry tree trunk?
For most cherry trees, late winter or early spring—just before buds swell—is ideal. This timing minimizes stress and disease risk. Avoid pruning in fall, as wounds may not heal before winter. Sweet cherries (like Bing or Rainier) should be pruned in late winter, while sour cherries (like Montmorency) can handle light pruning in summer to shape growth.
How much of the trunk can I safely remove?
Never remove more than 25% of the tree’s total canopy in one season. For young cherry trees, focus on structural shaping—removing weak or crossing branches near the trunk. Avoid "topping" (cutting the trunk flat), as it weakens the tree and encourages disease. Pro tip: Use sharp tools to make clean cuts at a 45° angle, just outside the branch collar.
Why does my cherry tree trunk ooze sap after pruning?
Sap bleeding is normal for 1–3 weeks post-pruning, especially in cherry trees. It’s the tree’s way of sealing wounds. Don’t panic! Just keep the area clean and dry. If sap flow is excessive (pint-sized drips daily) or accompanied by wilting, check for pests (like borers) or fungal infections. A copper fungicide spray can help prevent issues.
Can I use pruning paint or sealant on cherry tree trunks?
No—avoid pruning sealants on cherry trees! Research shows they don’t speed healing and can trap moisture, increasing rot risk. Instead, focus on proper cuts and wound care. If you’re concerned about large wounds (over 2 inches wide), smooth the edges with a pruning knife to reduce ragged areas, but skip the paint.
What if my cherry tree trunk grows crooked? Can I fix it?
Young cherry trees (under 5 years) can often be guided straight by selective pruning and strategic staking. Remove competing branches on the crooked side and tie the trunk to a stake with soft tree ties (not wire). For older trees, crooked trunks are usually permanent—focus on pruning to balance the canopy instead. Patience is key! Growth correction takes 1–2 seasons.
Wrapping up and next steps
Pruning your cherry tree trunk isn’t just about aesthetics—it’s the secret to a stronger, straighter, and more productive tree year after year. 🌳 By mastering the right techniques and timing, you’ll encourage robust growth, prevent disease, and even boost fruit yields.
Whether you’re a beginner or a seasoned gardener, every trim brings you closer to that perfect, picturesque cherry tree.
Ready to take the next step? Grab your tools, mark your calendar for the best pruning season, and start small—your cherry tree will thank you with lush branches and sweet rewards for years to come! 🍒✨