Pruning
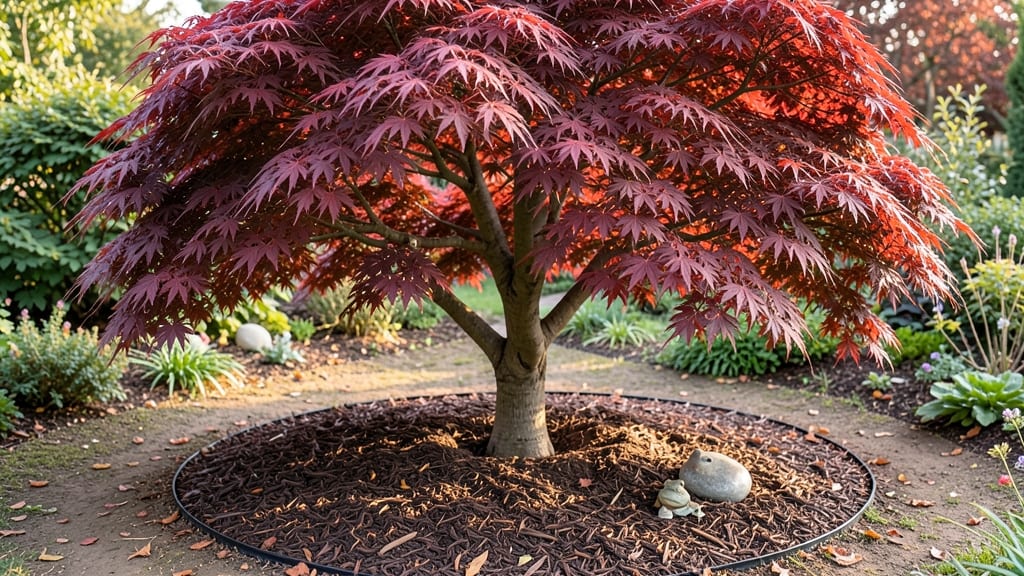
The crimson Japanese maple tree transforms any garden into a living masterpiece with its fiery foliage and graceful branches. I planted mine in my Pacific Northwest yard five years ago, and its layered canopy now provides year-round interest—even after our harsh winters.
The secret to keeping it vibrant through frost lies in how you prune and protect it during the cold months, not just in summer care.
This tree thrives in partial shade with well-draining, slightly acidic soil—exactly what my damp climate provides. The key to its resilience is layered canopy pruning, which strengthens its structure while encouraging dense, healthy growth.
You’ll need sharp pruning shears, a sturdy ladder (for higher branches), and a thick layer of mulch to shield its roots from winter’s chill. The process takes about 2-3 hours depending on the tree’s size, but the payoff is worth every minute.
After pruning, your tree will reward you with brighter red leaves that stay vibrant well into fall, even after frost. The layered branches create a stunning, almost sculptural silhouette that’s perfect for focal points in gardens.
With proper winter protection—like wrapping the trunk and adding extra mulch—you’ll see it bounce back stronger each spring, ready to dazzle again.
Whether you’re shaping a young sapling or maintaining a mature specimen, this method works for all sizes. The Pacific Northwest’s wet winters can be tough, but with these techniques, your crimson Japanese maple will stay healthy, beautiful, and resilient for decades.
Let’s get started on the care that keeps it thriving.
📚 In This Guide
- What you need
- Instructions
- Tips and common mistakes
- Wrapping up and next steps
What you need
- ● Pruning shears: Bypass pruners (for cuts under ½ inch) – 1 pair (sharp, clean, and sterilized with rubbing alcohol).
- ● Loppers: For branches ½ to 1½ inches thick – 1 pair (with a long handle for reach).
- ● Pruning saw: For thicker branches (1½+ inches) – 1 saw (bow or folding saw recommended).
- ● Ladder: Sturdy, extendable – 1 (ensure it’s rated for your height needs and has non-slip feet).
- ● Gloves: Heavy-duty, cut-resistant – 1 pair (to protect from thorns and sharp tools).
- ● Disposable pruning bags: For collecting debris – 2-3 bags (or a tarp if composting on-site).
- ○ Pruning sealant: (Optional but helpful for larger cuts) – 1 small tube (like Tanglefoot Tree Wound Pruning Seal).
- ● Notebook & pen: To track cuts and growth patterns – 1 (or a phone app like iTree or PruneTime).
- ● Anti-desiccant spray: (e.g., Wilt-Pruf) – 1 bottle (apply post-pruning to protect from winter drying).
- ● Burlap or frost cloth: – 1-2 sheets (to wrap young trees or vulnerable branches in late fall).
- ● Mulch: Organic (wood chips or straw) – 2-3 inches (apply around the base post-pruning).
- ● Check the weather: Prune on a dry, calm day (avoid frost warnings or rain within 24 hours).
- ● Sterilize tools: Wipe blades with 70% isopropyl alcohol to prevent disease spread.
- ● Mark your cuts: Use chalk or tape to outline branch collars before cutting.
Step-by-Step guide to pruning a crimson Japanese maple for Pacific Northwest resilience
This method preserves the tree’s signature layered canopy while hardening it against frost and wind.
Assess the Canopy Structure and Identify Priority Branches
Start by examining the tree’s branching pattern in late winter, before new growth begins. Look for three key structural layers: the main trunk, the mid-canopy branches (typically 12-18 inches apart), and the outer ornamental limbs. Crimson Japanese maples thrive on an open, tiered silhouette—this shape allows sunlight to penetrate lower branches, which is critical for Pacific Northwest frost resilience.
Use a sharp pruning saw (for branches over ½ inch thick) or bypass pruning shears (for thinner branches) to make clean cuts. Mark branches for removal with a white garden marker—this helps avoid over-pruning in one session. Focus first on dead, crossing, or rubbing branches, as these are the most vulnerable to disease and frost damage.
Thin Out Interior Branches to Improve Airflow and Light Penetration
The goal here is to create a balanced, open canopy that reduces frost pockets where cold air can settle. Start by removing up to 25% of the interior branches, prioritizing those growing inward or upward. These branches compete with stronger limbs for sunlight and nutrients, weakening the tree’s overall structure. Use the branch collar method: cut just outside the branch collar (the swollen area where the branch meets the trunk) to prevent damage to the tree’s healing tissues.
For thicker branches, make a clean, angled cut (about ¼ inch above a bud or lateral branch) to encourage outward growth. Avoid leaving stubs—these invite decay and weaken the tree’s frost resistance. After each cut, step back to visualize the tree’s new shape. The outer canopy should resemble a tiered umbrella, with each layer spaced 12-18 inches apart vertically.
Shape the Outer Canopy for Frost Resistance and Wind Deflection
In the Pacific Northwest, where frost and wind are constant threats, the outer canopy must be rounded and slightly domed to deflect wind and reduce ice buildup. Use hand pruners to trim back the tips of outer branches by ⅓ of their length, focusing on the topmost growth where wind damage is most likely. This encourages a fuller, denser growth pattern at the branch tips, which is more resilient to frost.
For larger branches, make heading cuts just above a lateral bud that faces outward. Avoid cutting back to a stub—this can lead to suckering (weak, watery growth) and increases frost susceptibility. After shaping, inspect the tree for balanced weight distribution. Uneven pruning can cause the tree to lean, making it more vulnerable to wind throw during storms.
Clean Up and Apply Protective Measures for Frost Season
Remove all pruned material from the base of the tree to prevent disease spread and pest infestations, which are common in the damp Pacific Northwest climate. Sterilize your tools with 70% rubbing alcohol between cuts to avoid transferring pathogens. Once pruning is complete, apply a thin layer of arborist’s anti-desiccant spray to protect the fresh cuts from drying out during winter.
For young trees or those in microclimates with late frosts, consider wrapping the trunk with burlap or tree guard to shield it from sunscald (a common issue when warm winter sun hits cold bark). Mulch the base with 3-4 inches of organic mulch (like the wood chips you’ll use) to insulate roots and retain moisture. This step is especially critical in the Pacific Northwest’s variable frost cycles, where sudden temperature swings can stress the tree.
Tips & tricks for perfect crimson Japanese maple pruning
These proven strategies ensure your pruning enhances both beauty and resilience against Pacific Northwest weather.
Timing is Everything: Late winter is ideal—right before buds swell but after the worst frosts have passed. This timing allows the tree to heal before spring growth begins. I’ve seen trees pruned in early spring develop frost cracks when sudden cold snaps hit, so don’t rush it. The goal is to give the tree a full healing season before the next winter.
The 25% Rule for Interior Branches: When thinning interior branches in Step 2, remember that 25% is your maximum—not a target. Start conservatively and reassess after each cut. I once removed too aggressively and ended up with a sparse canopy that struggled to recover. Step back frequently to visualize the open, tiered silhouette—this helps maintain that signature layered look while improving airflow.
Precision Cuts for Frost Resistance: In Step 3, when shaping the outer canopy, focus on making clean cuts just above lateral buds that face outward. This encourages stronger, frost-resistant growth. I’ve found that heading cuts made too close to the trunk often result in weak, watery regrowth (suckering) that’s highly susceptible to frost damage. Always leave a small collar of tissue to protect the branch’s healing tissues.
Seasonal Protection Beyond Pruning: After completing all cuts, don’t forget the protective measures in Step 4. Applying arborist’s anti-desiccant spray creates a protective barrier that prevents fresh cuts from drying out during winter winds—a critical step for Pacific Northwest resilience. For young trees, I’ve had success using tree wraps to prevent sunscald, especially in microclimates where late frosts are common.
Pro Tips for Crimson Japanese Maple Tree
- These proven strategies ensure your pruning enhances both beauty and resilience against Pacific Northwest weather.
- Timing is Everything: Late winter is ideal—right before buds swell but after the worst frosts have passed.
- The 25% Rule for Interior Branches: When thinning interior branches in Step 2, remember that 25% is your maximum—not a target.
Frequently asked questions
Got questions about nurturing your crimson Japanese maple tree? You’re not alone! Here are answers to the most common queries—from pruning timing to frost protection—tailored for Pacific Northwest growers.
When is the best time to prune a crimson Japanese maple in the PNW?
Prune your Acer palmatum in late winter or early spring (February–March) before new growth begins. Avoid pruning in fall or winter, as cold snaps can stress the tree. If you must prune in summer, do it after the first flush of leaves to reduce sap loss.
How do I protect my crimson Japanese maple from PNW frosts?
These maples are hardy to USDA Zone 5**, but young trees or severe frosts (<10°F) may need help. Use burlap wraps or tree blankets on trunks, and mulch heavily around the root zone. Water deeply before hard freezes to insulate roots. Avoid pruning heavily in frost-prone seasons.
Can I prune a crimson Japanese maple in summer?
Yes, but minimize summer pruning—it stresses the tree and can lead to sunburn on exposed bark. If you must, prune after July when the tree has hardened off. Focus on dead or diseased branches first, and avoid heavy cuts. Always sterilize tools to prevent infections.
What’s the best alternative if my crimson Japanese maple isn’t thriving?
If your tree struggles with frost damage, pests, or poor growth, consider these PNW-friendly alternatives:
- Bloodgood Japanese Maple (similar color, slightly more cold-hardy)
- Emperor I Japanese Maple (disease-resistant, upright form)
- Dwarf Crimson Queen (compact, great for small spaces)
Why are the leaves on my crimson Japanese maple turning brown?
Brown leaves can signal overwatering, underwatering, or fungal issues like anthracnose. Check the soil—it should be moist but not soggy. Prune for airflow, and apply copper fungicide if spots appear. Avoid wetting foliage when watering to prevent disease.
Pro Tip:
For layered canopy pruning, focus on removing crossing branches first to improve airflow. Use sharp, clean shears and make cuts just outside the branch collar. Never leave stubs—this invites decay.
Wrapping up and next steps
The crimson Japanese maple tree is a stunning addition to Pacific Northwest gardens, but its beauty thrives with the right care—especially when it comes to layered canopy pruning. By mastering frost-resistant techniques and seasonal trimming, you’ll ensure its vibrant foliage and sturdy structure for years to come. 🌿
Now that you’re equipped with the knowledge, grab your tools and give your tree the TLC it deserves! Start small—prune a single branch this season, then build confidence as you refine your skills. Your maple’s future brilliance is just a trim away! 🌟