Container Gardens
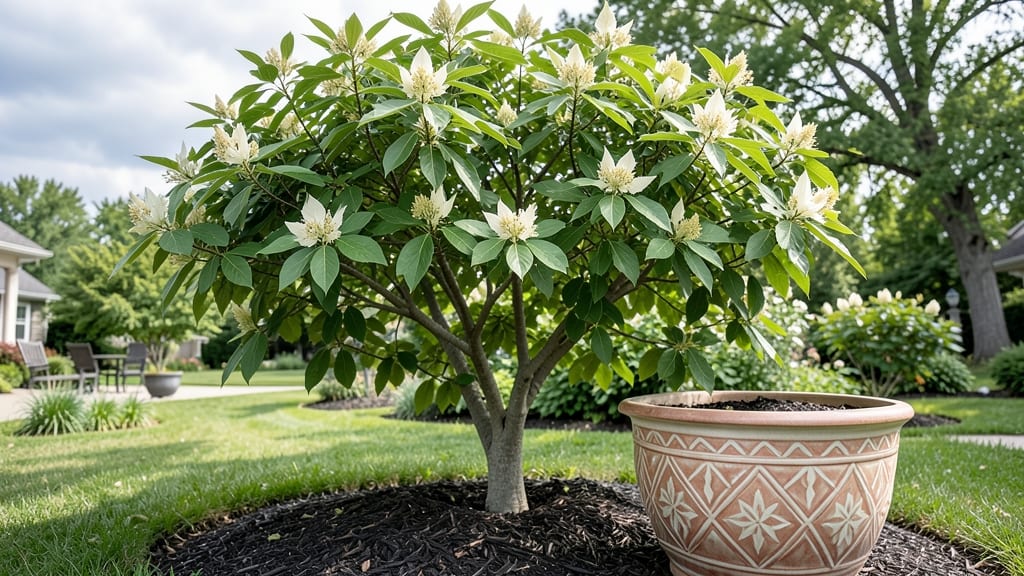
Growing a dogwood tree in a container lets you enjoy its iconic blooms without a yard—though it takes patience and the right approach. I’ve nurtured mine through three Pacific Northwest winters, and the key is mimicking its natural woodland conditions in a pot.
The challenge isn’t just the size of the tree but how you balance moisture, light, and root space to keep it thriving year-round.
Start with a 15-gallon container (minimum) and well-draining soil mixed with compost—dogwoods hate soggy roots. Place it where it gets morning sun and afternoon shade, just like its forest home. Water when the top inch of soil feels dry, but never let it sit in standing water.
In winter, wrap the pot in burlap and move it to a sheltered spot to prevent frost damage.
With proper care, you’ll reward yourself with showy spring blooms and glossy foliage that lasts into fall. Prune lightly after flowering to shape the tree, but avoid heavy cuts—dogwoods bloom on old wood.
The first year is about establishing roots; by year two, you’ll see real growth and those signature blooms you planted it for.
Container-grown dogwoods need extra attention in summer heat and winter cold, but the payoff is worth it. If leaves yellow or growth stalls, check for root-bound roots or pests. With these adjustments, your potted dogwood will outlive most container plants—some varieties thrive for decades in the right conditions.
📚 In This Guide
- What you need
- Instructions
- Tips and common mistakes
- Wrapping up and next steps
What you need
- ● Container: A large, durable pot (at least 18-24 inches in diameter) with drainage holes. Opt for fabric grow bags or ceramic/terracotta for stability and aesthetics.
- ● Dogwood Tree: A container-friendly variety like Cornus florida ‘Cherokee Brave’ or Cornus kousa (hardy to USDA Zones 5-8). Choose a 1-3 gallon sapling from a nursery.
- ● High-Quality Potting Mix: A well-draining blend like 50% peat moss, 30% perlite/pumice, and 20% compost. Avoid garden soil—it compacts and suffocates roots!
- ● Mulch: 2-3 inches of organic mulch (e.g., shredded bark or pine needles) to retain moisture and regulate temperature.
- ● Pruning Tools: Bypass pruners (for clean cuts on 1/4-inch stems)
- ● Loppers (for thicker branches, up to 1-inch diameter)
- ● Sterilized hand saw (for stubborn branches)
- ● Fertilizer: A balanced, slow-release fertilizer (e.g., 10-10-10 or organic fish emulsion) to support growth without burning roots.
- ● Drainage Layer: 2-3 inches of gravel or expanded shale at the bottom of the container to prevent root rot.
- ● Container Stand: Elevates the pot for better drainage and easier pruning. Look for adjustable metal stands with wheels for mobility.
- ● Self-Watering System: A wicking system or drip irrigation to keep soil consistently moist (dogwoods hate soggy roots!).
- ● Root Stimulator: A mycorrhizal inoculant or seaweed extract to boost root health during transplanting.
- ● Winter Protection: Burlap wraps or frost blankets to shield the container from harsh PNW winters.
- ● Decorative Elements: Moss liners or painted pots to match your patio or garden aesthetic.
Step-by-Step guide for pruning container-grown dogwood trees
Here's how to keep your Pacific Northwest dogwood thriving in a pot with simple pruning techniques.
Choose the Right Time for Pruning
Prune your container dogwood right after it finishes blooming in late spring, around May or early June. This timing ensures you don't cut off next year's flower buds, which form on last year's growth. Avoid pruning in fall or winter when the tree is dormant—it's more vulnerable to disease and cold damage during recovery.
I always check the blooms first. Once the flowers have fully faded and dropped, that's my cue to grab the pruners. If you're in a cooler microclimate, wait another week or two—dogwoods in shaded spots bloom later. The goal is to shape the tree while it's actively growing but before new buds set for next season.
Remove Dead or Damaged Branches First
Start by scanning the tree for any branches that are dead, broken, or crossing. Dead branches are easy to spot—they're grayish-brown, brittle, and don't bend when you test them. Crossed branches rub against each other, creating wounds that invite disease. Use sharp pruning shears to make clean cuts just outside the branch collar, the swollen area where the branch meets the trunk.
Don't worry about making the cuts perfect—just remove the damaged wood completely. If a branch is too large to cut by hand, use a small handsaw. The key is to work methodically from the top down. I like to work in sections so I don't miss anything. Once you've removed all the dead or damaged branches, the tree's structure will look much cleaner and more open.
Thin Out Crowded Branches for Better Airflow
Next, focus on thinning the canopy to improve airflow and light penetration. Look for branches that grow inward or upward toward the center of the tree. These create dense areas where moisture lingers, increasing the risk of fungal diseases like powdery mildew. Selectively remove one-third of the oldest, thickest branches to open up the tree's interior.
I target branches that are about one-quarter the diameter of the trunk—these are mature enough to remove without harming the tree's structure. Make your cuts at the branch collar again, and avoid leaving stubs. After thinning, the tree should have an open, vase-like shape that lets light reach all the way to the center. You'll notice new growth filling in the gaps within a few weeks.
Shape the Tree for a Balanced Canopy
Now it's time to shape the tree for a naturally balanced look. Focus on the outer edges, cutting back branches that are growing too long or too low. Aim to maintain a rounded, slightly tiered silhouette—this mimics the tree's natural growth pattern and encourages future blooms. Avoid cutting more than one-third of the tree's total foliage in a single pruning session.
I like to step back every few minutes to check the tree's shape from all angles. If one side looks heavier, trim back a few branches there to even things out. For container-grown dogwoods, pay extra attention to branches near the pot's edge—these can become top-heavy and prone to breaking in wind. After shaping, the tree should look full but not overcrowded, with light filtering through the branches.
Clean Up and Apply Post-Pruning Care
Once you've finished pruning, clean up all the debris and sterilize your tools with rubbing alcohol to prevent the spread of disease. Remove any fallen leaves or twigs from the pot and surrounding area. This keeps the base of the tree dry and reduces the risk of fungal infections.
Water the tree deeply after pruning to help it recover. In the Pacific Northwest's mild climate, your dogwood will bounce back quickly, especially if it's in a container with well-draining soil. I also apply a balanced, slow-release fertilizer in early summer to support new growth. Avoid heavy pruning in subsequent years—light maintenance trims in late winter (before buds swell) are enough to keep the tree healthy and blooming year after year.
Tips & tricks for pruning container-grown dogwoods
These practical tips will help you prune your Pacific Northwest dogwood like a pro—keeping it healthy, blooming, and thriving in its container.
Timing is Everything: The late spring timing in Step 1 is critical because it aligns with when your dogwood finishes blooming and before new flower buds form. I've learned the hard way that pruning too early can remove next year's blooms entirely. If you're unsure about the exact timing, use the "faded flower test"—once all blooms have dropped completely, it's safe to prune. For container-grown trees, this timing also helps prevent stress during our region's unpredictable spring weather.
Branch Collar Precision: When cutting in Step 2, focus on making clean cuts just outside the branch collar—the swollen area where the branch meets the trunk. This is where the tree's natural healing begins. I've seen many people leave stubs, which create entry points for disease. Use sharp pruning shears and cut at a slight angle following the branch's natural slope. For larger branches, a small handsaw works better, but still aim for that clean cut just outside the collar.
Canopy Vision Test: After thinning in Step 3, step back and look through the tree from all angles. You should be able to see light filtering through to the center—this is your goal for proper airflow. I've found that many people thin too aggressively, leaving the tree looking sparse. Remember, we're removing about one-third of the oldest branches, not stripping the tree bare. The open vase shape should still feel full and lush when viewed from outside.
Post-Pruning Care Matters: The deep watering and fertilizer application in Step 5 are just as important as the pruning itself. After cutting, your dogwood needs to recover and support new growth. I've noticed that container-grown trees often dry out faster than in-ground plants, so check the soil moisture daily for the first week after pruning. The balanced fertilizer gives it the nutrients it needs to bounce back quickly, especially in our Pacific Northwest climate where soils can be nutrient-poor.
Pro Tips for Dogwood Tree In Container
- These practical tips will help you prune your Pacific Northwest dogwood like a pro—keeping it healthy, blooming, and ...
- Timing is Everything: The late spring timing in Step 1 is critical because it aligns with when your dogwood finishes ...
- Branch Collar Precision: When cutting in Step 2, focus on making clean cuts just outside the branch collar—the swolle...
Frequently asked questions
Got questions about growing a dogwood tree in a container?
You're not alone! Here are some of the most common concerns—and practical answers—to help you nurture a thriving, blooming dogwood in your Pacific Northwest space.
What’s the best container size for a dogwood tree?
A mature dogwood needs depth—aim for a container at least 18–24 inches deep with a 12–15-inch diameter to accommodate roots and drainage. Smaller pots (under 12") work for young trees, but they’ll need repotting every 2–3 years. Pro tip: Use a self-watering container to prevent root stress!
Can a container-grown dogwood survive PNW winters?
Yes! Dogwoods are hardy, but protect your pot with a thick layer of mulch (3–4 inches) and move it to a sheltered spot (like against a wall) if winds exceed 20 mph. For extra safety, wrap the container in burlap or use a tree blanket for young specimens. Watch for frost heave—elevate pots on bricks or casters if needed.
Why isn’t my container dogwood blooming?
Blooms need sun + balance! Ensure your tree gets 6+ hours of sunlight daily (morning sun is ideal in hot summers). Over-fertilizing (especially with nitrogen) can also stunt flowers—use a low-phosphorus, high-potassium fertilizer in early spring. Check for pests like scale or spider mites, which stress the tree.
How often should I repot a dogwood in a container?
Repot every 2–3 years or when roots circle the pot’s base. Spring is the best time! Choose a container only 2–3 inches larger in diameter to avoid overwhelming the root system. Upgrade to a fabric grow bag for better aeration if repotting frequently.
What’s a good alternative if dogwoods are too finicky for containers?
Try these PNW-friendly container stars:
- Oregon Grape Holly (Mahonia aquifolium) – Drought-tolerant, berries, and evergreen!
- Japanese Maple (Acer palmatum) – Compact varieties like ‘Bloodgood’ thrive in pots.
- Dwarf Flowering Cherry (Prunus ‘Kanzan’) – Stunning spring blooms with less fuss.
Wrapping up and next steps
Growing a dogwood tree in a container is a rewarding way to bring Pacific Northwest beauty to your patio, balcony, or garden—without sacrificing space or those stunning year-round blooms! 🌸 With the right pruning techniques, container choice, and care, your dogwood can thrive and become a showstopper.
Remember, consistency is key: regular checks for pests, proper watering, and seasonal pruning will keep your tree happy and blooming for years.
Ready to transform your space? Start by selecting the perfect container and gather your tools—then roll up your sleeves and get pruning! Your future self (and your neighbors) will thank you. 🌿