Pruning
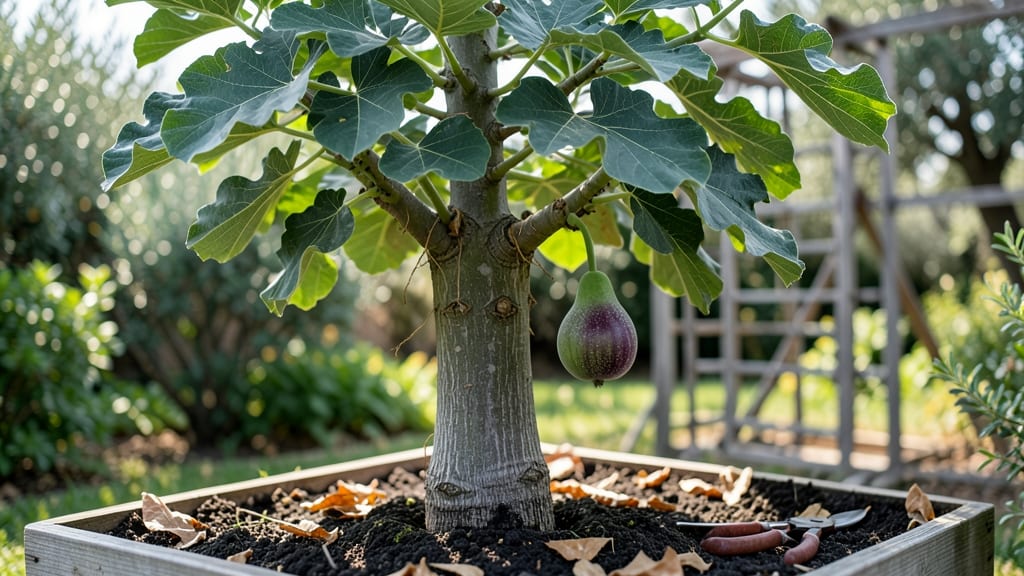
Pruning your fig tree branch isn't just about shaping—it's about unlocking frost-resistant growth that keeps your tree thriving through winter. I learned this the hard way after my first pruning session left branches vulnerable to cold snaps, but strategic layering changed everything.
The key is timing: prune in late winter or early spring when the tree is still dormant but the frost threat has passed.
You'll need sharp pruning shears, rubbing alcohol to sterilize them, and a clear plan for where each cut will go. Focus on removing dead or crossing branches first—they're the weak points that invite disease and cold damage.
Then, make your growth cuts at a 45-degree angle just above a leaf node, which is where new shoots will emerge strongest. This isn't just pruning; it's teaching your tree how to survive.
What you end up with is a tree that looks like it's been professionally cared for, with sturdy branches that hold their shape even after heavy snow. The leaves stay thicker, the fruit sets more reliably, and you'll notice fewer bare spots where frost could sneak in.
Plus, you're building a stronger structure for future harvests—every cut you make now saves you work (and potential damage) down the road.
This method works for both container-grown figs and in-ground trees, though container plants need slightly more protection in extreme cold. The same principles apply whether you're dealing with a young tree or an established one—just adjust the size of your cuts.
Ready to transform your fig tree's resilience? Let's get those branches in shape.
📚 In This Guide
- What you need
- Instructions
- Tips and common mistakes
- Wrapping up and next steps
What you need
- ● Pruning shears: Sharp, bypass-style shears (for clean cuts; blank">Felco F-2 or blank">Corona CS300 are top picks). Size: 6–8 inches for medium branches.
- ● Loppers: 10–12-inch loppers (for thicker branches up to 2 inches in diameter). Look for ratcheting models for ease.
- ● Pruning saw: Curved-tooth saw (for branches >2 inches). blank">Fiskars X7 is a reliable choice.
- ● Rubbing alcohol (70%+) or bleach: 1 small bottle to sterilize tools between cuts and prevent disease.
- ● Garden gloves: Heavy-duty, cut-resistant (e.g., blank">Felco 512) to protect hands from thorns and rough bark.
- ● Tarp or drop cloth: Medium-sized (10’x10’) to collect debris and protect the ground.
- ○ Pruning sealant (optional): Tree wound sealant (e.g., blank">Tanglefoot Tree Wound Pruning Sealer) for cuts >½ inch in diameter.
- ● Timing: Prune in late winter or early spring (before buds swell) to avoid frost damage. Never prune in fall!
- ● Weather: Choose a dry, overcast day (humidity <60%) to minimize stress on the tree.
- ● Safety gear: Safety glasses (to shield from debris) and a long-sleeve shirt/pants (fig thorns are no joke!).
- ● Tree health check: Inspect the fig tree for diseases (e.g., root rot) or pests before pruning. Treat if needed!
- ● ✨ Sharpen your tools! Dull blades tear bark—ruining the tree’s ability to heal. Hone shears with a blank">file or sharpening stone.
- ● 🌡️ Work in layers. Remove 30% or less of the tree’s canopy in one session to avoid shocking the fig.
- ● 🎯 Mark cuts first. Use chalk or a pencil to outline where you’ll prune before making cuts.
How to prune a fig tree branch for cold-resistant growth
Here's the straightforward approach I use to strengthen fig branches and prepare them for winter.
Identify and Mark Healthy Growth Points
Start by examining each branch carefully. Look for areas where the bark is smooth and green buds are visible—these are your growth points. I focus on branches that are at least ½ inch thick since thinner ones won't produce strong enough wood for layering. Use a small white marker to circle these points about 3-4 inches apart along the branch.
Skip any branches with dead wood, cracks, or signs of disease. Healthy branches will have a firm texture when you gently press them. If you see any brown or mushy areas, prune those sections completely off at a 45-degree angle, about ¼ inch above a healthy bud. This prevents disease from spreading to other parts of the tree.
Create Strategic Layering Cuts for Frost Resistance
At each marked point, make a shallow cut about ⅛ inch deep into the bark, just above the bud. This cut should be horizontal and about 1 inch long. The goal is to encourage new growth from that bud while keeping the branch strong enough to support it. I use sharp pruning shears for clean cuts—dull blades crush the wood and invite infection.
Don't cut too deep. You're not trying to remove the branch, just stimulating new growth. Real talk: I once cut too deep and nearly severed a branch. Now I measure carefully with my thumb as a guide—the cut should be just wide enough to expose the cambium layer without breaking through.
Thin Out Crowded Branches for Airflow
Remove any branches that cross each other or grow directly upward. These compete for sunlight and nutrients, weakening the tree's overall resilience. When thinning, cut back to the main trunk or a strong lateral branch, always making your cut just outside the branch collar. This ensures the tree can seal the wound properly over time.
Pay special attention to branches growing from the underside of the tree. These often get shaded and produce weak growth. After removing crowded branches, you'll notice more light reaching the center of the tree. This improves airflow, which is critical for preventing fungal diseases that thrive in damp, shaded conditions.
Apply Wound Sealer and Monitor New Growth
Once all cuts are made, apply a thin layer of pruning sealer to each cut surface. This prevents moisture loss and reduces the risk of infection. I use a product with natural ingredients like beeswax and tree resin—it's safe and effective. Don't overdo it; a light coat is all you need. The tree will eventually seal the wound on its own, but the sealer gives it a head start.
Watch for new shoots emerging from your marked points within 4-6 weeks. Healthy new growth will be bright green and firm. If you see slow or yellowing growth, it might need more sunlight or better watering. Water deeply after pruning to help the tree recover, but avoid overwatering—fig trees prefer slightly dry conditions once established.
Tips & tricks for perfect fig tree branch pruning
These practical pointers will help you prune your fig tree like a seasoned gardener—avoiding common pitfalls while maximizing cold resistance.
The Branch Thickness Test: When selecting branches in Step 1, I press my thumb firmly against the branch—if it leaves a noticeable dent, it's too thin. Aim for branches that feel firm and resilient, at least ½ inch thick. This ensures they'll support new growth during winter without snapping. Thinner branches often freeze back to the ground, leaving your tree vulnerable.
Cutting Precision Matters: In Step 2, the shallow ⅛-inch cut above the bud is crucial. I use my thumb as a guide—when my nail fits comfortably into the cut, I know it's deep enough to expose the cambium layer but not so deep it damages the branch. Too-deep cuts can actually kill the bud you're trying to stimulate. Always use sharp pruning shears; dull blades tear the wood and create larger wounds that invite infection.
Airflow Strategy: After thinning crowded branches in Step 3, step back and observe your tree's structure. You should see light penetrating to the center—this is your goal. I've found that removing just 20-30% of the branches can dramatically improve airflow. Pay special attention to the lower branches; these often get shaded and produce weak growth. The more light you let in, the stronger your tree's winter resilience will be.
Sealer Application Trick: When applying wound sealer in Step 4, I use a small paintbrush to apply a thin, even layer—just enough to cover the cut without creating a thick barrier. The goal is to protect the wound while still allowing natural healing. Too much sealer can trap moisture and create the perfect environment for fungal growth. A light coat is all you need to give your tree's natural sealing process a head start.
Pro Tips for Fig Tree Branch
- These practical pointers will help you prune your fig tree like a seasoned gardener—avoiding common pitfalls while maximizing cold resistance.
- The Branch Thickness Test: When selecting branches in Step 1, I press my thumb firmly against the branch—if it leaves a noticeable dent, it's too thin.
- Cutting Precision Matters: In Step 2, the shallow ⅛-inch cut above the bud is crucial.
Frequently asked questions
Got questions about pruning your fig tree branch for frost-resistant growth?
Here are answers to the most common ones—so you can confidently shape your tree and protect it from winter chills.
When is the best time to prune fig tree branches for frost resistance?
The ideal time to prune is late winter or early spring (just before new growth starts). This allows wounds to heal before summer heat stress and ensures the tree enters dormancy with a stronger structure. Avoid pruning in fall—new growth may not harden off before frost hits!
Can I use a fig tree branch for layering to create new plants?
Layering is a great way to propagate figs. Select a flexible, semi-hardwood branch (about pencil-thick), make a small cut, and bury it in soil while still attached. Keep it moist for 4–6 weeks until roots form. Once rooted, sever and transplant—just avoid layering in extreme heat or cold.
How do I protect fig tree branches from frost damage?
Start by pruning to open the canopy for airflow, reducing cold pockets. Wrap young branches with frost cloth or bubble wrap, and mulch the base with straw or leaves (6–8 inches deep). For mature trees, consider a tree blanket or even a DIY frame with plastic sheeting. Water deeply before frost to boost resilience.
What if my fig tree branch dies after pruning?
Don’t panic! If a branch looks brown, mushy, or fails to leaf out, it may be dead. Prune it out below the damage to healthy wood. If the whole tree struggles, check for root rot or over-pruning. Figs are tough—give it time to recover, and avoid heavy pruning the next year.
Are there alternatives to traditional pruning for frost-prone figs?
Yes! Try topiary shaping to create a low, bushy form (easier to protect from frost). You can also plant figs against south-facing walls for natural warmth or use container growing to move potted figs indoors during winter. Dwarf varieties like ‘Little Miss Figgy’ are also frost-tolerant picks!
Wrapping up and next steps
A fig tree branch thrives when pruned with care—layering and strategic cuts unlock frost-resistant growth while keeping your tree healthy and productive. 🌱 By mastering the right techniques, you’ll enjoy abundant harvests and a stronger, more resilient plant for years to come.
Ready to put your new skills to work? Grab your pruners and start shaping your fig tree today—your future harvests will thank you! For extra confidence, revisit the FAQs or watch a step-by-step video to reinforce your approach.