Pruning
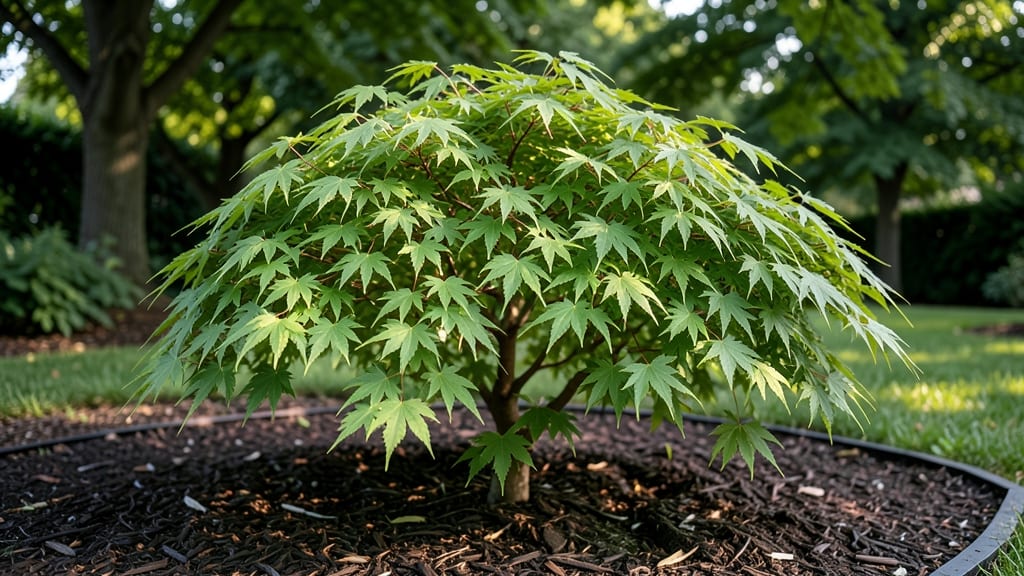
The green leaf Japanese maple tree transforms any garden into a living watercolor painting with its delicate, lacy foliage. 🌿 I remember the first time I saw one in full bloom—its vibrant green leaves shimmered like sunlight through stained glass, and I knew I had to grow one.
These trees aren’t just pretty; they’re resilient, thriving in containers or garden beds with the right care, especially when it comes to pruning.
Pruning isn’t just about shaping—it’s about encouraging strong branches and preventing disease. You’ll need sharp bypass pruners, rubbing alcohol for sterilizing cuts, and a clear day to assess the tree’s structure.
The best time to prune is late winter or early spring, just before new growth begins, but you can do light maintenance pruning in summer to keep the shape you love.
With proper pruning, your Japanese maple will develop a sturdy framework that supports its signature foliage year after year. The result? A tree that’s both structurally sound and visually stunning, with branches that spread gracefully and leaves that maintain their delicate texture.
Think of it as sculpting with nature—every cut refines the tree’s beauty.
Whether you’re working with a young sapling or an established tree, the techniques scale easily. We’ll cover everything from removing dead branches to thinning out crowded growth, so your green leaf Japanese maple stays healthy, vibrant, and the centerpiece of your garden for decades. Let’s get started!
📚 In This Guide
- What you need
- Instructions
- Tips and common mistakes
- Wrapping up and next steps
What you need
- ● Pruning shears: Bypass pruners (sharp, clean, and 5-7 inch blades for precision cuts). Pro tip: 💡 Sanitize with rubbing alcohol before and after use to prevent disease spread!
- ● Loppers: 8-10 inch bypass loppers for thicker branches (up to 1.5 inches in diameter).
- ● Hand pruners: 4-5 inch bypass pruners for delicate trimming (smaller branches or shaping).
- ● Pruning saw: Curved-tooth saw for branches 2+ inches thick (avoid tearing bark!).
- ● Gloves: Heavy-duty gardening gloves (cut-resistant for protection).
- ● Disinfectant: 70% isopropyl alcohol or 1-part bleach to 9-parts water (for sterilizing tools).
- ○ Pruning sealant: Optional but recommended for cuts larger than 0.5 inches (e.g., Tanglefoot Tree Wound Pruning Seal).
- ● Ladder or step stool: Sturdy and stable (if your tree is taller than 6 feet).
- ● Bucket or bag: For collecting pruned branches (line with a trash bag for easy disposal).
- ● Sharpie or masking tape: To mark branches for removal (if planning ahead).
- ● Extension pole pruners: For high branches without a ladder (10-15 feet reach).
- ● Tree tie or zip ties: To secure branches if heavy pruning weakens structure.
- ● Hose with nozzle: For rinsing tools and refreshing the tree post-pruning.
- ● Notebook & pen: To jot down notes on cuts made or future pruning plans.
- ● Safety glasses: Protect your eyes from debris (especially when using a saw!).
Step-by-step guide to pruning your green leaf Japanese maple
Here's how to shape your tree for stunning lace foliage while keeping branches strong.
🌿 Step 1: Time Your Pruning for Health and Beauty
Prune your green leaf Japanese maple in late winter or early spring before new growth begins. This timing lets you shape the tree while avoiding summer stress. Avoid pruning when temperatures drop below 40°F—cold weather slows healing and invites disease.
I always check the buds first—when you see them starting to swell slightly, that's your cue. For container-grown trees, you can prune lightly throughout the growing season, but major structural work still belongs in late winter. Watch for the first signs of bud break (tiny green tips appearing) to confirm you're not too late.
✂️ Step 2: Remove Dead, Weak, or Crossing Branches First
Start by cutting out any branches that are dead, diseased, or crossing. Use clean, sharp pruners to make cuts at a 45-degree angle just outside the branch collar—the swollen area where the branch meets the trunk. This ensures proper healing and prevents unsightly stubs.
Real talk: Don't skip this step. Weak branches break under snow or wind, and crossing branches rub together, creating wounds that invite pests. If a branch is less than 1/4 inch thick, you can snap it off cleanly by hand—just don't tear the bark.
🌱 Step 3: Thin the Canopy for Airflow and Light
Next, remove about 20-25% of the canopy by selectively thinning branches from the inside out. Focus on branches growing toward the center of the tree—these block light and airflow. Make your cuts just above an outward-facing bud or branch to encourage new growth in the right direction.
Here's the thing—you're not just pruning for shape, you're creating a stronger tree. Japanese maples grow best with good airflow, which reduces fungal diseases like anthracnose. Step back occasionally to visualize the tree's structure—you want to see light filtering through the branches.
☀️ Step 4: Shape the Tree's Natural Form
Now it's time to refine the tree's shape. Japanese maples respond beautifully to gentle pruning that follows their natural growth habit. For a more open, airy look, shorten some branches by 1/3 to 1/2 their length, cutting just above a bud that faces outward. Avoid heavy pruning—this stresses the tree and can reduce next year's foliage.
If your tree has become too wide, focus on removing branches from the bottom half to encourage upward growth. Remember, Japanese maples grow slowly, so be patient. You'll see new growth filling in within 4-6 weeks—that's your reward for careful pruning.
💧 Step 5: Clean Up and Protect Your Tree
After pruning, sterilize your tools with rubbing alcohol to prevent spreading disease. Collect and dispose of all clippings—don't leave them on the ground where they can harbor pests. For container-grown trees, water deeply right after pruning to help the tree recover.
Here's a pro tip: Apply a thin layer of mulch around the base (but not touching the trunk) to retain moisture and regulate soil temperature. This is especially important if you pruned in early spring when temperatures can still fluctuate. Your tree will thank you with vibrant, lacy foliage all season long.
Tips & tricks for perfect green leaf Japanese maple pruning
Here's what nobody tells you about keeping your Japanese maple looking its absolute best after pruning.
Timing is Everything: The late winter to early spring window is critical because that's when your tree is still dormant but about to burst into growth. If you prune too early (below 40°F), the wounds won't heal properly and can invite disease. I've seen people prune in summer heat, and their trees struggle to recover—stick to the recommended timing, and you'll avoid all that stress. The slight swelling of buds is your perfect cue to start.
Tool Sharpness Matters: Dull pruners crush branches instead of making clean cuts, which damages the tree's healing process. Test your tools by making a clean cut through a piece of paper—if it tears, sharpen your blades. I keep a small file in my toolkit just for this purpose. For branches under 1/4 inch thick, clean snips work better than pruners and give you more control for those delicate cuts.
Visualize the Light: When thinning the canopy in Step 3, step back every few cuts to visualize how light will filter through. You're aiming for that "airy lace" effect where you can see through the branches. Japanese maples naturally grow with a layered look—work with that rather than against it. Think of it like editing a photo: you're removing the parts that block your view of the beautiful subject (your tree's structure).
Mulching Strategy: That final mulch layer after pruning isn't just decorative—it's crucial for moisture retention and temperature regulation, especially in early spring when temperatures fluctuate. I use about 2-3 inches of organic mulch (like shredded bark) and keep it 2-3 inches away from the trunk. This helps prevent soil temperature swings that can stress your tree's recovery process after pruning.
Pro Tips for Green Leaf Japanese Maple Tree
- Here's what nobody tells you about keeping your Japanese maple looking its absolute best after pruning.
- Timing is Everything: The late winter to early spring window is critical because that's when your tree is still dormant but about to burst into growth.
- Tool Sharpness Matters: Dull pruners crush branches instead of making clean cuts, which damages the tree's healing process.
Frequently asked questions
Got questions about keeping your green leaf Japanese maple tree thriving with pruning? Here are some common concerns—and their answers—to help you care for its stunning lacy foliage and sturdy branches.
When is the best time to prune a green leaf Japanese maple?
The ideal time is late winter to early spring (before buds swell) or summer after flowering. Avoid pruning in fall or winter, as cold stress can harm the tree. Light shaping can be done in summer, but major cuts should wait for dormancy. Pro tip: If you must prune in summer, do it early to reduce stress.
How much can I trim back my Japanese maple without harming it?
Never remove more than 25% of the canopy in one season—this tree is sensitive to over-pruning. Focus on dead, diseased, or crossing branches first, then shape lightly. For young trees, limit cuts to 10-15% to avoid stunting growth. Warning: Heavy pruning can lead to weak branches or leaf scorch.
Why are my Japanese maple leaves turning brown after pruning?
Brown leaves post-pruning often signal stress from improper timing or cuts. Check for:
- Pruning too late in the season (fall/winter)
- Cutting into old wood (look for healed-over scars)
- Overwatering or drought after pruning
- Fungal issues (like anthracnose) from wet foliage
Can I grow a green leaf Japanese maple in a pot? How does pruning differ?
Yes! Potted maples thrive but need more frequent pruning to control size. Prune in the same seasons, but:
- Use smaller, sharper tools for precision.
- Trim roots lightly every 2–3 years to encourage growth.
- Watch for root-bound stress—repot every 3–4 years.
What’s a good alternative if my Japanese maple struggles with pruning?
If your tree is too finicky for pruning or your climate is harsh, consider these low-maintenance alternatives with similar beauty:
- Bloodgood Japanese maple – Dark leaves, hardier than green varieties.
- Dwarf Korean maple – Compact, vibrant foliage, needs minimal pruning.
- Serviceberry (Amelanchier) – Spring blooms, fall color, and edible berries.
- Ninebark (Physocarpus) – Tough, colorful, and forgiving of pruning.
Wrapping up and next steps
The Green Leaf Japanese Maple is a stunning addition to any garden, and with the right pruning techniques, you can keep its lacy foliage vibrant and its branches strong for years to come. 🌿 By following this guide—from gathering the right tools to mastering seasonal trims—you’ll ensure your tree thrives while minimizing stress.
Now that you’re armed with knowledge, roll up your sleeves and give your maple the care it deserves!
Ready to take the next step? Mark your calendar for your first pruning session—spring or early summer is ideal—and watch your Japanese Maple flourish with healthy, lush growth. Happy pruning! ✂️