Propagation
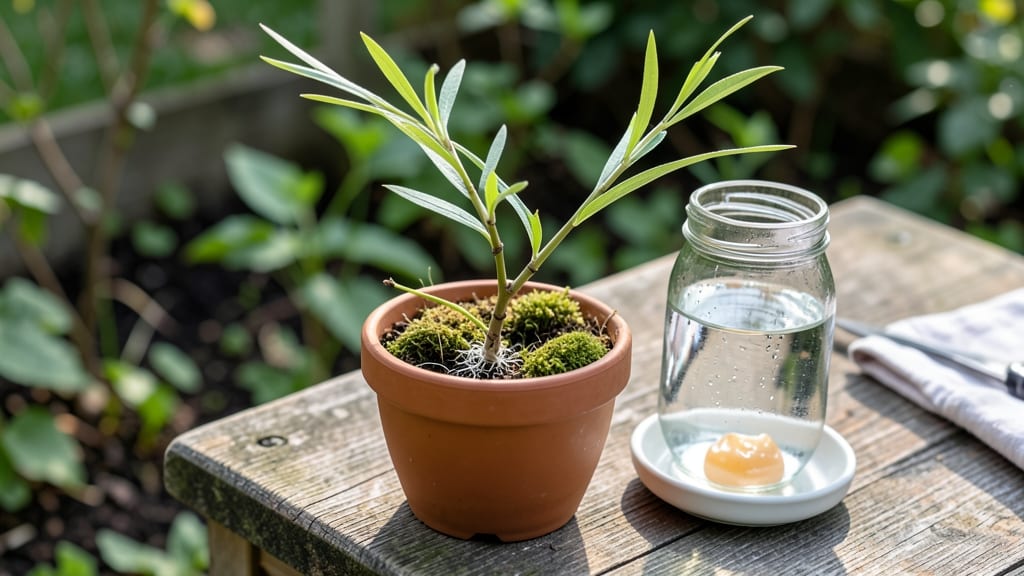
Growing a tree from a single branch cutting feels like magic—until you’ve done it yourself. 🌱 I’ve propagated willows, maples, and even fruit trees from cuttings, and the secret isn’t complicated: timing, the right cut, and a little patience.
The best part? You’re not just growing a plant; you’re creating a future shade tree, privacy screen, or fruit-bearing giant from a free branch.
Start with a healthy, pencil-thick branch—not too green, not too woody—taken in late winter or early spring when sap is flowing. Willows root in water like a dream, but most hardwoods prefer soil.
My first attempt with a maple cutting in water failed, but once I switched to a damp mix of perlite and peat, roots appeared in just three weeks. The key is keeping it moist but not soggy, and out of direct sun until roots form.
By summer, you’ll have a sturdy young tree ready to transplant. Imagine the satisfaction of walking past a neighbor’s $50 sapling and knowing yours cost nothing and carries the exact genetics of the tree you cut.
It’s not instant, but the payoff—a mature tree in a decade—is worth every weekly check on your cutting.
Works for shade trees, fruit trees, and even some shrubs—just pick the right species. Here’s how to avoid the rookie mistakes that kill most cuttings before they start.
📚 In This Guide
- What you need
- Instructions
- Tips and common mistakes
- Wrapping up and next steps
What you need
- ● Healthy branch cutting: Length: 4–6 inches (10–15 cm) (thicker than a pencil, thinner than your wrist)
- ● Age: Current year’s growth (soft, green wood—avoid woody, brown stems!)
- ● Quantity: 3–5 cuttings (increases success odds!)
- ● Pruning shears or sharp knife: Clean, sterilized (rubbing alcohol wipe)
- ○ Rooting hormone (optional but helpful): Powder or gel (e.g., Clonex or Dynamate)
- ● Well-draining potting mix: 50% perlite/sand + 50% peat moss or coconut coir (sterilized)
- ● Small pots or containers: 3–4 inches (7–10 cm) deep (yogurt cups, plastic containers, or nursery pots)
- ● Clear plastic bag or humidity dome: To retain moisture (e.g., Ziploc bag with holes)
- ● Spray bottle: For gentle watering (avoid soaking!)
- ● Timing: Take cuttings in late spring or early summer (when the plant is actively growing).
- ● Light: Bright, indirect sunlight (e.g., east-facing window or grow light).
- ● Temperature: 65–75°F (18–24°C) (consistent warmth speeds rooting!).
- ● Patience: Roots may take 4–12 weeks to form—stay consistent!
Step-by-step instructions for propagating trees from cuttings
Here's how I turn hardwood cuttings into thriving young trees—tested over years.
🌱 Step 1: Select and Prepare the Right Cuttings
Choose healthy, pencil-thick branches from the tree you want to grow. The best time is late winter or early spring when the tree is dormant. Look for branches that are about ¼ to ½ inch thick—thicker branches won’t root easily, and thinner ones are too fragile.
Cut a 6-12 inch section at a 45-degree angle just below a node (the bump where leaves or buds grow). This angle increases surface area for root growth. Strip off all but the top 2-3 leaves to reduce moisture loss. Use sharp pruners to avoid crushing the stem.
💧 Step 2: Dip in Root Hormone and Plant in Moist Medium
Dip the cut end into rooting hormone powder to encourage root formation. Shake off any excess—too much can suffocate the cutting. Plant the cutting 2-3 inches deep in a pot filled with a mix of perlite and peat moss (or a pre-made rooting medium). The mix should be moist but not soggy.
Press gently around the cutting to remove air pockets. Place the pot in a clear plastic bag or cover it with a plastic dome to create a humid environment. This mimics the natural conditions under the parent tree. Keep the medium consistently moist—water when the top inch feels dry to the touch.
☀️ Step 3: Provide Warmth and Indirect Light
Place the pot in a location with bright, indirect light—a north-facing window or under a grow light works well. Avoid direct sunlight, which can overheat the cutting and dry out the medium too quickly. Maintain a temperature of 65-75°F for optimal root growth.
Check the cutting weekly for signs of stress, like wilting or yellowing leaves. If leaves yellow, it’s often a sign of overwatering. If they wilt, the medium may be too dry. Adjust your watering schedule accordingly. Roots typically form in 4-12 weeks, depending on the tree species and conditions.
⏰ Step 4: Test for Roots and Transplant
After 8-12 weeks, gently tug on the cutting. If you feel slight resistance, roots are likely forming. To confirm, carefully remove the cutting from the pot and inspect the base. You should see small white or brown roots—this is your signal that it’s time to transplant.
Repot the cutting into a larger container with well-draining potting mix. Keep it in the same warm, humid conditions for another month to help it establish stronger roots. Once new growth appears in spring, it’s ready to move outdoors or into a larger pot.
Tips & tricks for perfect tree propagation from cuttings
Here's what nobody tells you about turning branches into thriving trees—these tricks make all the difference.
Cutting Selection: Look for branches that are pencil-thick with a slight bend—they're more flexible and less likely to snap during the process. I always check for smooth bark and avoid any branches with signs of disease or insect damage. The best cuttings come from the current year's growth, just below a node where leaves or buds grow.
Root Hormone Hack: While rooting hormone powder works wonders, I've found that dipping the cut end in a small amount of honey (sterilized by boiling) can also encourage root growth. Just make sure to use a clean, sterile surface when applying either method. Too much hormone can actually suffocate the cutting, so a light, even coating is all you need.
Humidity Setup: For the plastic bag or dome covering in Step 2, I like to add a few small air holes using a sterilized needle—this prevents too much condensation from building up, which can lead to mold. You can also place a small tray of water near the pot to increase humidity without covering the cutting directly.
Temperature Troubleshooting: Maintaining that 65-75°F range is crucial, but if your home runs cooler, consider using a small heating mat under the pot. Avoid placing the cutting near vents or drafts, which can cause temperature fluctuations. A simple thermometer near the pot helps monitor conditions without guesswork.
Pro Tips for Grow A Tree From A Branch Cutting
- Here's what nobody tells you about turning branches into thriving trees—these tricks make all the difference.
- Cutting Selection: Look for branches that are pencil-thick with a slight bend—they're more flexible and less likely to snap during the process.
- Root Hormone Hack: While rooting hormone powder works wonders, I've found that dipping the cut end in a small amount of honey (sterilized by boiling) can also encourage root growth.
Frequently asked questions
Got questions about growing a tree from a branch cutting? You’re not alone!
Here are some of the most common concerns—and straightforward answers—to help you avoid pitfalls and boost your success rate.
Can I use any branch from any tree for propagation?
Not quite! Only semi-hardwood or softwood cuttings (from healthy, disease-free trees) work best. Avoid branches that are too old (hardwood), diseased, or flowering—they won’t root easily. Stick to young, flexible growth from the current season for the highest success rate.
How long does it take for roots to form?
Patience is key! Most cuttings develop roots in 4–12 weeks, depending on the species, humidity, and care. Keep an eye out for new growth at the top—this signals rooting success. If no roots form after 3 months, your cutting may need a fresh start with adjusted conditions.
Why is my cutting rotting instead of rooting?
Overwatering or poor drainage is the usual culprit. Ensure your cutting is only lightly moist (not soggy) and planted in well-draining soil or a rooting hormone mix. If the base turns mushy, trim the rotted part, let it dry for a day, and replant with fresh hormone.
Can I grow a tree from a cutting taken in winter?
Winter cuttings are trickier because most trees are dormant. If you must try, use hardwood cuttings (from late fall/winter) and soak them in water for 24 hours before planting. Alternatively, wait until late spring or early summer for semi-hardwood cuttings when the tree is actively growing.
What’s the easiest tree to grow from a cutting for beginners?
Start with willow, poplar, or buckeye—they root like pros! Even oleander or hibiscus are beginner-friendly. Avoid finicky species like maple or oak unless you’re experienced. Pro tip: Rooting hormone can double your success rate for tougher varieties!
Wrapping up and next steps
Growing a tree from a branch cutting is a rewarding journey that combines patience, care, and a little green thumb magic! 🌱 With the right tools, timing, and techniques—like selecting healthy cuttings, mastering rooting hormones, and keeping your new plant cozy in its growing environment—you’ll soon be watching roots sprout and a tiny tree take shape.
Remember, every expert gardener started with their first cutting, so don’t hesitate to give it a try.
Ready to turn your branch into a thriving tree? Start small—pick a cutting today and nurture it step by step! Whether you’re gifting a new plant to a friend or adding to your garden, your efforts will bloom into something beautiful. Happy growing! 🌿