Propagation
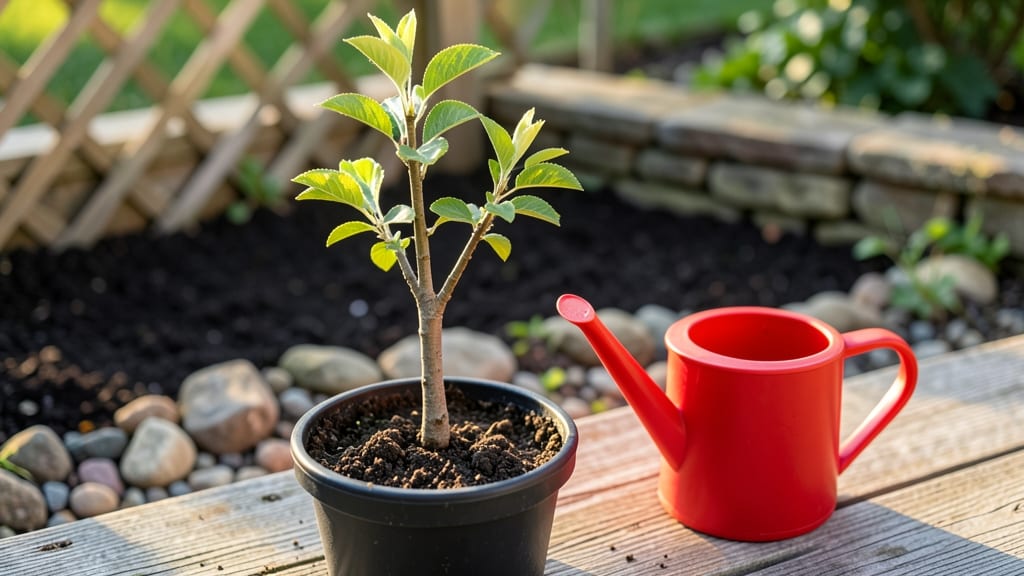
Growing an apple tree from an apple core sounds like magic—because it basically is. 🌱 That seed inside your snack has the potential to grow into a full-sized tree, though it might take a decade before you get fruit.
The process is simple but requires patience, and the reward? A unique apple variety that’s all yours.
You’ll need just a few supplies: an organic apple (non-hybrid varieties work best), a small pot, potting soil, and a sunny spot. The key is getting that seed to sprout—stratification (a cold period) helps break dormancy, and planting it shallowly (about ½ inch deep) gives it room to grow.
Most seeds take 2-4 weeks to sprout, but some may never wake up.
Once your seedling pops up, it’ll need consistent sunlight and well-draining soil to thrive. Expect your tree to grow slowly at first—it might only reach 1-2 feet in its first year—but with proper care, it could live for decades.
The fruit, when it arrives, might not match the parent apple, but that’s part of the adventure.
This method works best in zones 4-8, where apple trees grow naturally. If you’re in a warmer climate, choose disease-resistant varieties. The real test of success? Giving your tree time—just like the apples themselves.
📚 In This Guide
- What you need
- Instructions
- Tips and common mistakes
- Wrapping up and next steps
What you need
- ● Organic apple – Choose a fresh, non-GMO apple (e.g., Granny Smith, Fuji, or Honeycrisp) with seeds. Pro tip: 💡 Avoid apples from the grocery store if they’ve been treated to prevent sprouting!
- ● Paper towels or damp cloth – 2-3 sheets to wrap the seeds for germination.
- ● Plastic bag or airtight container – Small enough to hold the damp paper towels and seeds.
- ● Small pots or seed trays – 3-4 inch diameter pots (2-3 per seedling) with drainage holes.
- ● Potting soil – Well-draining, seed-starting mix (avoid garden soil—it’s too dense!).
- ● Spray bottle – For gentle watering (no drowning your seeds!).
- ○ Plastic wrap or dome lid – To create a mini greenhouse effect (optional but helpful).
- ● Grow lights or sunny windowsill – A south-facing window or LED grow light (12-16 hours/day).
- ● Fertilizer – Balanced, water-soluble fertilizer (5-10-5 ratio) for young seedlings.
- ● Pruning shears – Small, sharp pair for trimming as the tree grows.
- ● Rooting hormone – Speeds up seedling growth (gel or powder form).
- ● Label markers – To track seedling progress (trust us, they’ll look different in 6 months!).
- ● Mulch – Organic mulch (like straw) for outdoor planting to retain moisture.
- ● Tree collar protector – Plastic or metal guard to shield the trunk from pests.
- ● Apple tree variety guide – If you want to research cold-hardy or disease-resistant varieties.
Step-by-Step instructions for growing an apple tree from seed
Here’s how to turn that apple into a tree—no fancy tools needed.
🌱 Step 1: Extract and Prepare the Seed
Start with a fresh apple—organic is best, but any will work. Cut the fruit in half and remove the seeds, then rinse them gently to clean off any fruit residue. You’ll need 4 seeds to maximize your chances of success. Here’s the thing—apple seeds need a cold period to break dormancy, so don’t rush this step. Place the seeds in a small container with a damp paper towel, fold the towel over them, and refrigerate for 4-6 weeks. Check weekly to keep the towel moist but not soggy.
This cold treatment mimics winter conditions, tricking the seed into thinking it’s time to sprout. If you skip this, germination might take months—or never happen at all. I’ve tried planting untreated seeds, and they just sit there, stubborn as can be. Patience here pays off later.
🌱 Step 2: Plant the Seeds in a Pot
After the cold treatment, fill a 4-inch diameter pot with sterile seed-starting mix—not garden soil, which can harbor diseases. Plant the seeds ½ inch deep, spacing them 1 inch apart. Gently pat the soil around them so they’re snug but not buried too deep. Water lightly until the soil feels evenly moist, like a wrung-out sponge. Place the pot in a warm spot, ideally 65-75°F, where it gets bright, indirect light. A sunny windowsill works, but avoid direct afternoon sun, which can overheat the soil.
Cover the pot loosely with plastic wrap to retain humidity, but prop it open slightly to allow airflow. You’ll see tiny sprouts in 2-4 weeks, but don’t be alarmed if some seeds don’t germinate—it’s normal. Once the first true leaves appear (those are the second set, after the initial seed leaves), remove the plastic wrap. This is the moment that matters: now you’re officially growing a tree.
☀️ Step 3: Nurture the Seedling Through Its First Year
When the seedlings are 3-4 inches tall, it’s time to transplant them into individual 6-inch pots with fresh seed-starting mix. Handle the tiny stems carefully—they’re delicate and can snap easily. Water deeply after transplanting to help the roots settle. Place the pots in a spot with full sun (6+ hours daily). If you’re growing indoors, supplement with a grow light to keep them strong. Leggy seedlings (those stretching tall and thin) mean they’re reaching for light—move them closer to the window or light source immediately.
Fertilize lightly every 4-6 weeks with a balanced, water-soluble fertilizer (like 10-10-10) diluted to half strength. Over-fertilizing now can burn the tender roots. By late spring, when the seedlings have 4-6 true leaves, you can acclimate them to outdoor conditions by placing them outside for 1-2 hours daily, gradually increasing their time outside over 2 weeks. This process, called hardening off, prepares them for their permanent home.
🪴 Step 4: Plant Outdoors and Care for the Sapling
Choose a sunny spot in your yard with well-draining soil. Dig a hole twice as wide as the sapling’s root ball but no deeper. Gently remove the seedling from its pot and loosen the roots if they’re circling. Place it in the hole, ensuring the top of the root ball is level with the soil surface—burying too deep can suffocate the stem. Backfill the hole with soil, tamp it lightly, and water deeply to settle everything. Add a 2-inch layer of mulch around the base (but not touching the stem) to retain moisture and suppress weeds.
Young apple trees need consistent care. Water once a week (more in dry spells) to keep the soil 2-3 inches deep moist. Avoid wetting the leaves to prevent fungal diseases. In late winter, prune any dead or crossing branches with clean, sharp pruners, cutting just above a bud. This encourages a strong structure. Apple trees grown from seed take 5-10 years to bear fruit, but the wait is worth it—especially when you’re growing a tree from your favorite apple variety.
⏰ Step 5: Long-Term Care for Fruit Production
Once your tree is established (about 3-4 years old), it’ll need more attention to produce fruit. In early spring, apply a slow-release fertilizer around the drip line (the edge of the tree’s canopy). Apple trees are self-pollinating, but having another apple tree nearby improves fruit set. Thin the fruit when it’s 1 inch in diameter to leave 6-8 inches between each apple—this ensures larger, higher-quality fruit. Remove any misshapen or damaged apples to redirect the tree’s energy.
Watch for pests like aphids or codling moths, which love apple trees. A strong spray of water can knock off aphids, and row covers can protect blossoms from pests. Harvest apples when they’re fully colored and slightly soft to the touch. Remember, trees grown from seed may not produce fruit identical to the parent apple—genetics are unpredictable. But that’s part of the fun: you’re growing something unique, just like your favorite apple.
Tips & tricks for growing an apple tree from seed
Turn that apple into a thriving tree with these simple yet game-changing insights.
Cold Treatment Precision: The 4-6 week cold treatment in Step 1 is non-negotiable for breaking seed dormancy. I've learned the hard way—seeds left at room temperature might never sprout. If you're impatient, you can extend the cold period up to 8 weeks, but don't rush it! Use a small container with ventilation holes to prevent mold. Label your container with the apple variety and date—this becomes your germination timeline reference.
Lighting Strategy: For Step 2, bright indirect light is key, but watch out for heat stress. If you notice the soil surface drying too quickly, move the pot away from the window. A simple trick: place the pot on a bed of pebbles with water underneath (like a pebble tray) to maintain consistent moisture without overwatering. This mimics natural forest conditions where seedlings receive dappled sunlight.
Transplant Timing: When your seedlings reach 3-4 inches in Step 3, don't wait until they're crowded. Transplant into individual 6-inch pots immediately to prevent competition. Here's what I do: I use a small trowel to carefully lift each seedling with its root ball intact, then place it in its new pot. This minimizes root disturbance and gives each plant room to grow. The first true leaves are your cue to remove the plastic wrap—this prevents disease while allowing the seedlings to strengthen.
Hardening Off Hack: The 1-2 hour daily outdoor exposure in Step 3 is crucial for preparing seedlings for their permanent home. Start with just an hour on a mild day, then gradually increase by 30 minutes every few days. I've found that placing seedlings in a sheltered spot (like under a patio cover) prevents windburn while still allowing them to acclimate. Watch for any wilting—this is a sign they need more time to adjust.
Pro Tips for Grow An Apple Tree From An Apple
- Turn that apple into a thriving tree with these simple yet game-changing insights.
- Cold Treatment Precision: The 4-6 week cold treatment in Step 1 is non-negotiable for breaking seed dormancy.
- Lighting Strategy: For Step 2, bright indirect light is key, but watch out for heat stress.
Frequently asked questions
Got questions about growing an apple tree from a seed? You’re not alone—this method is full of surprises (and occasional hiccups!). Here’s what you need to know before diving in:
Can I grow any apple tree from a grocery store apple?
The short answer: probably not. Most store-bought apples are hybrids bred for taste, not propagation. Your seedling may grow, but it likely won’t produce fruit true to the parent—think wild, unpredictable flavors and sizes. For better odds, use seeds from heirloom or organic apples (or better yet, grafted trees!).
How long does it take for an apple tree to bear fruit from a seed?
Patience is key! Seed-grown apple trees can take 5–10 years (or longer) to produce fruit, if they ever do. Unlike grafted trees, they’re not guaranteed to bear apples at all—some may flower but drop fruit, or produce bitter, inedible varieties. If you’re eager for apples, consider grafting a known variety onto your seedling later.
Why did my apple seedling grow leaves but no apples?
This is common! Seedlings prioritize growth over fruiting. They may take years to mature enough to flower, or they might never produce viable fruit. To troubleshoot:
- Check for pests/diseases (aphids, apple scab).
- Ensure it gets 6+ hours of sunlight daily.
- Fertilize with balanced 10-10-10 in spring.
Can I grow an apple tree indoors from a seed?
Technically yes, but it’s not recommended for fruiting. Seedlings need outdoor conditions—full sun, seasonal temperature shifts, and pollinators—to thrive. If you’re set on indoor growth, keep it near a sunny window, but expect slow growth and minimal fruit potential. For best results, transplant outdoors once it’s 12+ inches tall.
What’s the difference between growing from a seed vs. grafting?
| Seed-Grown | Grafted |
|---|---|
| Unpredictable fruit (may not match parent). | Guaranteed variety (e.g., Fuji, Granny Smith). |
| Slower to fruit (5–10+ years). | Fruits in 2–4 years. |
| Hardier, disease-resistant roots. | Weaker roots (depends on rootstock). |
For fast, reliable apples, grafting is the winner. But seed-growing is a fun experiment—and you might discover a unique heirloom!
Wrapping up and next steps
Growing an apple tree from a seed is a rewarding journey that connects you to nature’s cycle—no green thumb required! 🌱 While it takes patience (and a little luck for fruit quality), every sprout is a tiny victory.
Once your seedling thrives, transplant it with care and watch it grow into a future orchard star.
Ready to take the next step? Start small:
- Label your saplings to track progress.
- Research local apple varieties for climate-friendly planting.
- Share your success (or bloopers!) with gardening communities.