Propagation
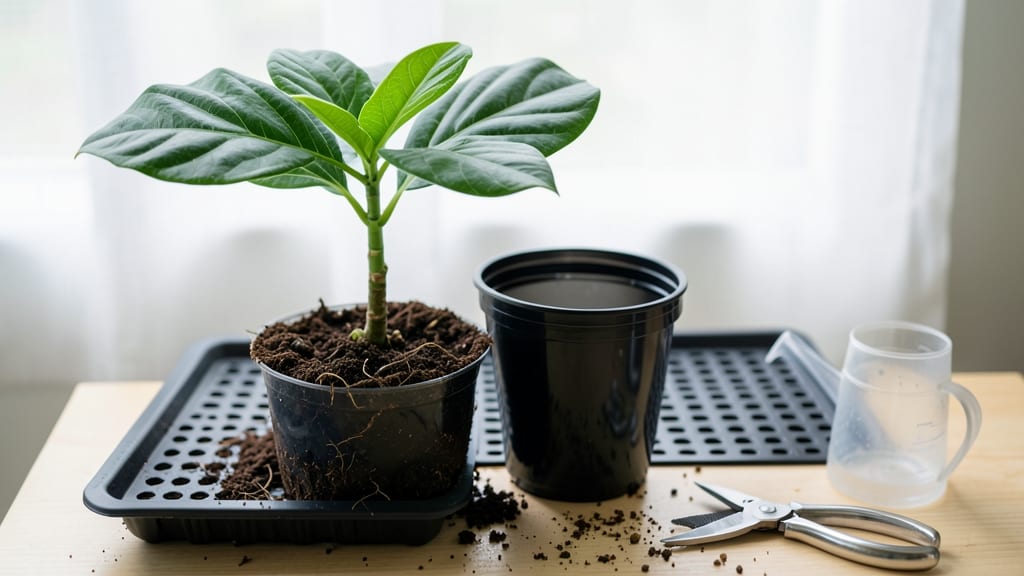
Starting an avocado tree from seed is the easiest way to grow one indoors, and yes, it actually works. 🌱 I’ve watched my kitchen countertop transform from a pit to a thriving seedling with just three supplies and a little patience—no fancy equipment needed.
The secret lies in the toothpick-and-glass method: suspend the seed over water so only the bottom half soaks, keeping the top dry. Within 2-6 weeks, roots and a sprout will appear, and that’s when the real fun begins.
Most people quit here, but moving it to soil is where the magic happens.
By the time your seedling hits 6-12 inches, it’ll need a pot with drainage and bright, indirect light. You’ll pinch off flowers the first year to build strong stems, and within 2-3 years, you could have a small tree producing fruit—though patience is key.
This method works in any climate, from sunny windowsills to grow lights. The only challenge? Waiting. But the payoff—your own avocado tree—makes every step worth it.
📚 In This Guide
- What you need
- Instructions
- Tips and common mistakes
- Wrapping up and next steps
What you need
- ● 1 fresh avocado pit – Choose a seed from an organic, ripe avocado for the best results.
- ● 3-4 toothpicks or skewers – For balancing the seed while it sprouts.
- ● 1 clear glass or jar – At least 12 oz (355 mL) in size, with a wide enough opening to fit the seed.
- ● Water – Filtered or room-temperature tap water (change weekly).
- ● Small pot (4-6 inches in diameter) – With drainage holes for transplanting.
- ● Well-draining potting mix – A blend of peat, perlite, and compost (or a cactus/succulent mix).
- ● Spray bottle – For gentle watering after transplanting.
- ● Grow lights or a sunny windowsill (south-facing preferred).
- ● Humidity dome or plastic wrap to retain moisture.
- ● Fertilizer (balanced, diluted 50% strength) for faster growth.
- ● Pruning shears (for shaping as it matures).
- ● Label or marker to track planting dates.
Step-by-Step instructions for growing an avocado tree from seed
Here's how to turn that kitchen discard into a lush houseplant with real growing potential.
🌱 Step 1: Prepare the Avocado Pit for Planting
Start by removing all the brown, fleshy fruit from the pit—you want just the hard shell. I like to soak it for a few days first to loosen any remaining fruit, then scrub it clean with a soft brush. The key is to keep it intact; cracks will invite rot later.
Next, insert three toothpicks evenly around the pit, about ½ inch below the widest part. This creates a cradle to suspend it over water without submerging the bottom. If the toothpicks sink too deep, the pit will float sideways and rot. Balance is everything here—test it in your glass before planting.
Fill a small glass with 3-4 inches of water (enough to cover about 1 inch of the pit's bottom). The water level is critical—too high and the pit drowns; too low and roots won't develop. I use filtered water to avoid chlorine, which can slow germination.
💧 Step 2: Suspend and Monitor the Pit
Place the toothpick-cradled pit so only the bottom ¼ inch sits in water. The top should stay completely dry. Cover the glass loosely with plastic wrap to maintain humidity, but leave a small gap for airflow—condensation buildup can smother the pit.
Set the glass in a warm spot with bright, indirect light (a south-facing window works best). Direct sun will overheat the water, while dim light slows root growth. You'll see roots emerge from the bottom in 2-6 weeks—patience is key here. Don't disturb it once it's in place.
Change the water every 2-3 days to prevent bacterial growth. Cloudy or smelly water means it's time for a fresh batch. Watch for a ½-inch root system before moving to soil—roots this size can handle transplanting without shock.
☀️ Step 3: Transplant to Soil When Roots Develop
Once roots reach about 2-3 inches long, it's time to plant. Fill a 6-inch pot with well-draining potting mix—avocado trees hate soggy roots. Make a small hole in the center and gently lower the pit so the roots spread downward naturally. Press the soil lightly around the sides to secure it.
Water thoroughly until moisture runs from the drainage hole, then let it drain completely. Place the pot in bright, indirect light again, but avoid cold drafts. The first few weeks are critical—too much water now causes root rot, while too little causes wilting. You'll know it's right when the soil feels damp but not wet to the touch.
After 4-6 weeks, you should see the first true leaves emerge from the top. This is your signal the tree is establishing itself. Here's the thing—it won't look like much yet, but those leaves mean the roots are actively growing downward.
🪴 Step 4: Care for Your Young Tree Long-Term
Once the seedling has 3-4 true leaves, move it to a 10-inch pot with fresh potting mix. Prune any yellow leaves immediately—they drain energy from the plant. Keep the soil consistently moist but never soggy; avocado trees prefer it slightly dry between waterings.
Rotate the pot quarter-turn weekly so the tree grows straight toward the light, not lopsided. When it reaches 18 inches tall, you can fertilize lightly with a balanced houseplant fertilizer every 2 months in spring and summer. No fertilizer in fall or winter—this mimics the tree's natural dormancy cycle.
Real talk: This won't be a fruit-bearing tree for 10+ years, but the journey is rewarding. Watch for pests like spider mites—wipe leaves with a damp cloth weekly to prevent infestations. With time, your kitchen scrap becomes a statement plant that turns heads.
Tips & tricks for starting an avocado tree from seed
Here's what nobody tells you about turning that avocado pit into a thriving plant—lessons I learned after watching three pits fail before success.
Toothpick Placement Matters: When inserting toothpicks in Step 1, angle them slightly downward so they rest against the pit's curve. This prevents them from slipping during the water phase. I've seen pits tip over when toothpicks aren't secured properly—test the balance in your glass before final placement. The goal is to keep the pit stable but still allow the bottom to touch water.
Water Level Precision: That 1-inch water coverage in Step 1 is non-negotiable. Use a ruler to measure—too little and roots won't form, too much and the pit will rot. I use a clear glass so I can monitor the water line daily. If the water evaporates below the 1-inch mark, top it off with filtered water immediately. The pit should never be submerged more than ¼ inch at the bottom.
Root Development Watch: In Step 2, don't be fooled by tiny root hairs—wait for roots that are at least ½-inch long before transplanting. I've rushed this step and lost seedlings because the roots weren't strong enough. Once roots reach this size, they'll be ready to handle the soil transition without shock. Change water every 2-3 days to prevent bacterial growth that can smother new roots.
Soil Selection Secret: For Step 3, mix your 6-inch pot's potting soil with 20% perlite or coarse sand. This improves drainage—the single biggest reason avocado seedlings fail. The soil should feel like a damp sponge, not wet mud. After planting, let the excess water drain completely before returning to bright, indirect light. Overwatering at this stage is the fastest way to kill your seedling.
Pro Tips for Start An Avocado Tree From Seed
- Here's what nobody tells you about turning that avocado pit into a thriving plant—lessons I learned after watching th...
- Toothpick Placement Matters: When inserting toothpicks in Step 1, angle them slightly downward so they rest against t...
- Water Level Precision: That 1-inch water coverage in Step 1 is non-negotiable. Use a ruler to measure—too little and ...
Frequently asked questions
about growing an avocado tree from seed—because curiosity deserves answers!How long does it take for an avocado seed to sprout?
Patience is key! Most avocado seeds sprout within 2–6 weeks when kept in warm, moist conditions. If you don’t see sprouts after 6 weeks, gently check for rot or adjust humidity. Some stubborn seeds take up to 8 weeks—stay consistent!
Will my avocado tree ever produce fruit?
Yes, but it’s a long game! Seed-grown avocado trees can take 5–13 years to bear fruit, depending on care, climate, and variety. Grafted trees (bought from nurseries) fruit faster—usually 3–5 years—but starting from seed is more rewarding (and fun!).
What’s the best temperature for growing an avocado seed?
Keep it warm and cozy! Ideal germination temps are 70–85°F (21–29°C). If your home is cooler, place the jar near a sunny window or use a seedling heat mat. Avoid drafts or cold spots—they’ll slow (or stop) growth.
Can I grow an avocado tree indoors year-round?
Avocado trees thrive indoors with bright, indirect light (south-facing windows are best). Rotate the pot weekly for even growth. In winter, supplement with a grow light if natural light is scarce. Just watch for pests like spider mites—mist leaves regularly to keep them happy!
Why is my avocado seed rotting?
Overwatering or poor drainage is the usual culprit. Check these fixes:
- Ensure only 1–2 inches of water in the jar (never submerge the seed fully).
- Use filtered or distilled water (tap water chemicals can harm roots).
- If mold appears, dry the toothpicks and repot in fresh water.
Wrapping up and next steps
Growing an avocado tree from seed is a rewarding journey that connects you to nature while yielding delicious, homegrown fruit in the future! 🌱 With patience, care, and these simple steps, you’ve got everything you need to nurture a thriving plant.
Once your seedling is strong and healthy, the next logical step is to transplant it into a pot or even the ground—if you live in a warm climate. Happy growing, and enjoy watching your green thumb turn seeds into trees!