How To
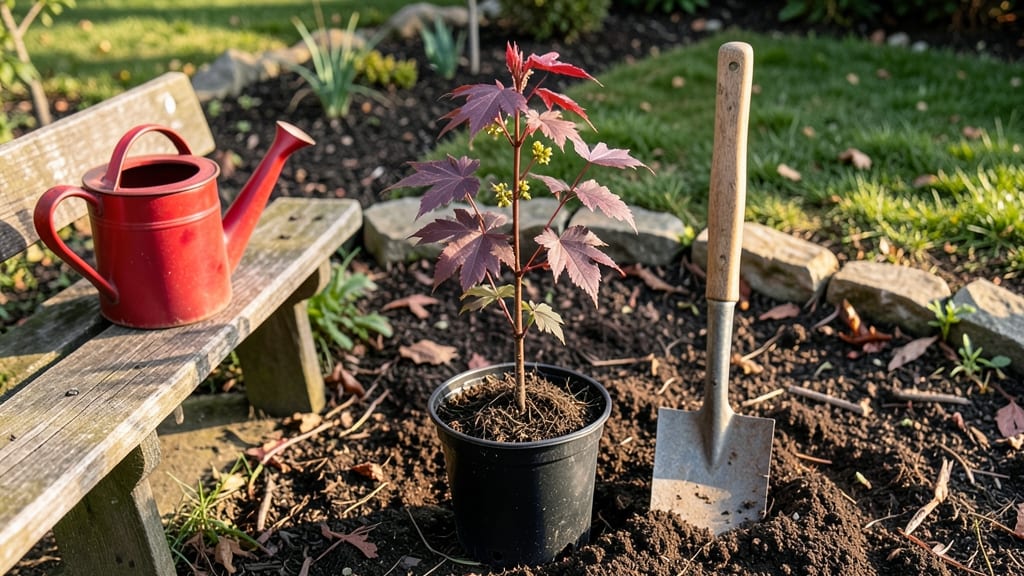
Transplanting tree shoots feels like giving them a second chance at life—when done right, survival rates jump from 50% to 90% with just a few simple adjustments. I’ve moved dozens of young trees this way, and the key isn’t brute strength but patience and preparation.
The right timing, soil prep, and gentle handling make all the difference between a wilted sapling and a thriving young tree.
Start by gathering your tools: a sharp shovel, root stimulator, and a bucket of water. Dig your new hole twice as wide as the root ball but no deeper—trees hate being buried too deep.
Handle those roots like you’re cradling a baby: keep them moist and spread them gently to encourage outward growth. Plant at the same depth they grew in the nursery, then water deeply to settle the soil around the roots.
📚 In This Guide
- What you need
- Instructions
- Tips and common mistakes
- Wrapping up and next steps
What you need
- ● Tree shoots: Healthy, disease-free saplings (1–3 inches in diameter, depending on species). Aim for 3–5 shoots if planting multiple.
- ● Shovel or spade: A 10–12-inch wide digging tool for precise holes (avoid serrated edges to protect roots).
- ● Pruning shears or sharp knife: For trimming roots or excess foliage (sterilize with rubbing alcohol).
- ● Garden hose or watering can: With a gentle spray nozzle to avoid damaging roots during watering.
- ○ Mulch (optional but recommended): 2–3 inches of organic mulch (e.g., wood chips, straw) to retain moisture and suppress weeds.
- ● Compost or fertilizer: A balanced, slow-release option (e.g., 10-10-10 NPK ratio) or organic compost for nutrient boost.
- ● Planting hole marker: Stakes or flags to mark the hole’s center (especially useful for larger plantings).
- ○ Root stimulator (optional): A natural rooting hormone (e.g., mycorrhizal fungi or willow water) to encourage faster growth.
- ● Tree guard or protective barrier: To shield young shoots from pests or lawn equipment (e.g., plastic tree tubes or wire cages).
- ● Soil tester kit: To check pH and nutrient levels before planting (ideal range: 6.0–7.0 for most trees).
- ● Wheelbarrow or bucket: For mixing soil amendments or transporting mulch.
- ● Gloves: Heavy-duty work gloves to protect hands from thorns or rough bark.
- ● Staking system (if needed): For tall or top-heavy shoots—use flexible stakes and soft ties to avoid girdling.
Step-by-Step instructions for transplanting tree shoots
Here’s how I’ve successfully moved young tree shoots without losing a single one.
Prepare the New Planting Site
Choose a location with well-draining soil and at least 6 hours of sunlight daily. Dig a hole twice as wide as the root ball but only as deep as the container—this prevents burying the trunk too deeply, which can suffocate the tree. Loosen the sides of the hole with a shovel to help roots spread easily.
Mix the excavated soil with 2 inches of compost (if not already in your soil) to enrich nutrients. This step is critical—poor soil quality stunts growth for years. Water the hole deeply before planting to settle the soil and remove air pockets.
Carefully Remove the Tree Shoot from Its Container
Gently squeeze the sides of the container to loosen the root ball. If the roots are circling tightly inside, use a knife to cut through them—this encourages outward growth. Lift the tree shoot by the base, not the stem, to avoid breaking delicate branches.
Inspect the roots for any that are dry, mushy, or tangled. Trim damaged roots with clean shears, but leave healthy ones intact. A healthy root system looks white or light tan and feels firm, not brittle.
Plant the Tree Shoot at the Right Depth
Place the tree shoot in the hole so the top of the root ball sits level with the surrounding soil. Press soil lightly around the roots to eliminate air gaps, but don’t compact it—this restricts root growth. Fill the hole gradually, tamping down in 1-inch layers to avoid displacing the root ball.
Leave a 2-inch-wide ring around the base of the tree to hold water when you water later. This prevents runoff and ensures moisture reaches the roots. Avoid mounding soil against the trunk—this can cause rot over time.
Water Thoroughly and Mulch
Water the newly planted tree shoot deeply until the soil is moist 6 inches down. This helps settle the roots into place. Use a slow watering method, like a hose with a gentle spray, to avoid eroding the soil around the base.
Spread 2-3 inches of mulch (like wood chips or straw) around the base, keeping it 3 inches away from the trunk. Mulch retains moisture, regulates soil temperature, and suppresses weeds. Replenish mulch as it breaks down to maintain its benefits.
Support and Monitor Growth
Stake the tree shoot only if it’s taller than 3 feet or in a windy area. Use a soft tie (like a strip of old T-shirt) to secure it to the stake—this prevents bark damage as the tree grows. Check the tie every few weeks and loosen it if the trunk thickens.
Water once a week for the first month, then adjust based on rainfall. You’ll know it’s thriving when new leaves appear within 4-6 weeks. If leaves yellow or wilt, the tree may need more water or better drainage.
Tips & tricks for perfect tree shoot transplanting
Transplanting tree shoots can feel intimidating, but these tricks will help you avoid common pitfalls and set your young trees up for success.
Soil Preparation Secret: In Step 1, don't skip the deep watering before planting. The hole should be completely saturated to eliminate air pockets that can suffocate roots. I've seen many transplants fail because the soil wasn't properly prepped—this one step makes all the difference. The 2 inches of compost is non-negotiable for young trees; their root systems are fragile and need that nutrient boost to establish quickly.
Root System Rescue: When you inspect the roots in Step 2, pay special attention to any circling roots. These can strangle the tree as it grows. Use a clean knife to make vertical cuts along the root ball to encourage outward growth. Remember, healthy roots should feel firm and look white or light tan—never mushy or dark brown. If you find damaged roots, trim them back to healthy tissue only.
Planting Depth Matters: During Step 3, use a small stick or level to ensure the top of the root ball stays exactly level with the surrounding soil. Burying too deeply suffocates the tree, while planting too shallow exposes roots to drying. The 1-inch layer tamping technique helps settle the soil gently without compacting it too much. After planting, that 2-inch water ring around the base becomes your best friend for keeping moisture where it needs to go.
Watering Wisdom: In Step 4, the "deeply until moist 6 inches down" rule is crucial. Many people water lightly and frequently, which leads to shallow root growth. Instead, give that initial watering slowly and thoroughly. After the first month, you'll adjust based on rainfall, but always check soil moisture before watering—stick your finger 2 inches down. If it's dry, water; if it's damp, wait.
Pro Tips for Transplant Tree Shoots
- Transplanting tree shoots can feel intimidating, but these tricks will help you avoid common pitfalls and set your yo...
- Soil Preparation Secret: In Step 1, don't skip the deep watering before planting. The hole should be completely satur...
- Root System Rescue: When you inspect the roots in Step 2, pay special attention to any circling roots. These can stra...
Frequently asked questions
Got questions about transplanting tree shoots? You’re not alone! Here are some of the most common concerns—and their straightforward solutions—to help you succeed.
When is the best time to transplant tree shoots?
The ideal times are early spring (just as new growth begins) or late fall (before the first frost). Avoid transplanting during extreme heat or drought—roots need moisture to recover. For container-grown shoots, you can transplant anytime, but spring is still best for long-term success.
How long does it take for transplanted tree shoots to establish?
Most tree shoots take 1–3 years to fully establish, depending on species, soil quality, and care. In the first year, focus on watering deeply 2–3 times per week and mulching to retain moisture. Patience is key—young roots grow slowly but steadily!
Can I transplant tree shoots from my yard or do I need to buy them?
You can transplant wild shoots or seedlings from your yard, but check local regulations—some areas restrict moving native plants to protect ecosystems. If you’re unsure, buy certified nursery stock for guaranteed health and species accuracy. Wild transplants may struggle if their original habitat differs from yours.
What if my transplanted shoots turn yellow or wilt?
Yellowing leaves often signal overwatering, underwatering, or root shock. Check soil moisture (it should be damp but not soggy) and ensure proper drainage. Wilting can also mean transplant shock—trim any damaged roots and give the tree a light pruning to reduce stress. A balanced fertilizer (low nitrogen) can help recovery.
Should I prune my tree shoots before transplanting?
Yes! Prune 1/3 of the foliage before transplanting to reduce stress and encourage root growth. Focus on removing damaged or crossing branches. Avoid heavy pruning—just a light trim helps the tree redirect energy to root establishment. Prune again in early spring after transplanting for better shape.
Wrapping up and next steps
Transplanting tree shoots may seem tricky, but with the right preparation, patience, and care, you’ll give your young trees the best chance to thrive! 🌱 Remember, timing, proper handling, and attention to soil conditions are your secret weapons.
Whether you’re a gardening novice or a seasoned green thumb, every healthy transplant starts with confidence—and now, you’ve got the know-how.
Ready to take the next step? Start small—practice with a few shoots before tackling larger trees, and soon, you’ll be nurturing a lush, flourishing landscape. Happy planting! 🌿