Pruning
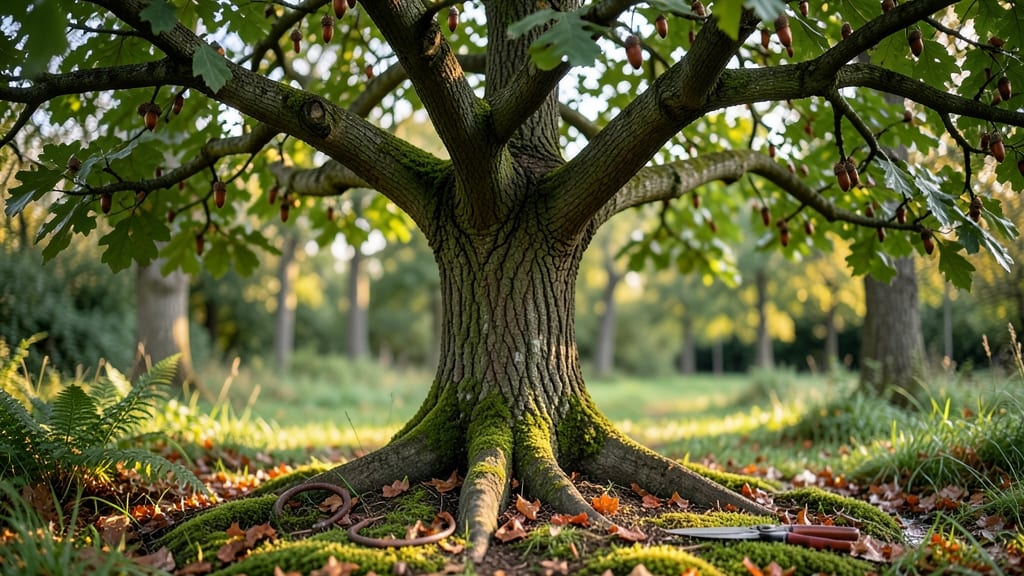
Planning around a huge acorn tree turns your Pacific Northwest garden into a living cathedral of shade and wildlife. 🌳 I’ve designed spaces where these giants aren’t just background—they’re the centerpiece, framing sunlit paths and sheltering understory plants that thrive in their dappled light.
The key is working with the tree’s quirks: its roots need 10+ feet of clearance, soil stays moist but well-drained, and leaf litter becomes free mulch if you embrace it.
I’ve seen these trees support entire ecosystems—woodpeckers, squirrels, and ferns all call the same branches home as your garden does.
Your garden becomes a layered masterpiece: sun-loving perennials at the edges, shade-tolerant hostas and ferns beneath, and climbing roses trained along the trunk. The trade-off? Less lawn, more drama—imagine summer afternoons spent under that canopy, the air humming with bees and the earthy scent of damp leaves.
We’ll tackle placement, companion plants, and pruning secrets to keep your tree healthy without sacrificing beauty. Even in tight spaces, these giants can be your garden’s most rewarding feature—if you plan for them right from the start.
📚 In This Guide
- What you need
- Instructions
- Tips and common mistakes
- Wrapping up and next steps
What you need
- ● Pole saw or pruning saw: Choose a bypass pruner (for clean cuts) or a pole saw with a 24-36" blade for high branches. Look for ergonomic grips and sharp, durable blades.
- ● Loppers: Heavy-duty bypass loppers (20-24" handles) for branches ½" to 2" in diameter. Opt for ratcheting loppers for extra leverage.
- ● Pruning shears: Bypass shears (6-8" blades) for smaller branches & twigs (under ½").
- ● Gloves: Heavy-duty gardening gloves (leather or reinforced) to protect against splinters, thorns, and blisters.
- ● Safety gear: Safety glasses (ANSI-rated)
- ● Ear protection (for loud cuts)
- ● Steel-toe boots or work boots with ankle support
- ○ Hard hat (optional but recommended) for very tall trees
- ● Ladder or lift: Extension ladder (20-30 ft) with non-slip feet and wide base.
- ● Safety harness + tree climbing spikes (if experienced in climbing).
- ● Professional lift rental (for trees over 50 ft).
- ● Cleaning supplies: Rubbing alcohol (70%+) or bleach solution (1:9 ratio) to sterilize tools.
- ● Shop towels or rags for wiping blades.
- ● Tree wound dressing: Pruning sealant (controversial—skip if unsure; research first!).
- ● Disposable bags or tarp: For collecting and disposing of large debris.
- ● Marking twine & flags: To tag branches for removal before cutting.
- ● First-aid kit: In case of cuts, scrapes, or allergic reactions (acorn trees can irritate skin!).
- ● Camera or phone: To document the tree’s structure before pruning.
- ● Weather: Prune on a dry, calm day (avoid wind or rain).
- ● Tree health: Inspect for disease, pests, or dead branches first.
- ● Local regulations: Check if your area requires a permit for large tree removal.
- ● Skill level: For trees over 30 ft tall, consider hiring a certified arborist.
Step-by-step guide to planting a mighty Pacific Northwest oak
Here’s how to establish a towering acorn tree that’ll dominate your landscape for centuries.
🌱 Step 1: Choose the Right Location and Prepare the Site
Oaks demand space—at least 50 feet in all directions for mature growth. Scan your property for open areas with full sun exposure (6+ hours daily) and well-drained soil. Avoid low spots where water pools, as oak roots despise soggy conditions.
Test your soil’s drainage by digging a 12-inch deep hole and filling it with water. If it drains in under 4 hours, your site is suitable. If not, amend the area with 4-6 inches of coarse sand or gravel mixed into the top 12 inches of native soil. This prevents root rot, which can kill young oaks within months.
🪴 Step 2: Dig the Planting Hole and Handle the Sapling
Dig a hole twice as wide as the root ball but no deeper—oaks struggle when buried too deeply. The top of the root ball should sit 1-2 inches above ground level to prevent waterlogging. If your sapling arrives bare-root, soak its roots in lukewarm water for 1-2 hours before planting to revive them.
Gently loosen any circling roots with your fingers (never a knife—you’ll sever them). Place the sapling in the hole so its roots spread naturally. Backfill with the native soil you removed, tamping lightly every 6 inches to eliminate air pockets. Avoid compacting the soil too firmly, or roots won’t penetrate easily.
☀️ Step 3: Water Deeply and Mulch for Long-Term Health
Water the newly planted oak slowly but deeply—10-15 gallons—until the soil 6 inches down is thoroughly moist. This encourages roots to grow downward rather than stay shallow. After watering, spread 3-4 inches of wood chips or bark mulch in a 3-foot diameter ring around the base, keeping it 6 inches away from the trunk to prevent rot.
Mulch retains moisture and regulates soil temperature, but never pile it against the trunk. Over time, this mulch ring will break down, feeding the tree’s roots. In the Pacific Northwest’s damp climate, check soil moisture weekly—oaks need 1-2 inches of water per week, but they’re drought-tolerant once established, so don’t overdo it.
✂️ Step 4: Prune Strategically and Monitor Growth
Wait 6-12 months before pruning—young oaks heal slowly. Remove only dead, diseased, or crossing branches using clean, sharp pruners. Make cuts just outside the branch collar (the swollen area where the branch meets the trunk) to promote fast healing. Never top the tree; oaks produce weak, storm-prone growth when cut back harshly.
Monitor for oak wilt (a fungal disease common in the PNW) by checking for sudden leaf drop, wilting, or discolored veins. If you spot symptoms, prune only in late winter or early spring when the fungus is dormant. Healthy oaks grow 1-2 feet per year—patience is key. In 5-10 years, your sapling will cast shade like a mature giant.
Tips & tricks for planting a mighty Pacific Northwest oak
Took me years of trial and error to master these secrets for establishing a thriving oak sapling in our damp climate.
Site Selection Insight: The 6+ hours of full sun requirement is non-negotiable, but I’ve found eastern exposures work best in the PNW—morning sun prevents afternoon heat stress while still providing ample light. Test that 12-inch drainage hole in multiple spots around your potential site; some areas may need more sand amendment than others. Remember, oaks hate soggy feet, and poor drainage is the #1 reason they fail.
Root Care Technique: When handling bare-root saplings, that 1-2 hour soak in lukewarm water is your best friend. I like to add a splash of seaweed extract (optional) to the water to give those roots a little growth boost right away. And here’s what nobody tells you—after planting, gently press the soil around the edges of the root ball to create a slight basin. This helps direct water straight to the roots during your initial watering.
Mulching Mastery: The 3-4 inch mulch ring should extend exactly 3 feet from the trunk, but don’t just pile it randomly. I create a slight mound of mulch around the outer edge to encourage water to flow toward the tree rather than away. This simple technique can double your water efficiency during those first critical weeks. And yes, that 6-inch clearance from the trunk is essential—piling mulch against the bark creates perfect conditions for rot.
Pruning Preparation: That 6-12 month waiting period before pruning might seem long, but it’s worth it. I mark potential pruning spots with a soft pencil on my calendar right when I plant the tree. This gives me time to observe how the branches naturally grow and develop before making any cuts. And pro tip: keep your pruners clean with rubbing alcohol between cuts—oaks are particularly susceptible to bacterial infections through dirty tools.
Pro Tips for Huge Acorn Tree
- Took me years of trial and error to master these secrets for establishing a thriving oak sapling in our damp climate.
- Site Selection Insight: The 6+ hours of full sun requirement is non-negotiable, but I’ve found eastern exposures work...
- Root Care Technique: When handling bare-root saplings, that 1-2 hour soak in lukewarm water is your best friend. I li...
Frequently asked questions
Got questions about nurturing or dealing with a massive acorn tree? You’re not alone!
Here are answers to the most common queries about these Pacific Northwest giants—from pruning tips to troubleshooting issues.
How often should I prune a huge acorn tree?
Prune mature acorn trees every 2–3 years to maintain health and shape. Focus on removing dead, diseased, or crossing branches in late winter or early spring (before new growth starts). Avoid heavy pruning during drought or extreme heat. Pro tip: Never remove more than 25% of the canopy at once—this can stress the tree.
Can I prune a huge acorn tree myself, or should I hire a professional?
For small branches (under 3 inches thick), DIY pruning is safe with the right tools. However, for large acorn trees (over 50 feet tall), hire an ISA-certified arborist. Falling branches or improper cuts can damage the tree or harm property. Pro tip: Look for professionals with experience in oak/acorn tree species—they know how to avoid oak wilt risks.
Why are my acorn tree’s leaves turning brown or yellow?
Brown/yellow leaves often signal drought stress, fungal diseases (like anthracnose), or pest infestations (e.g., acorn weevils). Check for:
- Wilting or curled leaves (drought)
- Black spots or powdery mildew (fungus)
- Holes in acorns or sawdust-like frass (pests)
Water deeply during dry spells and remove infected branches. For pests, use neem oil or insecticidal soap in early summer.
What’s the best time to plant a new acorn tree?
Plant acorn trees in early fall or late winter (before buds swell) for the best survival rates. The Pacific Northwest’s mild winters give young trees time to establish roots before summer heat. Choose a well-draining spot with 6–8 hours of sunlight and space at least 40–60 feet apart for mature growth.
How do I remove a huge acorn tree that’s too close to my house?
Removing a mature acorn tree is dangerous and complex—never attempt it alone. Hire an arborist to:
- Assess root barriers and structural risks
- Use sectional dismantling (cutting in pieces) to avoid damaging your home
- Dispose of debris properly (check local regulations—acorn trees may require special handling to prevent invasive pests)
Cost note: Removal can range from $1,500–$5,000+ depending on size and location. Pro tip: If the tree is healthy, consider root pruning or crown reduction instead.
Wrapping up and next steps
Caring for a huge acorn tree in the Pacific Northwest isn’t just about pruning—it’s about nurturing a living landmark that brings shade, beauty, and ecological value to your landscape. 🌳 With the right tools, timing, and techniques, you can keep your towering champion thriving for generations.
Start small, stay consistent, and don’t forget to celebrate the rewards of your efforts—like the sweet acorns that feed local wildlife and the cool shade that makes summer days a breeze!
Ready to take the next step? Mark your calendar for your first pruning session this fall and observe how your tree responds. Over time, you’ll build a deeper connection with this majestic giant—and maybe even inspire your neighbors to do the same! 🌿