Pruning
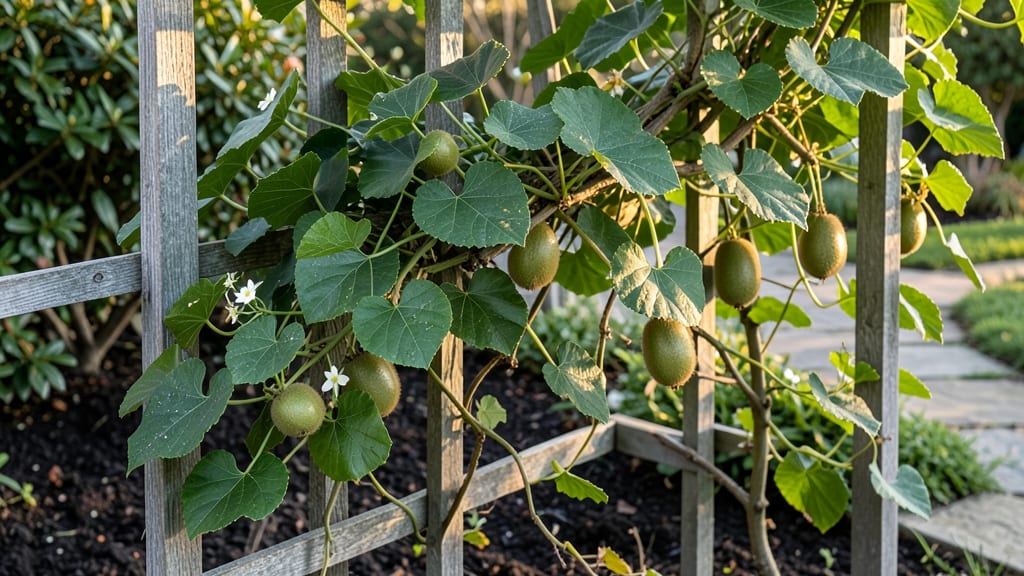
Growing kiwi on a tree means harvesting sweet, fuzzy fruit from your own backyard—no grocery store needed. 🌱 I learned the hard way that proper pruning cuts the difference between a tangled mess and a productive vine that yields fruit year after year.
The key is training those vigorous vines early, before they outgrow your trellis or overwhelm your space.
Most gardeners skip the variety selection step, but choosing between hardy Actinidia arguta (smaller, cold-tolerant fruit) or classic Actinidia deliciosa (larger fruit, needs warmer climates) makes all the difference.
You'll also need a sturdy trellis or espalier system—think of it as a vine's natural scaffolding, guiding growth upward instead of sprawling across your yard.
With the right cuts and training, you'll end up with a compact, fruit-bearing "tree" that produces harvests from late summer through fall—and sometimes even into winter in mild climates.
The vines become a stunning vertical garden, while the fruit rewards your patience with juicy, vitamin C-packed treats straight from the plant.
This method works in zones 5-9, though hardy kiwi varieties push the cold tolerance further. Whether you're working with a small balcony or a spacious backyard, the same pruning principles apply—just scale the trellis size to your space. Let's get those vines climbing!
📚 In This Guide
- What you need
- Instructions
- Tips and common mistakes
- Wrapping up and next steps
What you need
- ● Kiwi vine (Actinidia deliciosa or Actinidia arguta): 1-2 healthy, disease-free plants (male and female for pollination, unless using self-pollinating varieties like Actinidia arguta)
- ● Rootstock or bare-root plants (spring planting recommended)
- ● Pruning tools: 1 pair of bypass pruners (sharp, clean, and sanitized with rubbing alcohol)
- ● 1 pair of loppers (for thicker branches, 2-3 ft cutting capacity)
- ● 1 pruning saw (for large, woody stems)
- ● 1 glove set (cut-resistant and comfortable for extended use)
- ● Support structure: 1 trellis or arbor (8-10 ft tall, sturdy, and spaced 6-8 ft apart for vines)
- ● OR strong fence or pergola (if already available)
- ● Soil amendments: Compost or well-rotted manure (5-10 gallons per plant)
- ● Balanced 10-10-10 fertilizer (1-2 lbs per plant, applied in early spring)
- ● Mulch: 2-3 inches of organic mulch (straw, wood chips, or pine needles)
- ● 1 spray bottle with water (for keeping tools clean during pruning)
- ● 1 labeling tags (to mark male/female plants and pruning cuts)
- ● 1 hose with nozzle (for post-pruning hydration)
- ● 1 plant growth regulator (like Paclobutrazol, to control vigorous growth if needed)
- ● 1 fruit-thinning shears (for managing overproduction in later years)
Step-by-Step pruning for year-round kiwi fruit production
Here's how to coax abundant fruit from your kiwi vine through strategic cuts.
✂️ Step 1: Understand Kiwi Vine Growth Cycles
Kiwi vines produce fruit on one-year-old wood, meaning this season's growth will bear next year's harvest. The key is balancing flowering wood (last year's growth) with fruit-bearing potential. Look for brown, woody stems—these are your fruit producers. Remove any thin, green growth that hasn't yet matured, as it won't fruit this cycle.
Here's the thing—kiwi vines are aggressive. Without pruning, they'll put all their energy into vine extension rather than fruit production. You'll want to reduce last year's growth by 30-50% to force the plant to focus on flowering and fruiting instead of sprawling. This is where most gardeners go wrong—they prune too lightly and wonder why their vines never produce well.
✂️ Step 2: Perform Winter Dormancy Pruning (Late Winter)
Wait until late winter when the vine is fully dormant (no leaves, no growth). This is typically February-March in most climates. Start by removing all dead, diseased, or crossing branches—these compete with healthy growth and can spread rot. Use clean, sharp pruners to make cuts at a 45-degree angle, about ¼ inch above a outward-facing bud to encourage proper growth direction.
Next, shorten all remaining branches by ⅓ to ½ of their length. Focus on last year's growth—these are the fruit-bearing canes. You'll see them as thicker, woody stems compared to the current year's thin, green shoots. This heavy pruning might look drastic, but it's what triggers the vine to produce more flowering shoots for next season's fruit.
☀️ Step 3: Summer Pruning for Airflow and Fruit Set
In mid-summer, when the vine is actively growing, perform a second light pruning to improve airflow and fruit development. Remove any suckers (shoots growing from the base) and water sprouts (vertical shoots growing from the main stem). These compete with fruit production and weaken the vine. You'll notice them as fast-growing, thin shoots with no flowers.
Thin out overcrowded clusters of fruit to 3-5 per stem. Kiwi fruit needs space to grow—too many fruits will result in small, underdeveloped berries. Here's where it gets fun: hand-pollinate female flowers (they have a large stigma) with pollen from male flowers (smaller, with stamens) using a soft brush. This ensures better fruit set, especially if your vine has separate male and female plants.
⏰ Step 4: Autumn Cleanup for Next Season
In autumn, after harvest but before first frost, perform a final cleanup. Remove any fruit-bearing canes that have produced this season—they'll be thicker and more woody. These old canes won't fruit again and take energy from new growth. Keep 2-3 of the strongest canes for next year's production, cutting them back to 4-6 buds from the base.
This is also the time to train your vine. Kiwi vines need a strong support structure—a trellis, arbor, or sturdy fence. Guide the remaining canes along the support, securing them with soft ties (never wire, which can damage the bark). You'll see new shoots emerging from the base—these are your future fruit producers. Let them grow 12-18 inches before pruning back to encourage bushiness.
🌱 Step 5: Year-Round Maintenance for Continuous Fruit
Kiwi vines thrive with consistent care. Water deeply once a week during dry spells, keeping the soil evenly moist but not soggy. Mulch around the base with 2-3 inches of organic mulch to retain moisture and regulate soil temperature. Fertilize in early spring with a balanced 10-10-10 fertilizer to support new growth and flowering.
Watch for pests like vine borers or diseases such as powdery mildew. Treat early with neem oil or copper fungicide to prevent spread. Here's the moment that matters: prune lightly in early spring to shape the vine and remove any dead or weak growth before the new season's flush begins. You'll see new leaves and shoots emerge within 2-3 weeks—this is your sign that the vine is recovering and preparing for another year of fruit.
Tips & tricks for perfect kiwi vine pruning
Pruning your kiwi vine correctly transforms it from a wild sprawl into a productive fruit machine. Here's what I've learned from years of trial and error—and what nobody tells you about keeping those vines happy.
Pruning Precision: When you're shortening last year's growth by 30-50% in Step 2, don't just guess—count the buds. Aim to leave 4-6 strong buds on each remaining cane. These buds are your future fruit producers, so you want them healthy and well-positioned. I always make my cuts just above an outward-facing bud at a 45-degree angle; this creates a natural shield that prevents water from pooling and rotting the cut. The angle might seem fussy, but it makes all the difference in preventing disease.
Seasonal Timing Secret: The February-March window for winter pruning is critical, but don't stress if you miss it. If your vine is still dormant in early spring, you can prune up to 2 weeks before bud break (when you see tiny green swellings forming). The key is always pruning before new growth begins—once those buds start pushing, you're too late for that season's shaping. I've seen gardeners prune too early in cold snaps, and the vine just goes dormant again. Wait until daytime temperatures consistently stay above 40°F before you start cutting.
Hand-Pollination Hack: In Step 3, when you're thinning fruit clusters to 3-5 per stem, take that extra time to hand-pollinate. Use a soft makeup brush to transfer pollen from male flowers (those with prominent stamens) to female flowers (the ones with the large, fuzzy stigma). This might seem tedious, but it dramatically increases fruit set—especially if you have separate male and female plants. I've seen fruit yields triple when I do this consistently. The best time is late morning when flowers are fully open and pollen is most abundant.
Support System Strategy: Don't wait until autumn to set up your trellis or arbor. If you're starting fresh, install your support structure in early spring before new shoots emerge. Kiwi vines grow aggressively—up to 30 feet in a single season if unchecked. Train the main canes along the support as they grow, securing them with soft ties every 12-18 inches. I use old t-shirts or rubber tree straps because they're gentle on the bark and won't cut into the vine as it thickens. This systematic training prevents the vine from becoming a tangled mess while maximizing sunlight exposure for all parts of the plant.
Pro Tips for Kiwi On A Tree
- Pruning your kiwi vine correctly transforms it from a wild sprawl into a productive fruit machine.
- Pruning Precision: When you're shortening last year's growth by 30-50% in Step 2, don't just guess—count the buds.
- Seasonal Timing Secret: The February-March window for winter pruning is critical, but don't stress if you miss it.
Frequently asked questions
Got questions about growing kiwi on a tree or maximizing your harvest? Here are some of the most common queries from gardeners and fruit enthusiasts—plus straightforward answers to help you succeed!
Can I grow a kiwi vine on a tree instead of a trellis?
Kiwi vines thrive when trained onto a sturdy tree like an apple, pear, or even a special "kiwi tree" frame. Use soft ties or twine to guide vines upward, and prune aggressively to maintain shape. Just ensure the tree provides enough support—kiwi vines can grow heavily!
How long does it take for a kiwi vine on a tree to bear fruit?
Patience is key! With proper care, kiwi vines on trees typically produce fruit in 3–5 years. Male and female flowers must be present for pollination (or plant a self-pollinating variety). Pruning young vines encourages faster fruiting—focus on removing weak growth and shaping the tree structure early.
Do kiwi trees need winter protection in cold climates?
Yes! Kiwi vines are sensitive to frost, especially young plants. In zones below 7, wrap the tree trunk and vines in burlap or frost cloth once temps drop below 20°F. Mulch the base with straw or leaves for extra insulation. Hardy varieties like Actinidia arguta (hardy kiwi) tolerate colder temps better.
What’s the best way to prune a kiwi tree for maximum fruit?
Prune in late winter or early spring to remove dead wood, crossing branches, and overcrowded growth. Keep the tree open for airflow—aim for a balanced canopy with 4–6 main branches. Thin out excess fruit clusters (leave 1–2 per shoot) to improve size and sweetness. Use sharp shears and sterilize tools between cuts!
Why aren’t my kiwi flowers being pollinated?
Kiwi vines need cross-pollination (unless you have a self-pollinating variety). Hand-pollinate with a small brush if bees are scarce, or plant a male vine nearby. Flowers open in spring—check for pests (like aphids) that might block access. Wind or rain can also hinder pollination; a gentle shake of the tree helps!
Wrapping up and next steps
Growing kiwi on a tree isn’t just possible—it’s a rewarding adventure that brings vibrant, year-round fruit to your backyard with the right pruning techniques! 🌱 Whether you’re a seasoned gardener or just starting, these tips will help you nurture a thriving vine and enjoy the sweet taste of homegrown kiwi.
The key lies in patience, consistency, and a little creativity with your pruning cuts.
Ready to take the next step? Start small—plant a single vine or two and experiment with pruning styles. Track your progress, adjust as needed, and soon you’ll be harvesting plump, delicious kiwis straight from your tree. Your future self (and taste buds) will thank you! 🍈✨