Pruning
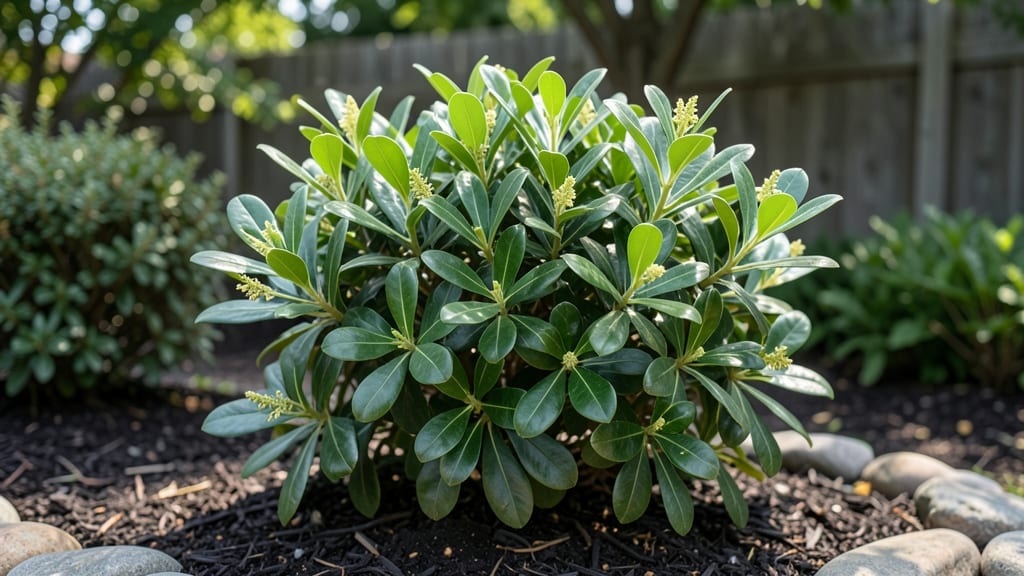
Your Laurus nobilis bay tree could be the star of your garden—and kitchen—if you prune it right. I’ve turned my once-ragged bay tree into a dense, glossy-green hedge that stays lush all year, and it only took learning a few simple cuts.
The secret lies in timing and technique, not fancy tools or complicated steps.
Bay trees thrive in USDA zones 7-10, where they handle heat and humidity like a champ, but even in cooler climates, they reward patience with fragrant, evergreen foliage. Pruning isn’t just about shaping—it’s about encouraging new growth so you always have fresh leaves for soups, stews, or garnishes.
And the best part? You can start with just a pair of sharp shears and a clear morning.
By the end of this, you’ll have a bay tree that looks like it belongs in a botanical garden—not just your backyard. The leaves will stay vibrant, the branches will fill in neatly, and you’ll never again wonder why your bay tree looks half-dead.
Let’s get those pruners out and make it happen.
Whether you’re growing it as a solitary specimen, a formal hedge, or a culinary staple, the same principles apply. The key is consistency—just 10-15 minutes every few months keeps it thriving. Ready to transform yours?
📚 In This Guide
- What you need
- Instructions
- Tips and common mistakes
- Wrapping up and next steps
What you need
- ● Pruning shears: Bypass pruners (for clean cuts on small branches) or anvil pruners (for thicker stems). Choose sharp, stainless-steel blades (4–6" size).
- ● Loppers: Bypass loppers (for branches ½–1½" thick). Look for ratcheting or bypass action for precision.
- ● Hand saw: Pruning saw (for branches >1½" thick). Opt for a curved blade for ease.
- ● Disinfectant: 70% isopropyl alcohol or rubbing alcohol (to sterilize tools between cuts and prevent disease).
- ● Gloves: Heavy-duty gardening gloves (to protect from thorns and sap). Choose nitrile-coated for durability.
- ○ Pruning sealant (optional but helpful): Tree wound sealant (like Tanglefoot Tree Wound Pruning Seal) for cuts >½".
- ● Ladder or step stool: Aluminum extension ladder (if tree is >6 ft tall) or a stable 3-step stool (for shorter trees).
- ● Trash bags or bucket: For collecting pruned branches (1–2 heavy-duty contractor bags or a 5-gallon bucket).
- ● Sharpener: Pruner sharpening stone (to maintain blade edge between uses).
- ● Marking twine or spray paint: For temporary branch marking (if planning a complex shape).
- ● Safety goggles: To protect eyes from debris (especially if sawing thick branches).
- ● Hose with nozzle: For rinsing tools post-pruning (if sap is sticky).
- ● Notebook & pen: To jot down pruning notes (e.g., "pruned in March 2024" or "focused on lower branches").
Step-by-step guide to pruning your Laurus nobilis bay tree
Mastering this technique transforms your bay tree from scraggly to sculpted—here’s how to do it right.
Time Your Pruning for Optimal Growth
Prune your Laurus nobilis in late winter or early spring, just before new growth begins. This timing aligns with the tree’s natural dormancy cycle, ensuring minimal stress and maximum recovery. Avoid pruning in fall or winter, as cold temperatures slow healing and expose the tree to frost damage.
Look for fresh, plump buds along the branches—these signal the tree’s readiness to regrow. If you prune too early, you risk encouraging tender new growth that won’t survive winter. If you wait too long, you’ll cut back growth that could have contributed to next year’s harvest or foliage density.
Assess and Remove Dead or Damaged Wood
Start by inspecting the entire tree for dead, diseased, or crossing branches. Dead wood appears brittle, dry, or lacks the tree’s signature dark green leaves. Diseased branches may show discoloration, mold, or unusual spots. Use sterilized pruning shears to cut these back to healthy wood, making cuts at a 45-degree angle just above a leaf node or bud.
Crossing branches compete for sunlight and nutrients, weakening the tree’s structure. Remove one of the two branches entirely, cutting back to a lateral branch or bud. This step improves airflow and reduces the risk of fungal infections. If a branch is only partially damaged, trim it back to the last healthy section—never leave stubs.
Shape the Tree for Balance and Airflow
Step back and visualize the tree’s natural shape. Aim for an open, vase-like form that allows sunlight to penetrate the center. Start by thinning out the interior branches to reduce crowding—remove one-third of the oldest, thickest branches first. This encourages younger, more vigorous growth from the base.
For height control, focus on the topmost branches. Cut back the longest stems by one-third to encourage bushier growth. Avoid cutting into older wood, as bay trees struggle to regenerate from large wounds. If you’re pruning for a formal hedge, maintain a consistent height by trimming the outer edges evenly.
Prune for Harvest and Health
If you’re growing your bay tree for leaves, prioritize pruning mature, woody stems that produce the most flavorful foliage. Cut these back to encourage new, tender growth. For culinary use, harvest leaves from non-flowering branches—flowering stems produce bitter leaves. Use sharp shears to make clean cuts, and avoid tearing the bark.
Never remove more than one-third of the tree’s foliage in a single session. Over-pruning stresses the tree and can lead to dieback. After pruning, apply a balanced, organic fertilizer to support new growth. Water deeply to help the tree recover, especially if you’ve trimmed during dry periods.
Clean Up and Monitor Recovery
Remove all pruned branches and debris from the area to prevent pests or diseases from taking hold. Sterilize your tools with rubbing alcohol or a 10% bleach solution to avoid spreading pathogens. Dispose of diseased wood immediately—never compost it.
Watch the tree closely in the weeks following pruning. New growth should emerge within 4-6 weeks if conditions are right. If you notice yellowing leaves, reduce watering slightly—the tree may be struggling with the shock. Adjust future pruning based on the tree’s response; some Laurus nobilis varieties recover faster than others.
Tips & tricks for pruning your Laurus nobilis bay tree
Transforming your bay tree into a lush, healthy specimen starts with these essential pruning insights that go beyond the basics.
Timing is Everything: The late winter or early spring window isn't just about avoiding winter dormancy—it's about catching your tree at its most resilient moment. I've seen bay trees recover beautifully when pruned right before those first plump buds swell, but I've also watched them struggle when pruned too early or late. Pay close attention to those buds: they're nature's countdown timer for optimal pruning.
Precision Cuts Make All the Difference: When making those 45-degree cuts above leaf nodes, imagine you're creating a tiny roof that will protect the bud from rain and snow. I've learned this the hard way—cutting too close to the bud can expose it to moisture, leading to rot. Use sharp, sterilized shears and make clean cuts that look like professional landscapers did it, not like you're hacking through branches with a dull knife.
Structural Balance Creates Beauty: That one-third rule for thinning oldest branches isn't arbitrary—it's based on the tree's natural growth patterns. I've pruned trees where people took too much, and I've seen the devastating results of dieback. Start conservatively, remove no more than one-third of the oldest branches in any single session, and always prioritize the interior branches first to create that perfect open vase shape that lets sunlight reach all parts of the tree.
Recovery Monitoring is Key: Those 4-6 weeks of watching for new growth aren't just idle time—they're your chance to catch any issues before they become serious problems. I've noticed that trees in cooler climates often take the full 6 weeks, while those in warmer areas might show new growth in just 3 weeks. Keep a pruning journal to track your tree's recovery patterns year after year.
Pro Tips for Laurus Nobilis Bay Tree
- Transforming your bay tree into a lush, healthy specimen starts with these essential pruning insights that go beyond ...
- Timing is Everything: The late winter or early spring window isn't just about avoiding winter dormancy—it's about cat...
- Precision Cuts Make All the Difference: When making those 45-degree cuts above leaf nodes, imagine you're creating a ...
Frequently asked questions
about pruning your Laurus nobilis (bay tree) can help you keep your plant thriving year-round. Here are some common queries answered for your convenience!When is the best time to prune a bay tree?
The ideal time to prune your Laurus nobilis is in late winter or early spring (February to March), just as new growth begins. This timing encourages healthy, vigorous growth while avoiding the risk of frost damage. Light pruning can also be done in summer to shape the plant, but avoid heavy cuts during this season.
How much can I prune my bay tree without harming it?
Bay trees are highly resilient and can tolerate up to 20-30% of their foliage being removed in a single pruning session. For mature trees, you can prune back to a strong bud or branch junction. Avoid over-pruning—never remove more than one-third of the tree’s canopy at once to prevent stress.
What should I do if my bay tree isn’t growing after pruning?
If your bay tree seems stunted or slow-growing post-pruning, check these factors:
- Light exposure: Ensure it gets 6+ hours of sunlight daily.
- Soil health: Well-draining, slightly acidic soil (pH 6.0-7.0) is ideal.
- Watering: Keep soil consistently moist but not waterlogged.
- Fertilizer: Apply a balanced, slow-release fertilizer in spring.
Can I prune a bay tree into a specific shape (e.g., topiary)?
Bay trees are fantastic for topiary due to their dense, glossy foliage. Use sharp pruning shears to create clean lines, and prune just after new growth appears to maintain shape. For formal topiary, prune lightly but frequently (every 4-6 weeks in growing season).
What’s the difference between pruning for growth vs. pruning for harvest?
Pruning for growth focuses on removing dead, crossing, or overcrowded branches to encourage airflow and new shoots. For harvesting bay leaves, prune selectively:
- Harvest leaves from non-flowering branches to avoid reducing future leaf production.
- Avoid heavy pruning if you rely on leaves for cooking—balance harvest with growth pruning.
Wrapping up and next steps
Mastering the art of pruning your Laurus nobilis (bay tree) is all about patience and precision! With the right tools, timing, and techniques, you’ll unlock year-round lushness and vibrant growth. Whether you’re shaping it for culinary use, ornamental beauty, or both, remember: consistency is key—a little effort now means fewer headaches later.
Ready to take your bay tree to the next level? Start small: pick one pruning session this season to practice, then gradually expand your skills. Before you know it, you’ll have a thriving, fragrant centerpiece that’s as rewarding to tend as it is to admire! 🌿✨