Pruning
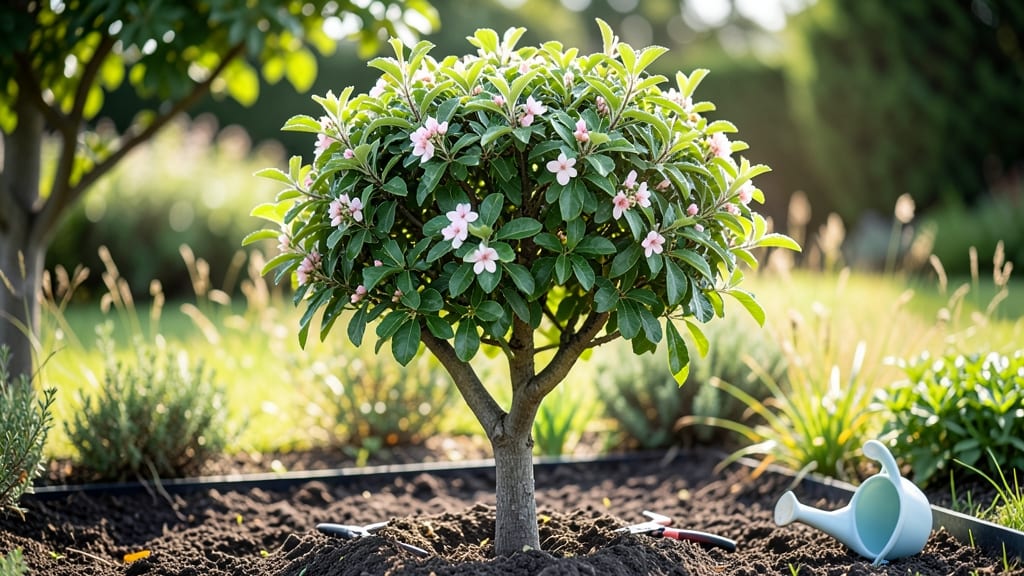
Growing a miniature pear tree lets you enjoy fresh fruit without needing acres of space. 🌱 I planted mine in a large container last spring, and now it’s already heavy with tiny, sweet pears—something I never thought possible in my small urban yard.
The key is choosing the right dwarf rootstock and giving it consistent care, which I’ll walk you through step by step.
These little trees thrive in 5-gallon pots or in-ground beds, as long as they get 6+ hours of sunlight daily. The soil should drain well but stay moist—think crumbly, not soggy.
Pruning in late winter keeps them compact and productive, and most varieties bear fruit within 2-3 years of planting. My favorite part? The way they look like a real orchard, just in miniature.
You’ll end up with a tree that stays under 6 feet tall, perfect for patios or small gardens. The pears might be tiny, but they’re packed with flavor—ideal for snacking, baking, or gifting. Plus, they’re less prone to pests than full-sized trees, making them a foolproof choice for beginners.
Whether you’re growing in containers or the ground, these trees adapt well to urban spaces. Just watch for fire blight and keep an eye on watering—overdoing it can drown the roots. With the right care, you’ll have a thriving little orchard in no time.
📚 In This Guide
- What you need
- Instructions
- Tips and common mistakes
- Wrapping up and next steps
What you need
- ● Miniature pear tree (dwarf variety): Choose a grafted variety like Pyrus communis (e.g., 'Seckel' or 'Bartlett')—ensure it’s labeled as dwarf or semi-dwarf (4–8 ft mature height).
- ● Pruning shears: Bypass pruners (sharp, 5–7" blades) for clean cuts. Sterilize with rubbing alcohol between cuts to prevent disease.
- ○ Hand pruners (optional): For thicker branches (up to ½"), opt for anvil pruners (but bypass is preferred for precision).
- ● Loppers: Only if your tree grows over 1 inch in diameter—use for larger branches (8–12" blades).
- ● Pruning saw: For branches thicker than 2 inches (avoid if your tree stays small!).
- ● Rubbing alcohol (70% isopropyl): 1 small bottle (4 oz) for sterilizing tools.
- ○ Pruning sealant (optional): Tree wound paint (like Tanglefoot Tree Wound Pruning Seal) for cuts larger than ½".
- ● Gloves: Nitrile or leather (gardening gloves) to protect from thorns and sap.
- ● Disposable bags or bucket: For collecting pruned branches (1–2 gallon size).
- ● Know your tree’s age: Young trees (light pruning (focus on shape). Mature trees (3+ years) can handle structural pruning.
- ● Best time to prune: Late winter/early spring (before buds swell) or summer after harvest (avoid fall/winter in cold climates).
- ● Weather check: Prune on a dry, cloudy day (wet wood splinters; sun can stress the tree).
- ● Safety first: Wear closed-toe shoes (watch for falling branches!).
- ● Have a ladder or stool if your tree is 6+ ft tall (but dwarf varieties rarely need this!).
- ● 🔥 Mark your cuts: Use a white chalk marker to outline where you’ll cut—helps avoid mistakes!
- ● 🌡️ Tool maintenance: Sharpen shears annually with a file or sharpening stone for clean cuts.
- ● ✨ Compost branches: Small pruned wood makes great mulch or compost—just avoid diseased wood.
Step-by-step instructions for planting and caring for miniature pear trees
Here's how I've grown thriving dwarf pear trees in small spaces—no orchard needed.
🌱 Step 1: Choose the Right Location and Planting Time
Miniature pear trees thrive in full sun (at least 6-8 hours daily) and well-draining soil. I plant mine in early spring, just as buds begin to swell, so roots establish before summer heat arrives. Avoid fall planting—young trees won’t harden off before winter.
If your yard has heavy clay soil, amend with 2-3 inches of compost mixed into the top 12 inches of soil. Miniature trees have shallow roots, so good drainage prevents root rot. Test your spot by digging a 6-inch hole—if water pools, raise the planting area with a mound or use a large container with drainage holes.
🪴 Step 2: Prepare the Planting Hole and Transplant
Dig a hole twice as wide as the root ball but only as deep. The top of the root ball should sit 1 inch above ground level—settling will occur over time. Gently loosen any circling roots with your fingers (they’ll strangle the tree if left intact).
Place the tree in the hole and backfill with native soil, tamping lightly every 2 inches to remove air pockets. Water deeply to settle the soil, then add a 2-inch layer of mulch (like wood chips) around the base, keeping it 3 inches away from the trunk to prevent rot. This mimics natural forest conditions and retains moisture.
☀️ Step 3: Water and Fertilize for Early Growth
Water deeply once a week for the first 4-6 weeks, ensuring moisture reaches 6-8 inches down. You’ll know it’s enough when water drains out the bottom of the hole or container. Overwatering is the fastest way to kill a miniature tree—let the top 2 inches of soil dry out between waterings after establishment.
Apply a balanced 10-10-10 fertilizer (following package rates) in early spring and again after harvest. Miniature trees need less food than full-size varieties, so avoid heavy-handed feeding—it leads to weak wood and fewer fruits. I also side-dress with compost tea every 2 months for organic nutrients.
✂️ Step 4: Prune and Train for Shape and Productivity
Prune in late winter or early spring before new growth starts. Remove dead, crossing, or inward-growing branches first, then thin out 25% of the canopy to improve airflow. Miniature trees fruit best on older wood, so avoid heavy summer pruning—it reduces next year’s crop.
Train the central leader (main upward branch) by tying it to a stake if needed. For a bushier shape, prune the top 1-2 inches above a outward-facing bud. Watch for suckers (shoots at the base)—remove them immediately to direct energy into fruit production.
🍐 Step 5: Protect and Harvest for Long-Term Success
Young trees need winter protection in cold climates. Wrap the trunk with tree guard and mound 4-6 inches of mulch around the base after the first frost. In USDA Zones 5-6, I also cover the canopy with frost cloth during hard freezes to prevent bud damage.
Harvest pears when they easily detach from the tree (usually late summer to early fall). Store them at 35-40°F in a paper bag to ripen naturally. Miniature trees produce 20-50 fruits per tree, so expect a modest but rewarding harvest—patience is key!
Tips & tricks for perfect miniature pear tree cultivation
These practical insights will help you nurture a thriving dwarf pear tree that produces fruit for years to come.
Location and Soil Strategy: For optimal sun exposure, position your tree where it receives morning sunlight and afternoon shade if you're in a hot climate. The 6-8 hours of daily sun is non-negotiable, but the angle matters too—south-facing locations (in northern hemisphere) give the best light distribution. If your yard has heavy clay soil, consider raised beds instead of amending—this creates better drainage from the start and prevents compaction issues that can suffocate shallow roots.
Transplanting Technique: When loosening circling roots in Step 2, make small vertical cuts with a clean knife if roots are tightly bound—this encourages outward growth rather than strangling the tree. The 1-inch elevation above ground level is crucial; if you plant too deep, you risk suffocating the trunk. After backfilling, create a shallow basin around the base to direct water straight to the roots during the critical first 4-6 weeks.
Watering Wisdom: The deep watering requirement of 6-8 inches down might seem excessive, but miniature trees have surprisingly large root systems relative to their size. Use a soil moisture meter to verify—if the top 2 inches stay dry between waterings after establishment, you're on track. In containers, check for drainage holes and use a saucer to catch excess water, but never let the tree sit in standing water.
Pruning Precision: When thinning 25% of the canopy in Step 4, focus on removing branches that cross or grow inward—they create weak points and disease entryways. Make cuts just outside the branch collar (the swollen area where the branch meets the trunk) using sharp pruners. For sucker removal, pull them out completely rather than cutting, as any remaining stem can regrow. The 1-2 inch pruning above outward-facing buds encourages bushier growth without sacrificing fruit production.
Pro Tips for Miniature Pear Tree
- These practical insights will help you nurture a thriving dwarf pear tree that produces fruit for years to come.
- Location and Soil Strategy: For optimal sun exposure, position your tree where it receives morning sunlight and afternoon shade if you're in a hot climate.
- Transplanting Technique: When loosening circling roots in Step 2, make small vertical cuts with a clean knife if roots are tightly bound—this encourages outward growth rather than strangling the tree.
Frequently asked questions
Got questions about growing a miniature pear tree?
You're not alone! Here are answers to the most common queries to help you get started with your compact orchard.
How big will a miniature pear tree actually get?
A true miniature pear tree (like the Pyrus varieties bred for dwarfing) typically reaches 6–10 feet tall at maturity—about 1/3 the size of a standard pear tree. However, with proper pruning (especially in early years), you can keep it even smaller (4–6 feet) for container growing or tight spaces. Always check the specific cultivar’s expected size!
When is the best time to plant a miniature pear tree?
Plant your miniature pear tree in early spring (after the last frost) or late fall (6–8 weeks before the first frost). This gives roots time to establish before extreme temperatures. Avoid planting in summer heat or winter freeze—both stress young trees. If you’re container-growing, spring is ideal to kickstart growth!
Do miniature pear trees produce fruit as reliably as full-size ones?
Yes! While they may yield fewer pears (think 10–30 fruits per tree vs. 50+ for standard trees), their fruit is often just as flavorful and perfect for snacking or small-scale canning. Pollination is key—plant two compatible varieties (check labels) for cross-pollination. Patience pays off: most dwarf pears bear fruit in 3–5 years.
How often should I prune a miniature pear tree, and what’s the best technique?
Prune annually in late winter/early spring (before buds swell) to shape the tree and encourage fruiting. Focus on:
- Removing dead/diseased branches (cut at the branch collar).
- Thinning out crowded branches to improve airflow (aim for an open center).
- Shortening vigorous shoots by 1/3 to maintain size.
Can I grow a miniature pear tree in a container, and what do I need?
Containers are perfect for dwarf pears. Use a 15–25 gallon pot with drainage holes and fill it with well-draining potting mix (add perlite or sand for aeration). Place the pot in full sun (6+ hours/day) and water when the top inch of soil is dry. Fertilize lightly in spring/summer with a balanced fruit-tree fertilizer. Remember: container-grown trees need more frequent watering and may need winter protection (move indoors or wrap the pot).
What pests or diseases should I watch for in miniature pear trees?
Miniature pear trees face the same pests as full-size ones but may be more vulnerable due to their size. Common issues include:
- Pear psylla (tiny sap-sucking insects)—spray with neem oil or insecticidal soap.
- Fire blight (bacterial disease)—prune infected branches 6 inches below the damage and sterilize tools.
- Scale insects or aphids—blast off with water or use horticultural oil.
- Powdery mildew (white fungal coating)—improve airflow and apply sulfur-based fungicide.
Wrapping up and next steps
Growing a miniature pear tree is a rewarding way to enjoy fresh fruit without the space of a full orchard! With the right pruning techniques, you’ll keep your tree healthy, productive, and stunningly compact.
Remember, consistency is key—regular trims in early spring and late winter will ensure strong growth and abundant harvests.
Ready to take the next step? Start small—pick a sunny spot, gather your tools, and give your tree the care it deserves. Before you know it, you’ll be savoring homegrown pears straight from your backyard! 🍐✨