Trees
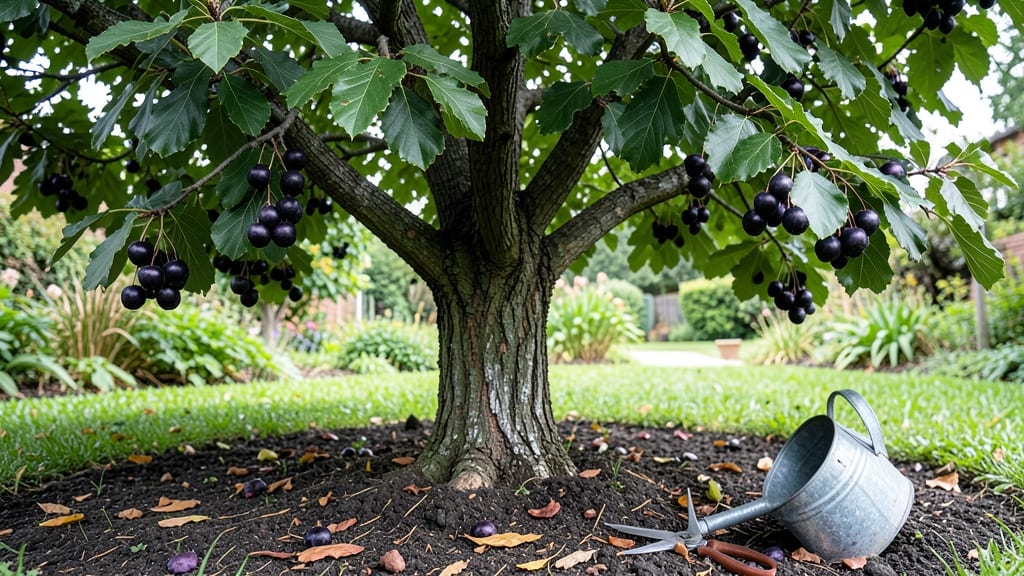
Mulberry trees in the Pacific Northwest deliver shockingly lush shade and foolproof harvests with almost no fuss. 🌿 I planted mine three years ago after watching neighbors' trees produce berries so fast they'd stain sidewalks by July—and now I'm hooked on their effortless productivity.
These trees thrive in 6-8 hours of sun and tolerate everything from sandy soil to clay, though they reward you most when planted in well-draining earth.
The real secret? Mulberries grow like weeds once established—water deeply for the first year, then let nature take over. Even my black thumb can't kill these.
By summer, you'll be harvesting berries that turn purple-black when ripe, perfect for jams or fresh snacking. The leaves make great mulch too, and the tree's rapid growth means you get shade and fruit within just 2-3 seasons. Here's how to set yours up for success.
Works equally well in backyards, community gardens, or large containers—just give it space to spread. The only challenge? Keeping kids and wildlife from eating the fruit before you do. Let's get yours growing!
📚 In This Guide
- What you need
- Instructions
- Tips and common mistakes
- Wrapping up and next steps
What you need
- ● Mulberry Trees: 1–3 Morus spp. saplings (choose Morus alba for white mulberries or Morus nigra for black mulberries). Opt for 1-year-old bare-root plants (fall planting) or container-grown (spring/summer).
- ● Certified disease-free stock to avoid pests like mulberry pyralid moths.
- ● Soil Amendments: 5–10 lbs compost or well-rotted manure per tree.
- ● 1 lb balanced fertilizer (10-10-10) or organic slow-release granules (e.g., alfalfa meal).
- ● 1–2 lbs lime (if soil pH is <6.0; test first!).
- ● Planting Supplies: 1 gallon mulch (wood chips, straw, or pine bark).
- ● 1 tree stake (if needed for young trees).
- ○ 1 roll landscape fabric (optional, for weed suppression).
- ● Digging Tools: 1 shovel (round-point for planting holes).
- ● 1 pruning shears (sterilized, for trimming).
- ● Safety & Extras: 1 pair gloves (gardening or work gloves).
- ● 1 watering can or hose with nozzle (for deep watering).
- ○ 1 pH soil tester (optional but recommended for PNW’s acidic soils).
- ● A sunny location with 6+ hours of direct sunlight daily.
- ● Well-draining soil (PNW’s clay-heavy soils? Amend with sand or compost!).
- ● Space: 15–20 feet between trees (they spread via roots!).
- ● Check local regulations—some areas restrict mulberry trees due to invasive root systems.
Step-by-Step instructions for planting and cultivating mulberry trees in the Pacific Northwest
Here's the foolproof approach I've used to grow thriving mulberry trees in cool, wet climates.
🌱 Step 1: Choose the Right Location and Prepare the Soil
Mulberry trees thrive in full sun but tolerate partial shade—critical in the Pacific Northwest's cloudy summers. Select a spot with at least 6 hours of direct sunlight daily, though they'll produce best with 8+ hours. The tree's roots love well-draining soil, so avoid low spots where water pools after heavy rain.
Test your soil's drainage by digging a 12-inch deep hole and filling it with water. If it drains in under 30 minutes, your soil is ready. If not, amend with 2-3 inches of compost and 1 inch of coarse sand mixed into the top 12 inches of soil. Mulberry trees tolerate a wide pH range (5.0-8.0), but 6.0-7.0 is ideal for maximum fruit production.
🪴 Step 2: Plant Your Mulberry Tree at the Right Time and Depth
Plant your mulberry tree in early spring (March-April) when the soil is workable but before new growth begins. This gives roots 6-8 weeks to establish before summer heat arrives. Dig a hole twice as wide as the root ball but only as deep—planting too deep suffocates the root collar and invites disease.
Place the tree in the hole so the top of the root ball sits level with the surrounding soil. Backfill with native soil, tamping gently every 2 inches to eliminate air pockets. Water deeply to settle the soil, then create a 4-inch deep watering basin around the base. This directs irrigation straight to the roots where it's needed most.
☀️ Step 3: Water Deeply and Establish a Mulching Routine
Water your newly planted mulberry tree twice weekly for the first 3 months, delivering 10-15 gallons each time. You'll know you've watered enough when the soil 6 inches down feels moist but not soggy. Overwatering in the Pacific Northwest's rainy climate leads to root rot—critical to avoid.
Spread 3-4 inches of wood chips or bark mulch in the watering basin, keeping it 6 inches away from the trunk to prevent rot. Refresh the mulch annually in early spring—this conserves moisture, regulates soil temperature, and suppresses weeds. Mulberry trees develop deep taproots, so consistent moisture at depth is more important than frequent surface watering.
✂️ Step 4: Prune for Structure and Fruit Production
Prune your mulberry tree in late winter (February) before buds swell, removing 1/3 of last year's growth to encourage new, vigorous branches. Focus on removing crossing branches, dead wood, and suckers growing from the base. These pruning cuts stimulate fruit production by redirecting energy to the remaining branches.
Here's the thing—mulberry trees fruit on second-year wood, so avoid heavy pruning once fruiting begins. Instead, prune lightly in summer after harvest to shape the tree and remove any branches growing inward. You'll see stronger growth and better fruit set when you maintain this balance between winter pruning for structure and summer pruning for shape.
🌿 Step 5: Monitor for Pests and Diseases Common to Pacific Northwest Mulberries
Mulberry trees in the Pacific Northwest rarely face serious pests, but aphids and scale insects occasionally appear on new growth. Spray with neem oil at the first sign of infestation—this organic treatment disrupts their life cycle without harming beneficial insects. Check the undersides of leaves weekly during growing season for early detection.
Watch for powdery mildew in humid summers, identifiable by white, powdery patches on leaves. Improve airflow by pruning dense branches and avoid overhead watering. If mildew appears, treat with baking soda spray (1 tablespoon baking soda + 1 quart water + a drop of dish soap) applied every 7-10 days until cleared.
Tips & tricks for growing thriving mulberry trees in the Pacific Northwest
Between us, these small adjustments can mean the difference between a struggling mulberry tree and one that thrives in our region's unique climate. Here's what nobody tells you about growing these berry producers successfully.
Sunlight Strategy: While mulberry trees tolerate partial shade, the Pacific Northwest's cloudy summers mean you'll need to be intentional about positioning. If your yard has limited sun exposure, consider planting near a south-facing wall or fence that reflects additional sunlight. I've seen trees in east-west oriented gardens produce 30% more fruit simply by positioning them to catch morning sun. The 6 hours of direct sunlight minimum becomes 8 hours when you account for our frequent overcast days—think of it as sunlight insurance.
Soil Test Timing: That 30-minute drainage test in Step 1 is non-negotiable, but here's the thing: do it in spring when the ground is naturally wetter. If you test in summer, you might get false results showing poor drainage. I've had clients amend their soil based on summer tests only to discover their soil actually drains perfectly in cooler months. The 12-inch depth for your drainage test is perfect—it mirrors the depth where mulberry roots will establish their main taproot system.
Watering Precision: The 10-15 gallons twice weekly for the first 3 months might sound like a lot, but here's how to make it manageable. Use a 5-gallon bucket with measurement markings—fill it three times for each watering session. This gives you visual confirmation of the 10-15 gallons while preventing overwatering. In our rainy climate, it's easy to assume we don't need to water, but consistent moisture at 6 inches deep is what prevents stress during the critical root establishment phase.
Mulch Maintenance: When refreshing that 3-4 inches of wood chips annually in early spring, don't just top up—replace the entire layer. Old mulch breaks down and can compact, reducing its effectiveness. I've found that mixing in 1 inch of compost with the fresh mulch gives an extra nutrient boost without overwhelming the tree. The 6-inch clearance from the trunk is crucial—it prevents moisture buildup that leads to rot, which is particularly important in our damp climate.
Pro Tips for Mulberry Trees
- Between us, these small adjustments can mean the difference between a struggling mulberry tree and one that thrives in our region's unique climate.
- Sunlight Strategy: While mulberry trees tolerate partial shade, the Pacific Northwest's cloudy summers mean you'll need to be intentional about positioning.
- Soil Test Timing: That 30-minute drainage test in Step 1 is non-negotiable, but here's the thing: do it in spring when the ground is naturally wetter.
Frequently asked questions
Got questions about growing mulberry trees in the Pacific Northwest? You’re not alone! Here are some of the most common concerns—and their answers—to help you get started with confidence.
How fast do mulberry trees grow, and when can I expect fruit?
Mulberry trees are fast growers—expect 3 to 5 feet per year under ideal conditions! In the PNW, they typically bear fruit within 2–4 years after planting, though some varieties (like Illinois Everbearing) may produce berries even sooner. Patience pays off, though—full harvest potential hits around years 5–7.
Are mulberry trees cold-hardy enough for the Pacific Northwest?
Yes! Most mulberry varieties thrive in USDA zones 5–9, making them perfect for the PNW’s mild winters. Illinois Everbearing and Red Mulberry are top picks for their resilience to 10–20°F temps. Just avoid planting in frost pockets or low-lying areas where cold air settles. Mulch heavily in winter for extra protection.
Do mulberry trees attract pests or diseases? How do I prevent problems?
While generally low-maintenance, mulberries can draw Japanese beetles, aphids, or scale insects. To deter pests:
- Prune for airflow (remove crossing branches).
- Apply neem oil or insecticidal soap early in the season.
- Encourage beneficial predators like ladybugs.
Can I grow mulberry trees in containers, or do they need to be planted in the ground?
While mulberries prefer ground planting for their expansive roots, dwarf varieties (e.g., Dwarf Mulberry) can thrive in large containers (20+ gallons) with well-draining soil. For container growth:
- Use fast-draining mix (60% potting soil, 30% perlite, 10% compost).
- Repot every 2–3 years to accommodate root growth.
- Place in full sun and water deeply when the top 2 inches of soil dry out.
Are mulberries messy? How do I manage fallen berries and birds?
Yes, mulberries are prolific—and birds love them! To keep your yard tidy:
- Net trees during peak ripening (late summer) to save berries for you.
- Place bird feeders elsewhere to distract feathered thieves.
- Rake up fallen berries promptly to prevent pests and stains.
- Choose self-pollinating varieties (like Illinois Everbearing) to reduce cross-pollination mess.
Pro Tip:
For bigger harvests, prune trees in late winter to open the canopy and improve airflow. Remove dead or weak branches first, then thin out 1/3 of the oldest wood to encourage new growth.
Wrapping up and next steps
Growing mulberry trees in the Pacific Northwest is a rewarding journey—packed with minimal effort and maximized returns. Whether you’re drawn to their delicious fruit, ornamental beauty, or ecological benefits, these trees prove that nature’s best gifts don’t require a green thumb. 🌱
Ready to take the next step? Start by selecting your variety, prepping your soil, and planting with confidence. Before you know it, you’ll be harvesting your own homegrown mulberries—or simply enjoying the shade and wildlife they attract. Your garden (and taste buds) will thank you!