Pruning
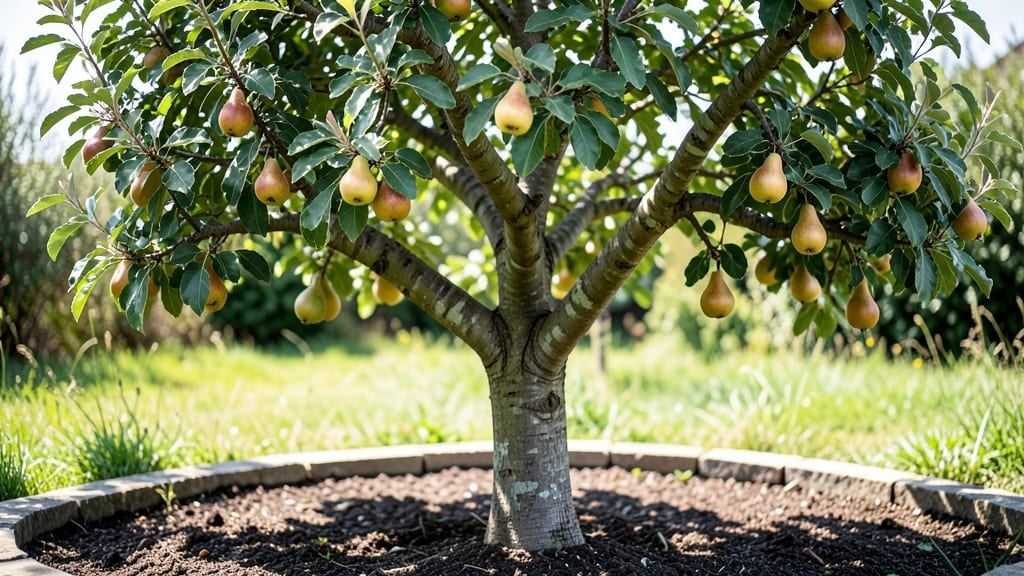
Pears on tree start with the right pruning strategy—because a well-shaped tree produces fruit twice as abundantly and keeps bearing for decades. 🌱 I remember my first Bartlett tree: it looked like a tangled mess until I learned how to open its center to sunlight, and suddenly, the branches sagged with fruit instead of bare wood.
The secret isn’t complicated—just timing and technique. Prune in late winter when the tree is dormant, removing 30% of last year’s growth to encourage new fruiting wood. Varieties like Bosc and Asian pears thrive in zones 5-9, while Bartletts need warmer climates.
Pair your tree with clover or thyme as ground cover to improve soil and deter pests naturally.
By mid-summer, you’ll harvest pears that taste sweeter than store-bought, with skins that blush from green to golden. Store them in a cool, dark place, and they’ll keep until January or February—long after grocery shelves go bare.
The key is consistent pruning every year, which keeps the tree healthy and productive.
This method works for both young trees and mature ones, though young trees need more aggressive shaping. Whether you’re dealing with a 10-year-old tree or a sapling, the same principles apply. Let’s get those branches in shape for a harvest that’ll make your neighbors jealous.
📚 In This Guide
- What you need
- Instructions
- Tips and common mistakes
- Wrapping up and next steps
What you need
- ● Pruning shears: Sharp, bypass-style shears (20–24" blade length) for clean cuts on branches up to ½-inch thick.
- ● Loppers: Heavy-duty, bypass or anvil loppers (24–36" handles) for branches ½–2 inches thick.
- ● Pruning saw: Curved-tooth saw for branches thicker than 2 inches.
- ● Gloves: Heavy-duty, cut-resistant gloves to protect hands from thorns and rough bark.
- ● Disinfectant: 70% isopropyl alcohol or rubbing alcohol to sterilize tools between cuts (prevents disease spread).
- ○ Pruning sealant: Optional but helpful for large cuts (e.g., tree wound paint) to reduce sap loss.
- ● Ladder: Sturdy, extension ladder (16–24 ft) for tall trees (ensure it’s rated for your weight + tools).
- ● Safety gear: Safety glasses and ear protection (if using a chainsaw for thick branches).
- ● Know your tree: Identify the pear variety (e.g., Bartlett, Anjou) and its growth habits. Young trees (formative pruning; mature trees focus on maintenance.
- ● Timing: Prune in late winter/early spring (just before buds swell) for best results. Avoid pruning in fall (increases disease risk).
- ● Weather check: Choose a dry, calm day to prevent sap bleeding and ensure tool safety.
- ● Tree health: Inspect for diseases (fire blight, powdery mildew) or pests (pear psylla) before pruning. Treat as needed.
- ● 🔥 Mark cuts first: Use chalk or tape to outline branches to remove before climbing the ladder.
- ● ✨ Work in layers: Remove up to 25% of the tree’s foliage in one session to avoid stressing it.
- ● 🌡️ Tool care: Sharpen blades annually or after heavy use for precise cuts.
Step-by-Step instructions for year-round pear tree care
Here's how to keep your pear tree thriving—and producing fruit—through every season.
🌱 Step 1: Prune for Structure in Late Winter
Start by removing any dead, diseased, or crossing branches first. I always use clean, sharp pruners to make angled cuts just outside the branch collar. This prevents tears and encourages faster healing. Focus on opening up the center of the tree to let light and air reach the core—pears need good airflow to prevent fungal issues.
Next, cut back any suckers or water sprouts growing straight up. These compete with fruit production and weaken the tree's energy. Aim to shape the tree into an open vase form with a strong central leader. You'll know you've done well when sunlight can reach all the way to the center branches.
☀️ Step 2: Thin Fruit in Early Spring
Once the flowers appear but before they open, thin clusters to leave only one pear per spur branch. I use my fingers to gently twist off excess fruit—this prevents overcrowding and ensures larger, higher-quality pears. A good rule is to leave fruit spaced about 6 inches apart on mature branches.
Thinning also reduces stress on the tree during fruit development. You'll see fewer but larger pears that ripen more evenly. If you wait until fruit sets, you'll have to remove smaller, underdeveloped pears later—which is more work and can stress the tree.
💧 Step 3: Water Deeply During Fruit Development
When pears are the size of a golf ball, water deeply once a week unless rain provides 1 inch of moisture. I use a soaker hose to deliver water slowly at the base, avoiding the foliage to prevent disease. The soil should be moist to 12 inches deep—stick your finger in to check.
Too little water causes small, hard pears, while too much leads to cracking. Mulch with 2-3 inches of organic mulch (like wood chips) to retain moisture and regulate soil temperature. Keep mulch away from the trunk to prevent rot.
✂️ Step 4: Light Summer Pruning After Harvest
After pears ripen, remove any branches that produced fruit this year. These branches are now spent and won't bear next season. Also cut back any branches that grew excessively during the season to maintain the tree's shape. I make these cuts just above an outward-facing bud.
This summer pruning encourages new growth for next year's fruit. You'll notice fresh, green shoots forming where you pruned—these will develop into next season's fruiting spurs. Avoid heavy pruning now, as it can stimulate late-season growth that won't harden off before winter.
🪴 Step 5: Prepare for Winter Dormancy
In late fall, apply a 2-3 inch layer of mulch around the base to insulate roots from freezing temperatures. I also wrap the trunk of young trees with tree wrap to protect against sunscald and rodent damage. Older trees usually don't need wrapping unless your winters are extremely harsh.
Stop fertilizing by late summer to allow the tree to harden off. You'll know it's ready for winter when leaves turn yellow and fall naturally. A well-prepared tree will burst into new growth come spring, ready to produce another abundant crop.
Tips & tricks for perfect year-round pear tree care
Here's what nobody tells you about keeping your pear tree productive through every season—details that make all the difference.
Pruning Precision: When you're shaping your tree in Step 1, look for branches that grow at less than a 45-degree angle from the trunk—these are the weakest and should be removed first. I also recommend sterilizing your pruners between cuts by wiping with rubbing alcohol. This prevents spreading disease between branches, especially important for pear trees that are prone to fungal infections.
Fruit Thinning Strategy: In Step 2, don't just thin based on quantity—prioritize removing smaller pears and those growing toward the center of the tree. The largest, sunniest pears will develop best. I've found that thinning when flowers are just opening gives me the best results, as the tree hasn't yet committed resources to fruit that will inevitably be removed later.
Watering Wisdom: The 1-inch weekly watering guideline in Step 3 works for most soils, but clay soils need less frequent watering while sandy soils may require daily checks. I test moisture by pushing a metal rod into the soil—if it comes out clean, it's time to water. This simple check prevents both under- and over-watering issues that affect pear quality.
Seasonal Timing: For Step 5 winter prep, mark your calendar for late October—this is when most pear varieties enter dormancy in most climates. If you live in a warmer zone, you might delay mulching until early November. I also recommend applying a thin layer of nitrogen-rich fertilizer in early spring (before buds swell) to support new growth after winter.
Pro Tips for Pear On Tree
- Here's what nobody tells you about keeping your pear tree productive through every season—details that make all the difference.
- Pruning Precision: When you're shaping your tree in Step 1, look for branches that grow at less than a 45-degree angle from the trunk—these are the weakest and should be removed first.
- Fruit Thinning Strategy: In Step 2, don't just thin based on quantity—prioritize removing smaller pears and those growing toward the center of the tree.
Frequently asked questions
Got questions about keeping your pear tree fruitful year-round? Here are answers to some of the most common queries—because even the best pruners need a little guidance!
When is the best time to prune a pear tree for fruit production?
Prune your pear tree during late winter or early spring (just before buds swell but before leaves appear). This timing ensures healthy growth and maximizes fruit yield. Avoid pruning in fall—it can invite disease. For fire blight-prone varieties, wait until after harvest to reduce risk.
How do I know if my pear tree isn’t producing fruit?
Common culprits include overcrowded branches (blocking sunlight), lack of pollination (especially for self-unfruitful varieties), or poor pruning (too much shade or weak structure). Check for thinning fruit early in spring—too many pears = small, poor-quality harvests. If needed, consult a local extension service for variety-specific tips.
Can I prune a pear tree in summer? What’s the risk?
Summer pruning is risky but can be done lightly to improve airflow (e.g., removing diseased branches). Avoid heavy cuts—it stresses the tree and opens wounds to fire blight or pests. If you must prune, do so on dry, sunny days and sterilize tools with rubbing alcohol. Pro tip: Focus on dead or crossing branches only.
What’s the difference between pruning for fruit vs. pruning for shape?
Both goals overlap, but fruit-focused pruning prioritizes:
- Open center shape (sunlight to core branches).
- Thinning crowded shoots to reduce competition.
- Removing "water sprouts" (fast-growing vertical shoots).
My pear tree has blackened branches after pruning—what went wrong?
Blackened branches often signal fire blight (a bacterial infection) or sunscald (exposed wood drying out). To fix:
- Cut 6+ inches below the blackened area (disease can lurk unseen).
- Dip tools in bleach or alcohol between cuts.
- Avoid pruning when wet—bacteria spreads faster.
Wrapping up and next steps
Growing pears on a tree is a rewarding journey that combines patience, care, and a little pruning know-how. By mastering the art of smart pruning, you can enjoy a bountiful harvest year after year—whether you're a seasoned gardener or just starting out. 🌱
Now that you’re armed with the right techniques and tips, it’s time to roll up your sleeves and give your pear tree the love it deserves. Start small, observe your tree’s progress, and soon you’ll be savoring fresh, homegrown pears straight from the branch! 🍐
Next step: Pick a sunny day, grab your tools, and begin pruning with confidence—your future harvest is waiting!