Pruning
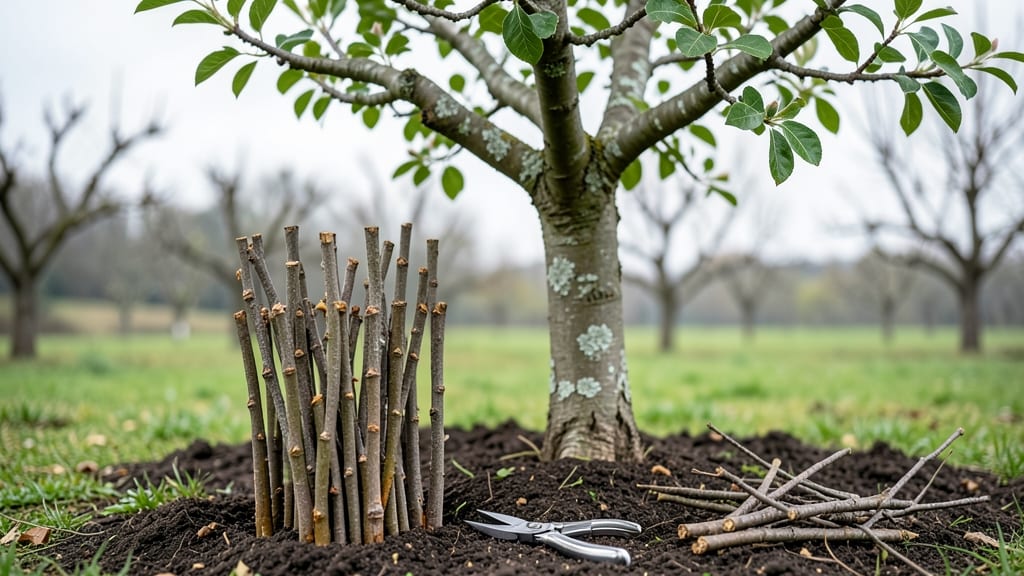
A properly pruned apple tree not only thrives with stronger branches and more fruit but also becomes the envy of every neighbor—if you master the right timing and cuts.
I’ve spent years watching trees transform from tangled messes into strong, fruit-bearing giants, and the key lies in understanding when to cut, where to shape, and how to avoid common pitfalls.
The right approach turns a chaotic canopy into an open, sunlit structure that produces juicy apples instead of sparse, bitter ones.
Start with the basics: sharp pruners, a saw for thick branches, and a clear plan for thinning crowded growth. The best time to prune depends on your climate—late winter or early spring is ideal for most regions, but summer pruning can address specific issues like water sprouts.
My first mistake? Cutting too late in the season and inviting pests. Now, I follow a structured method that keeps the tree balanced, air flowing, and energy focused on fruit production rather than excess foliage.
You’ll see the difference in just one season: fewer broken limbs, more sunlight reaching the center, and apples that ripen evenly instead of hiding in the shade.
Proper pruning also reduces disease risk by improving air circulation, so you’ll spend less time treating fungal issues and more time enjoying the harvest. The goal isn’t just aesthetics—it’s long-term vitality that pays off year after year.
Whether you’re working with a young sapling or an established tree, the principles stay the same. We’ll cover everything from thinning cuts to structural shaping, plus how to spot signs of over-pruning or neglect.
By the end, you’ll have a tree that not only survives but thrives—producing abundant, high-quality fruit with minimal effort. Let’s get started.
📚 In This Guide
- What you need
- Instructions
- Tips and common mistakes
- Wrapping up and next steps
What you need
- ● Pruning Shears: Bypass pruners (sharp, 6–8 inch blades) for small branches (Pro Tip: Clean blades with rubbing alcohol after use to prevent disease spread! 💡
- ● Pruning Saw: A curved-tooth pruning saw (8–10 inch blade) for thicker branches (½–2 inches). Look for: Non-serrated teeth to avoid tearing wood.
- ● Loppers: 1 pair (18–24 inch handle) for medium branches (2–4 inches thick). Bonus: Adjustable loppers save space!
- ● Hand Saw: 1 (for branches >4 inches thick). A bow saw or pruning saw with a 12–14 inch blade works best.
- ● Gloves: Heavy-duty gardening gloves (cut-resistant, like those with Kevlar or leather). Why? Protects hands from thorns and blisters!
- ● Disinfectant: 70% isopropyl alcohol or a 10% bleach solution (1 part bleach to 9 parts water) to sterilize tools between cuts.
- ● Rubbing Alcohol Wipes: For quick tool cleaning in the field.
- ○ Twine or Zip Ties: (Optional) For temporary support if you’re tying branches during pruning.
- ● Weather Check: Prune on a dry, calm day (avoid rainy or windy conditions). Best time: Late winter/early spring (dormant season).
- ● Safety Glasses: Protects eyes from debris.
- ● Long-Sleeved Clothing: Lightweight, breathable fabric to shield against scratches.
- ● Ladder or Step Stool: Sturdy and tall enough to reach the tree’s canopy safely. Safety first: Never stand on wobbly surfaces!
- ● First Aid Kit: Bandages and antiseptic wipes for minor cuts.
- ○ Tree Diagram or Sketch: (Optional but helpful!) Map out branches to prune before starting.
- ● Sealant (Pruning Paint): For large cuts (>½ inch diameter) to prevent disease entry. Use a copper-based or horticultural sealant.
- ● Extension Pole Pruners: For high branches (if you lack a ladder).
- ● Notebook & Pen: To jot down notes on cuts made or observations about the tree’s health.
- ● Tree Pruning Guidebook: Or a trusted app (e.g., iTree) for visual reference.
Step-by-step guide for pruning an apple tree
Here's how to shape your tree for maximum fruit production and long-term health.
✂️ Step 1: Time and Tools for Pruning
Prune your apple tree during late winter or early spring—just before buds swell but before new growth begins. This timing ensures wounds heal quickly and minimizes disease risk. Avoid pruning in fall or wet conditions, as open wounds can invite fungal infections.
Gather these essential tools: sharp pruning shears for small branches, loppers for thicker limbs, and a pruning saw for large branches over ½ inch thick. Sterilize tools with rubbing alcohol between cuts to prevent spreading disease. I always keep a small bucket of soapy water nearby to dip tools after each cut—this simple step prevents cross-contamination between branches.
🌿 Step 2: Remove Dead, Diseased, or Crossing Branches
Start by identifying dead wood—branches that are brittle, cracked, or lack bark. These should be cut back to the main trunk or a healthy lateral branch. Next, look for diseased branches (yellowing leaves, black spots, or oozing sap) and remove them entirely, cutting 6 inches below the affected area to ensure the disease doesn’t spread.
Watch for crossing branches—where two limbs rub against each other. These create wounds that invite rot and weaken the tree. Cut the smaller of the two branches at its base, making the cut just outside the branch collar (the swollen area where the branch meets the trunk). This ensures the tree can seal the wound naturally.
☀️ Step 3: Open the Tree’s Canopy for Sunlight and Airflow
Apple trees need good airflow to prevent fungal diseases like apple scab. Thin out 25-30% of the tree’s branches to create an open, vase-like shape. Focus on removing branches that grow inward or downward, as these block sunlight and trap moisture. Start from the outer edges and work inward, always cutting back to a healthy lateral branch or bud.
Pay special attention to water sprouts—fast-growing, vertical shoots that steal energy from fruit production. These should be cut back to a lateral branch or bud. You’ll know you’re doing it right when the tree’s center is visible from the ground—this ensures sunlight reaches all parts of the canopy.
⏰ Step 4: Shape for Future Growth and Fruit Production
Encourage a balanced, open-center shape by selectively pruning to maintain a central leader (the main upward-growing branch). If the tree has multiple strong leaders, choose the strongest one and remove the others at their base. This prevents competition and promotes a single, sturdy trunk.
Look for fruit spurs—short, stubby branches that produce clusters of fruit. These are valuable and should be preserved. If a spur is overcrowded, thin it slightly to improve airflow. Avoid heavy pruning on bearing branches, as this can reduce next year’s harvest. Instead, focus on lightly thinning to maintain the tree’s natural shape.
🌱 Step 5: Clean Up and Monitor for Recovery
After pruning, rake up and dispose of all debris—burning or bagging it prevents disease from overwintering in the yard. Seal larger wounds (over ½ inch thick) with pruning sealant to protect against pests and rot. Smaller cuts will heal on their own, so avoid sealing them unless they’re particularly jagged.
Water the tree deeply after pruning to help it recover. Monitor the tree over the next few weeks for signs of stress, such as wilting or discolored leaves. If you see new growth emerging from the cuts, you’ve pruned at the right time. Apple trees are resilient, but proper pruning now sets the stage for healthy growth and abundant harvests for years to come.
Tips & tricks for pruning an apple tree
Here's what I've learned from years of shaping apple trees—these little details make all the difference for long-term health.
Timing is Everything: Late winter or early spring is the perfect window because the tree is dormant but about to wake up. If you prune too early, you risk frost damage to fresh cuts. If you wait too long, you'll encourage new growth that can't harden off before winter. I always check for bud swelling—when you see tiny buds forming but leaves aren't out yet, that's your cue.
Tool Sterilization Matters: I can't stress this enough—sterilizing your tools between cuts prevents spreading disease from branch to branch. After each cut, wipe your pruning shears or loppers with rubbing alcohol or dip them in soapy water. For larger wounds over ½ inch thick, I use a dedicated pruning sealant to protect against pests and rot. This simple step has saved my trees from multiple infections over the years.
Branch Collar Awareness: When removing branches, always cut just outside the branch collar—the swollen area where the branch meets the trunk. Cutting too close can damage the tree's natural healing tissue. I mark this spot with my thumb before cutting to ensure I'm making the cleanest possible cut. This small detail helps wounds heal faster and reduces the risk of disease entering the tree.
Visualizing the Canopy: Before making any cuts, step back and visualize how sunlight will reach the center of the tree. You're aiming for that open, vase-like shape where you can see the trunk from the ground. I often sketch a rough outline on paper first to plan which branches to remove. This prevents over-pruning and ensures every cut serves a purpose for better airflow and fruit production.
Pro Tips for Properly Pruned Apple Tree
- Here's what I've learned from years of shaping apple trees—these little details make all the difference for long-term...
- Timing is Everything: Late winter or early spring is the perfect window because the tree is dormant but about to wake...
- Tool Sterilization Matters: I can't stress this enough—sterilizing your tools between cuts prevents spreading disease...
Frequently asked questions
Got questions about pruning your apple tree?
You’re not alone! Here are answers to the most common concerns to help you keep your tree thriving and productive.
When is the best time to prune an apple tree?
The ideal time is late winter or early spring (just before buds swell) when the tree is dormant but pests are less active. Avoid pruning in fall—it can invite disease. For young trees, prune in summer to shape growth. Always use clean, sharp tools to minimize stress!
How much should I cut off my apple tree?
Remove no more than 25% of the tree’s foliage in one season to avoid shock. Focus on:
- Dead, diseased, or crossing branches ()
- Suckers or water sprouts ()
- Overcrowded branches to improve airflow ()
Will pruning reduce my apple harvest?
Not if done right! Pruning increases fruit size and quality by redirecting energy to fewer, healthier branches. Over-pruning can cut yields short-term, but a well-maintained tree will reward you with bigger, tastier apples over time. Think of it as a spa day for your tree!
What if my tree bleeds sap after pruning?
Sap bleeding () is normal in early spring but doesn’t harm the tree. To minimize it:
- Prune on dry, cool days (not warm ones).
- Avoid thick branches—cut gradually if needed.
- Seal cuts with pruning sealant only if the tree is diseased.
Can I prune an apple tree without special tools?
You can use basic tools like hand pruners, loppers, and a pruning saw, but invest in a few essentials for safety and precision:
- Bypass pruners (for clean cuts on small branches).
- Disinfectant (to prevent disease spread).
- Safety gloves (thorns are no joke!).
Wrapping up and next steps
Pruning your apple tree isn’t just about shaping—it’s about nurturing its health and future harvests! 🌳 With the right tools, timing, and technique, you’ll encourage strong growth, better fruit production, and a stunning tree that’s easier to care for. Remember, patience and consistency are key, so don’t rush the process.
Ready to take the next step? Grab your pruners and schedule your first pruning session—whether it’s winter dormancy or summer thinning. Your apple tree (and future apple pies!) will thank you. 🍏✨