Trees
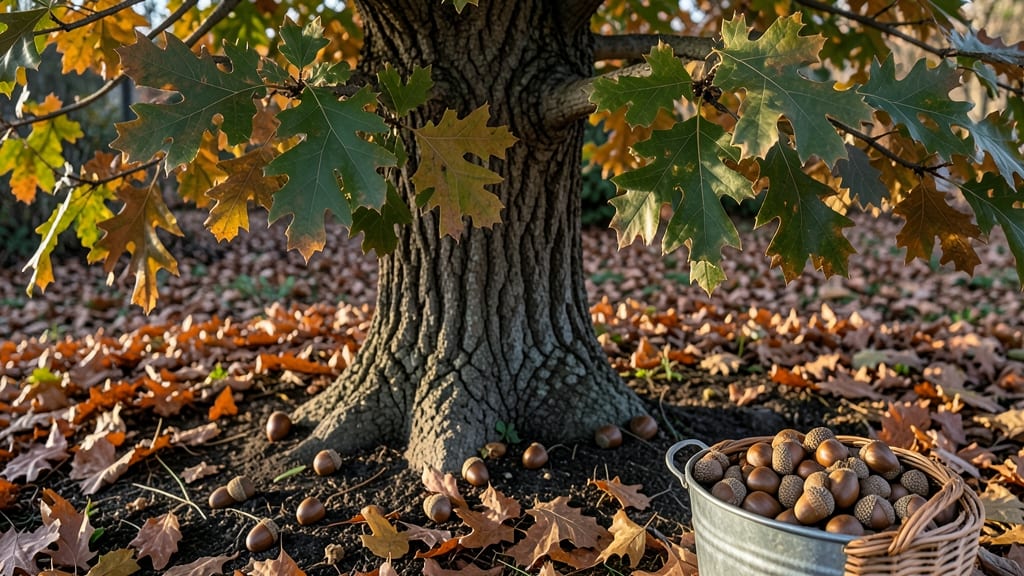
Harvesting red oak tree acorns in late fall is how I started my backyard forest project—now three saplings stand where I once had bare soil. The key lies in timing, patience, and knowing exactly how to break dormancy before planting.
Most gardeners rush the process, but oak acorns need a specific cold treatment to germinate properly.
You’ll need just a few supplies: a bucket for collection, damp sand or peat moss for stratification, and small pots or a seed tray for planting. The trick is mimicking winter’s natural chilling period—place acorns in damp sand and refrigerate for 90 days before sowing.
This step alone makes the difference between success and frustration for beginners.
What you’ll end up with are sturdy seedlings that grow into majestic red oaks, their deep roots stabilizing soil and providing shade for generations. The first leaves appear within 4-6 weeks after planting, and with proper care, you’ll watch them mature into towering trees over decades.
It’s a long-term investment, but the payoff is a living legacy.
Perfect for landowners, homesteaders, or anyone with space for a future forest. The process rewards patience—just don’t expect instant gratification. Here’s how to get started without common pitfalls like overwatering or planting too deep.
📚 In This Guide
- What you need
- Instructions
- Tips and common mistakes
- Wrapping up and next steps
What you need
- ● Fresh red oak acorns (at least 50–100 for planting; collect from mature trees in late fall).
- ● Gloves (thick, durable—acorns can be prickly!).
- ● Buckets or mesh bags (for collecting acorns; 5–10 gallons capacity recommended).
- ● Pruning shears or a sturdy knife (for trimming branches if harvesting from height).
- ● Watering can or hose (with a gentle spray nozzle).
- ● Well-draining potting soil (10–20 lbs, mix with perlite for aeration).
- ● Small pots or seedling trays (3–4 inches deep; 50+ cells if planting many acorns).
- ● Plastic wrap or humidity dome (to retain moisture during germination).
- ● Shovel or trowel (for transplanting seedlings into the ground).
- ○ Garden twine or stakes (optional but helpful for marking planting spots).
- ● Acorn leach solution (1 part bleach to 9 parts water—sterilizes acorns to prevent rot).
- ● Heat mat or warm spot (speeds up germination; 70–80°F ideal).
- ● Acorn storage container (airtight, with ventilation holes if storing long-term).
- ● Mulch (pine straw or wood chips) (protects young seedlings from weeds and drought).
- ● pH testing kit (ensure soil pH is 5.0–7.0; red oaks prefer slightly acidic soil).
Step-by-Step guide for harvesting and planting red oak acorns
Here’s how to collect and nurture acorns into strong saplings for your future forest.
Identify and Collect Mature Acorns
Look for red oak acorns—easily recognized by their rounded caps and deep ridges. They typically mature in late September through October, when they fall naturally from the tree. Check the ground beneath mature red oaks daily during this period, as acorns ripen unevenly.
Use a clean basket or breathable bag to gather acorns, avoiding those with holes or cracks (these are likely infested by weevils). Collect only full-sized acorns with intact caps—smaller ones won’t germinate properly. Store them in a cool, dry place (around 40°F) for 3-4 months to complete their natural dormancy period.
Stratify Acorns for Germination
Stratification mimics winter conditions, breaking dormancy so acorns can sprout. Fill a plastic bag with a mix of moist sand and peat moss (or use the 3 gallons of potting mix you’ve prepared). Place 10-15 acorns per bag, ensuring they’re partially buried but not buried completely.
Seal the bag and refrigerate it for 90-120 days, checking monthly to ensure the mix stays damp (not soggy). You’ll know stratification is working when the acorns begin to crack open slightly. This step is critical—skipping it results in low or no germination, even with healthy acorns.
Plant Stratified Acorns in Containers
Fill 4-inch deep pots with sterile potting mix (the 3 gallons you’ve prepared will cover this). Plant 2-3 stratified acorns per pot, burying them 1 inch deep—just enough to cover the body but leave the cap exposed. Water gently until the soil is evenly moist but not waterlogged.
Place the pots in a bright, indirect light area (like a north-facing window) and maintain 60-70°F temperatures. Germination can take 4-8 weeks, so patience is key. Once sprouts emerge, thin to the strongest seedling per pot to avoid competition.
Transplant Seedlings to Outdoor Nursery Beds
After seedlings develop 2-3 sets of true leaves (not just the initial cotyledons), they’re ready for outdoor hardening. Choose a sheltered, partially shaded spot in your garden for the 4 seedlings you’re growing. Dig small holes twice as wide as the root ball but no deeper than the pot.
Transplant on a cool, overcast day to reduce stress. Water deeply after planting to settle the soil around roots. Keep the area consistently moist for the first 2-3 weeks, then gradually reduce watering as roots establish. Mulch lightly with 1-2 inches of organic matter (like shredded leaves) to retain moisture and suppress weeds.
Tips & tricks for perfect red oak acorn cultivation
Growing red oak trees from acorns rewards patience with decades of shade and wildlife support. Here’s how to maximize your success.
Timing is Everything: The 3-4 month storage at 40°F is non-negotiable—this mimics natural winter conditions and prevents premature germination. I’ve seen acorns sprout too early when stored at room temperature, ruining their viability. Place them in a cardboard box with ventilation holes in your refrigerator’s crisper drawer for consistent conditions. If you’re in a warm climate, consider a dedicated seed refrigerator or even a root cellar for more stable temperatures.
Stratification Success: During the 90-120 day refrigeration period in Step 2, the acorns need consistent moisture but not sogginess. I’ve found that wrapping the plastic bag in a thin towel helps prevent condensation buildup while still maintaining humidity. You’ll know it’s working when you see tiny cracks forming in the acorn shells—this is the dormancy breaking down naturally. If your acorns don’t crack after 120 days, they may need an additional 30 days of stratification.
Lighting Matters: The bright, indirect light requirement in Step 3 is crucial for healthy seedling development. A north-facing window works well, but if you’re using artificial grow lights, position them 6-12 inches above the pots. I’ve seen seedlings stretch unnaturally toward light sources when placed too close, resulting in weak, leggy growth. Rotate the pots weekly to ensure even light exposure on all sides of the seedlings.
Transplanting Wisdom: When hardening off seedlings in Step 4, gradually introduce them to outdoor conditions over 7-10 days. Start with just 1-2 hours of exposure on the first day, then increase by 1-2 hours daily. I’ve lost seedlings to transplant shock when moved too quickly from indoor pots to full sun exposure. The cool, overcast day recommendation is perfect—these conditions reduce stress on the young plants as they adapt to their new environment.
Pro Tips for Red Oak Tree Acorns
- Growing red oak trees from acorns rewards patience with decades of shade and wildlife support.
- Timing is Everything: The 3-4 month storage at 40°F is non-negotiable—this mimics natural winter conditions and prevents premature germination.
- Stratification Success: During the 90-120 day refrigeration period in Step 2, the acorns need consistent moisture but not sogginess.
Frequently asked questions
about red oak tree acorns—here’s what you need to know before harvesting and planting!When is the best time to harvest red oak acorns?
Harvest red oak acorns in late fall (October–November) when they’ve fallen but before squirrels or insects take over. Look for acorns that are plump, firm, and brown—avoid those with holes or soft spots. Early harvests yield better quality for planting!
How do I tell if red oak acorns are good for planting?
Good acorns for planting should be heavy for their size, have a smooth, glossy cap, and no cracks or mold. Tap two acorns together—if they sound hollow, they’re likely empty. Discard any with weevil holes or discoloration to avoid poor germination.
Can I plant acorns directly from the ground, or do I need to treat them?
While you can plant untreated acorns, soaking them in water for 24–48 hours before planting improves germination rates. For better results, stratify them (mix with damp sand and refrigerate for 60–90 days) to mimic winter conditions. This mimics nature’s process!
Why aren’t my red oak acorns sprouting after planting?
Acorns need patience and the right conditions. Germination can take weeks to months. Ensure they’re planted 1 inch deep in well-draining soil, kept moist (but not soggy), and in partial shade. If soil is too cold or dry, try a greenhouse or indoor tray until spring.
How long does it take for a red oak tree to grow from an acorn?
Red oaks grow slowly—expect 5–10 years for a sapling (3–6 feet tall) and 30–50 years for full maturity (60+ feet). Proper care (water, sunlight, and soil health) speeds up growth. Celebrate small wins! Even a 1-inch sprout is a future forest giant!
Wrapping up and next steps
Harvesting and planting red oak tree acorns is a rewarding way to contribute to future forest growth while connecting with nature.
Whether you’re a gardener, forester, or eco-conscious enthusiast, these steps empower you to nurture new life and strengthen local ecosystems. Now’s your chance to take action—start small, plant wisely, and watch your efforts grow into thriving red oaks for generations to come!
🌱 Next step: Mark your calendar for acorn season (fall) and gather your supplies. Ready to plant? Review the checklist or clarify any doubts before you begin.