Pruning
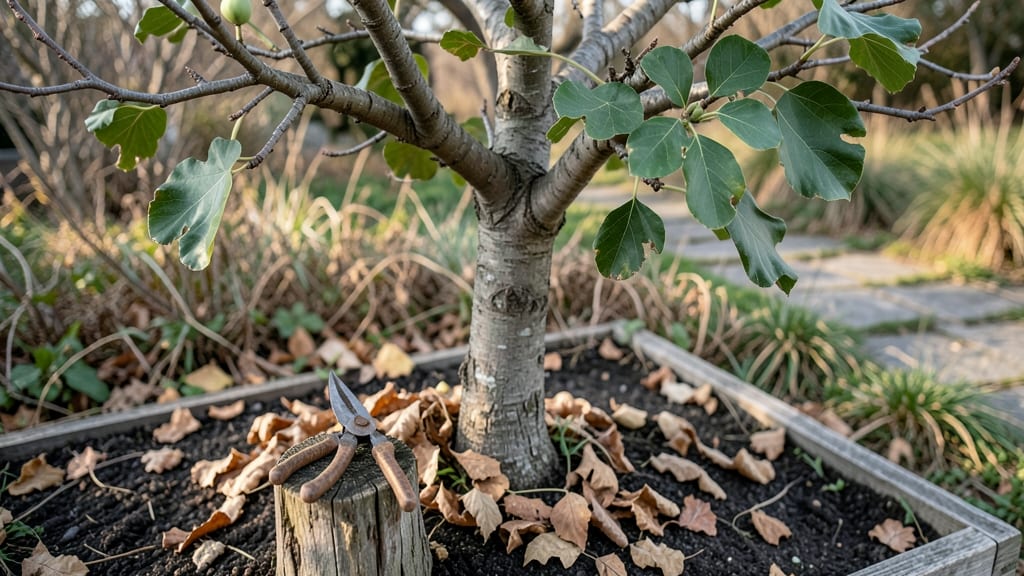
Trimming fig trees for winter isn’t just about tidying up—it’s the secret to stronger spring growth and surviving cold snaps. I learned that the hard way when my fig tree’s branches cracked under last winter’s ice, leaving it looking like a sad, tangled mess.
The right cuts now mean lush, productive branches come spring, not a struggle just to keep the plant alive.
You’ll need sharp pruners, a saw for thicker branches, and a clear day to assess the tree. Focus on removing dead wood first, then thin out crowded branches to let light and air circulate.
For tender varieties, hold off until after the first frost to avoid shocking the plant—cold-hardy types can handle late fall pruning. The goal is to shape the tree into an open vase shape, which prevents snow buildup and makes harvesting easier next season.
After trimming, you’ll notice how much more vibrant the remaining branches look, with fresh green shoots pushing out early. The tree’s energy goes into fewer, stronger stems instead of struggling to support weak growth.
Just avoid cutting into the main trunk unless absolutely necessary—figs heal slowly, and unnecessary wounds invite disease. A little patience here pays off in bigger, sweeter fruit by summer.
This method works for both container-grown figs and in-ground trees, though you’ll adjust timing slightly based on your zone. In mild climates, a light trim in late fall keeps the tree tidy; in colder areas, wait until early spring when new growth starts.
Either way, you’ll skip the heartbreak of winter-killed branches and enjoy a tree that bounces back year after year.
📚 In This Guide
- What you need
- Instructions
- Tips and common mistakes
- Wrapping up and next steps
What you need
- ● Pruning shears: Bypass pruners (for small branches, 5–8 inches long) or loppers (for thicker branches, 8–12 inches long). Choose sharp, stainless steel blades to avoid crushing branches.
- ● Hand saw: A pruning saw with a curved blade (8–10 inches) for larger branches (over 2 inches in diameter). Look for fine-toothed blades to make clean cuts.
- ● Gloves: Heavy-duty gardening gloves (water-resistant, cut-resistant) to protect your hands from thorns and sap.
- ● Disinfectant: Rubbing alcohol (70%+ isopropyl) or a garden disinfectant to sterilize tools between cuts and prevent disease spread.
- ○ Rope or twine: (Optional but helpful) For temporarily securing branches during trimming or tying up smaller figs for support.
- ● Ladder or step stool: If your fig tree is taller than 6 feet, use a stable, non-slip ladder (extension ladder for very tall trees). Always have a spotter if working high up!
- ● Trash bags or bucket: For collecting pruned branches and debris. A 5-gallon bucket with a lid works well for smaller jobs.
- ○ Marking twine or tape: (Optional) To flag branches for removal before making cuts.
- ● Weather check: Trim on a dry, overcast day (avoid windy or rainy conditions). Ideal temps: 50–70°F.
- ● Safety glasses: Protect your eyes from debris, especially when sawing larger branches.
- ● Long sleeves/pants: Wear lightweight, long-sleeved clothing to shield against thorns and sap.
- ● First-aid kit: Include antiseptic wipes, bandages, and tweezers for minor cuts or thorn pricks.
- ● Water and snacks: Stay hydrated—pruning can be a physical workout!
Step-by-step guide to pruning fig trees for winter
Winter trimming sets your fig trees up for stronger, more productive growth next season.
Choose the Right Time and Tools
Wait until after the first hard frost when the tree is fully dormant—this is usually late fall or early winter. I like to prune on a dry, sunny day when the air is crisp but not freezing. Use sharp, clean pruning shears or loppers to make precise cuts. Dull blades tear bark and invite disease, so sharpen them before starting.
Disinfect your tools with rubbing alcohol between cuts on different trees to prevent spreading any potential infections. I also keep a small bucket of soapy water nearby to wipe blades clean after each major cut. This simple step saves hours of cleanup later if sap gets everywhere.
Remove Dead, Diseased, or Weak Branches
Start by identifying branches that are dead, diseased, or crossing each other. Dead wood is easy to spot—it's brittle, lacks leaves, and often has a gray or brown hue. Cut these back to healthy wood at a 45-degree angle just above a bud or lateral branch. This angle helps water run off instead of pooling at the cut.
For diseased branches, look for discoloration, fungal growth, or unusual growth patterns. Remove these completely, then disinfect your tools again. I always prune out any branches that are rubbing against others—they'll create wounds that weaken the tree over time.
Thin Out the Canopy for Better Airflow
Step back and look at the tree's overall shape. Your goal is to create an open, airy structure that lets sunlight and air circulate freely. Remove about 20-30% of the branches, focusing on those growing inward or upward. This prevents overcrowding and reduces the risk of fungal diseases.
I like to start from the inside of the tree and work my way out. Cut branches back to their point of origin or to a strong lateral branch. Avoid leaving stubs—always make cuts just outside the branch collar where the branch meets the trunk. This ensures the tree can heal properly.
Shape the Tree for Stronger Growth
Now it's time to shape the tree to encourage healthy growth. Focus on maintaining an open center with branches spaced evenly. For standard fig trees, aim for a vase-like shape with a few main branches spreading outward. For dwarf varieties, keep the height manageable—usually between 6 and 8 feet—to make harvesting easier.
Use your pruners to trim back any overly long branches by about one-third. This encourages branching and prevents the tree from becoming top-heavy. I also remove any suckers or water sprouts—those are the fast-growing, weak shoots that pop up at the base or along the trunk. They drain energy from the tree.
Clean Up and Protect the Tree
After pruning, gather all the clippings and dispose of them properly. If any branches show signs of disease, bag them and throw them away—don't compost them. I like to spread a 2-3 inch layer of mulch around the base of the tree to protect the roots from freezing temperatures and retain moisture.
Finally, give the tree a light watering if the ground isn't frozen. This helps the roots recover from the pruning stress. I also apply a balanced, slow-release fertilizer in early spring to give the tree a nutrient boost as it starts to wake up. This step ensures your fig tree comes back stronger and more productive next season.
Tips & tricks for pruning fig trees in winter
Winter pruning transforms your fig tree from a tangled mess into a productive powerhouse—here’s how to do it right without costly mistakes.
Timing is Everything: The instructions mention pruning after the first hard frost, but I’ve learned the hard way that waiting until late winter can be too late. Aim for early winter when temperatures consistently drop below freezing—this ensures the tree is fully dormant and won’t bleed sap excessively. If you miss this window, you risk stimulating premature growth, which weakens the tree before spring. Check your local frost dates if you’re unsure; most regions experience their first hard frost between late November and early January.
Tool Prep Prevents Problems: Sharp tools aren’t just about clean cuts—they’re about the health of your tree. Before you start, test your pruning shears by making a few cuts on a scrap branch. If the blade doesn’t cut cleanly, sharpen it or replace it. I keep a small file and rubbing alcohol in my toolkit for quick touch-ups between trees. Pro tip: Wipe blades with soapy water after each diseased branch to prevent cross-contamination. This step saved me from a fungal outbreak last season that took months to recover from.
Visual Cues for Better Cuts: When trimming branches in Step 2, focus on the 45-degree angle mentioned—but don’t just guess. Look for the branch collar, that swollen area where the branch meets the trunk. Make your cut just outside this collar, about 1/8 inch away. This ensures the tree can seal the wound properly. For thicker branches, use a three-cut method: First, make an undercut, then a top cut, and finally twist the branch off. This prevents tearing and creates smoother healing surfaces.
Shape Matters More Than You Think: The instructions recommend removing 20-30% of branches, but here’s what nobody tells you—focus on the why. Thin out branches that grow toward the center first; these are the ones that block sunlight and trap moisture. I like to visualize the tree as an open vase—imagine sunlight streaming through the center. For dwarf varieties, keep the height between 6 and 8 feet by pruning back the tallest branches first. This prevents the tree from becoming top-heavy and makes future harvesting a breeze.
Pro Tips for Trimming Fig Trees For Winter
- Winter pruning transforms your fig tree from a tangled mess into a productive powerhouse—here’s how to do it right without costly mistakes.
- Timing is Everything: The instructions mention pruning after the first hard frost, but I’ve learned the hard way that waiting until late winter can be too late.
- Tool Prep Prevents Problems: Sharp tools aren’t just about clean cuts—they’re about the health of your tree.
Frequently asked questions
Got questions about trimming your fig trees for winter? You’re not alone!
Here are answers to the most common concerns—from timing to tools—to help you prep like a pro.
When is the best time to trim fig trees in winter?
Trim fig trees after the first hard frost (typically late fall to early winter) when the tree is dormant. This prevents stress from cold snaps and reduces disease risk. Avoid pruning in deep winter—wait until temps rise slightly above freezing for cleaner cuts.
Should I remove all the leaves before winter?
No—don’t strip every leaf! Healthy leaves provide some winter protection. Focus on removing dead, diseased, or crowded leaves (especially near the trunk) to improve airflow. Leave the rest until spring, when they’ll naturally fall.
What if I missed the winter trimming window?
Don’t panic! Light pruning can still happen in early spring (before buds swell), but avoid heavy cuts. If you wait until summer, you risk stressing the tree. Prioritize removing dead wood or water sprouts first, then plan a full trim for next winter.
Can I use regular scissors or do I need special pruners?
For thick branches (over ½ inch), use bypass pruners or a sharp saw—they make cleaner cuts that heal faster. For smaller stems, clean, sharp hand pruners work fine. Never use hedge clippers; they crush branches, inviting disease.
Will trimming fig trees reduce next year’s fruit?
Not if done right! Proper winter pruning boosts fruit production by improving air circulation and sunlight. Over-trimming (cutting >30% of growth) may reduce yield, but light shaping (removing dead wood/suckers) encourages healthier, more abundant figs in spring. Think of it as a spa day for your tree!
Do I need to protect the cuts after trimming?
For fig trees, no pruning sealant is necessary—they heal well on their own. Just ensure cuts are clean and slanted (about ¼ inch above a bud). If your climate is extremely cold or wet, a light dusting of copper fungicide can prevent rot.
Wrapping up and next steps
Trimming your fig trees for winter is a simple yet powerful way to ensure they thrive in the spring!
By removing dead wood, shaping the canopy, and encouraging airflow, you’re setting the stage for vibrant growth and bountiful harvests next season. 🌿 With the right tools, timing, and technique, you’ll be well on your way to a healthier, happier tree.
Ready to take the next step? Grab your pruners and schedule your trimming session before the first frost hits—your fig tree will thank you with lush foliage and delicious fruit come spring! 🍇✨