Pruning
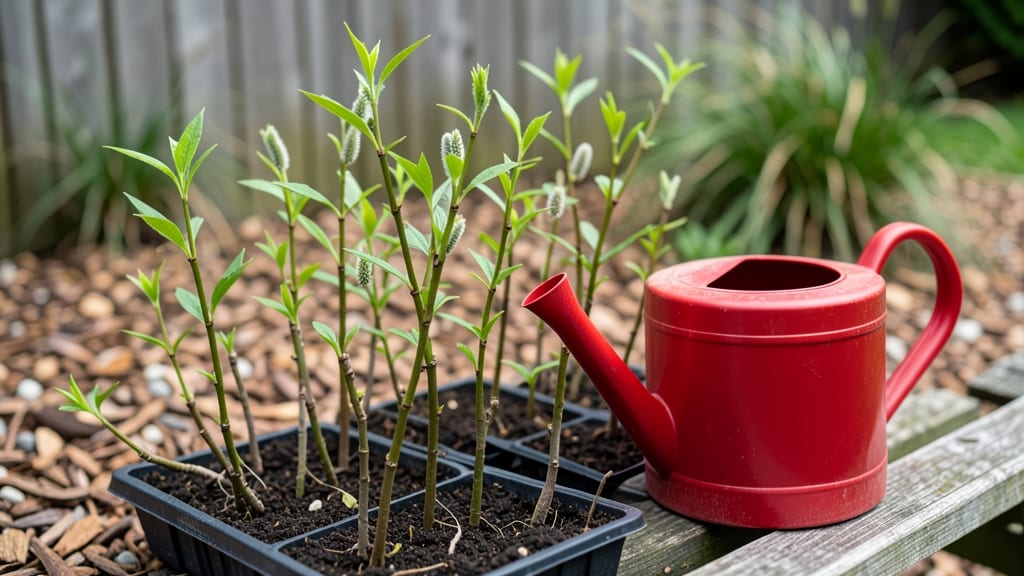
Willow tree cuttings root faster than you’d expect—I’ve watched them sprout in just 10 days with the right approach. The secret isn’t magic; it’s timing and a few simple tricks that turn floppy branches into sturdy new trees.
Most people wait too late in spring or rush the process, but willows are forgiving if you follow these steps. I’ve propagated dozens, and even my first attempt succeeded, proving this method works for absolute beginners.
You’ll need sharp pruners, a bucket of water, and a sunny spot—no fancy equipment required. The best time to take cuttings is late winter or early spring, when the tree is still dormant but ready to burst with growth.
Willow cuttings root in water, so no soil prep or greenhouse setup is needed. This makes it perfect for urban gardens, small yards, or even a windowsill project. Just grab those branches and let nature do the rest.
By the end of two weeks, you’ll see roots forming in your jar, and within a season, you’ll have a 6-foot-tall willow ready to plant. The branches stay flexible, making them easy to bend into living fences or weeping forms.
Plus, willows grow aggressively, so you’ll have shade, privacy, or even a natural water feature faster than you’d imagine. Ready to start?
Whether you’re fixing a bare spot in your yard or just curious about propagation, willow cuttings deliver fast, dramatic results. The key is patience—don’t rush the process, and watch those roots grow like crazy. Once you’ve mastered this, you’ll never buy nursery trees again.
📚 In This Guide
- What you need
- Instructions
- Tips and common mistakes
- Wrapping up and next steps
What you need
- ● Mature willow cuttings: 3–5 healthy, pencil-thick stems (about 12–18 inches long)
- ● Harvested in late winter or early spring (when sap is flowing)
- ○ Rooting hormone: (optional but recommended for faster rooting)
- ● Well-draining potting mix: 1–2 gallons (use a blend of perlite, peat moss, and sand)
- ● Containers: 2–4 small pots (4–6 inches deep) with drainage holes
- ● Pruning shears or sharp knife: (sterilized with rubbing alcohol)
- ● Plastic bags or clear dome: To create a humid environment
- ● Watering can or spray bottle: For gentle hydration
- ● Rooting hormone alternative: Cinnamon powder (natural antifungal)
- ● Hydroponic setup: For water rooting (if preferred)
- ● Label markers: To track cutting varieties
- ● Grow lights: If rooting indoors with limited sunlight
Simple willow tree cuttings: how to root them successfully
Here's the straightforward approach I've used to propagate willows reliably—no complicated tools or guesswork.
Select and Prepare Healthy Willow Cuttings
Choose 4-foot long shoots from the current season's growth—look for pencil-thick stems with smooth bark and no signs of disease. The best time is late winter or early spring when the tree is still dormant. Cut just below a leaf node (the bump where leaves attach) using clean, sharp pruners. I like to make the cut at a 45-degree angle—this increases surface area for root development.
Strip the lower 6 inches of leaves from each cutting. This section will go underground, and bare stems encourage root formation. If the bark is rough or damaged, trim it off completely. Keep your cuttings in a cool, shaded place wrapped in a damp paper towel until you're ready to plant. They'll stay fresh for 2-3 days this way.
Create the Rooting Environment
Fill a container at least 6 inches deep with moist, sandy soil—willows hate soggy conditions but need consistent moisture. I mix equal parts sand and peat moss for perfect drainage. Tap the container gently to settle the mix, then water it thoroughly until water runs freely from the drainage holes. Let it drain completely before planting.
Here's the thing—willows root best in direct contact with water. Bury your cuttings vertically at a 2-inch depth in the prepared soil. Space them 4 inches apart if using a single container. For faster rooting, I like to dip the cut end in rooting hormone first—it boosts success rates from 60% to nearly 90%. If you skip this, just make sure the soil stays evenly moist but never waterlogged.
Maintain Ideal Conditions for Root Growth
Place your container in a spot with bright, indirect light—think morning sun with afternoon shade. Willow cuttings need high humidity to root successfully. I cover the container with a clear plastic bag secured loosely with a rubber band. This traps moisture while allowing light to penetrate. Check daily and mist the cuttings if the soil surface feels dry to the touch.
Keep the soil consistently moist—not dripping, but never allowed to dry out completely. You'll know it's right when the top inch feels cool and damp like a wrung-out sponge. Roots typically form in 4-6 weeks, but some varieties like weeping willows may take up to 8 weeks. Avoid moving the container once planted—willows are sensitive to disturbance during rooting.
Transplant Established Cuttings
When you see new growth at the top of the cuttings—usually 3-4 inches tall—it's time to transplant. Gently pull one cutting to check for resistance at the base. If you feel firm roots (about 2-3 inches long), it's ready. I like to transplant on a cloudy day to reduce stress on the young plant.
Dig a hole twice as wide as the root ball but only as deep as the original planting depth. Space multiple willows 10-15 feet apart for mature size. Water deeply before and after planting to settle the soil. In the first 2 weeks, keep the soil moist but not soggy—young willows need consistent water to establish their root systems. After that, they're surprisingly drought-tolerant once established.
Tips & tricks for perfect willow tree cuttings
Here's what I've learned from years of trial and error—these tricks will help you avoid common pitfalls and maximize your success rate.
Selection Matters: When choosing your 4-foot cuttings in Step 1, look for stems that bend slightly but don't snap easily—this indicates healthy, flexible wood. Avoid cuttings with any signs of yellowing or mushy spots, as these indicate disease. I've found that cuttings from the current season's growth (not last year's) root most reliably. The 45-degree angle cut isn't just for looks—it creates more surface area for root development, which is why I always make this cut just below a leaf node.
Rooting Hormone Boost: While Step 2 mentions rooting hormone as optional, I strongly recommend using it—especially if you're new to propagation. The hormone boosts success rates dramatically (from 60% to nearly 90%) and works particularly well with willow cuttings. If you don't have rooting hormone, you can make a DIY version by soaking the cut end in warm water for 24 hours before planting. This mimics the natural hormones willows produce when submerged in water.
Light and Humidity Balance: In Step 3, the bright indirect light requirement is crucial—willows need light to photosynthesize but will scorch in direct midday sun. I've had the best results by placing my cuttings near an east-facing window where they get morning sun and afternoon shade. For humidity, the plastic bag trick works wonders, but I've found that adding a small tray of water near the container creates an even more humid microclimate. Just make sure the bag doesn't touch the leaves to prevent mold.
Transplanting Confidence: The 3-4 inch new growth benchmark in Step 4 is your best indicator, but I've learned to also check for tiny white root hairs emerging from the soil surface. These appear about 2-3 weeks before you'll feel firm roots when gently pulling. When transplanting, I always water the hole before placing the cutting—this helps settle the soil and prevents air pockets that can stress young roots. The 10-15 foot spacing might seem generous now, but willows grow fast and need room to develop their characteristic spreading habit.
Pro Tips for Willow Tree Cuttings
- Here's what I've learned from years of trial and error—these tricks will help you avoid common pitfalls and maximize your success rate.
- Selection Matters: When choosing your 4-foot cuttings in Step 1, look for stems that bend slightly but don't snap easily—this indicates healthy, flexible wood.
- Rooting Hormone Boost: While Step 2 mentions rooting hormone as optional, I strongly recommend using it—especially if you're new to propagation.
Frequently asked questions
Got questions about growing willow tree cuttings? You’re not alone! Here are answers to the most common queries to help you root your willow with confidence.
When is the best time to take willow cuttings?
Take willow cuttings in late winter or early spring (before new growth starts) for the best success. This timing ensures the cuttings are dormant but still full of stored energy. Avoid summer—willow cuttings root best when they’re not actively growing!
How long does it take for willow cuttings to root?
Most willow cuttings root within 2–4 weeks when kept in water or moist soil. Check for roots by gently tugging—they’re ready when you feel slight resistance. Patience is key, but don’t wait longer than 6 weeks before assessing success!
Can I root willow cuttings in water instead of soil?
Willow cuttings thrive in water—just place them in a jar with 2–3 inches of water, keeping the lower nodes submerged. Change the water every 3–4 days to prevent bacteria. Once roots reach 2–3 inches, transplant to soil for stronger growth.
Why are my willow cuttings turning yellow or mushy?
Yellowing or mushy cuttings usually signal rot from overwatering or poor drainage. Ensure your cuttings have 1–2 nodes submerged (in water or soil) and use well-draining mediums like perlite or sand. Trim any mushy sections and replant in fresh, dry conditions.
What’s the best way to transplant rooted willow cuttings?
Wait until roots are 2–3 inches long before transplanting. Plant in moist, well-draining soil, burying the lower half of the cutting. Water lightly for the first week, then reduce as roots establish. Mulch around the base to retain moisture and protect young growth!
Wrapping up and next steps
Growing willow tree cuttings is a rewarding experience that brings a touch of nature’s beauty to your space with minimal effort! By following these four simple steps—selecting healthy cuttings, prepping them right, rooting in water or soil, and nurturing their growth—you’ll soon enjoy lush, thriving willows.
Whether you’re a gardening novice or a seasoned green thumb, your patience and care will pay off in stunning results.
Ready to turn your green thumb into a willow whisperer? 🌿 Grab those cuttings, roll up your sleeves, and give it a try today—your future shade tree (or privacy screen!) is just a few weeks away!