Pruning
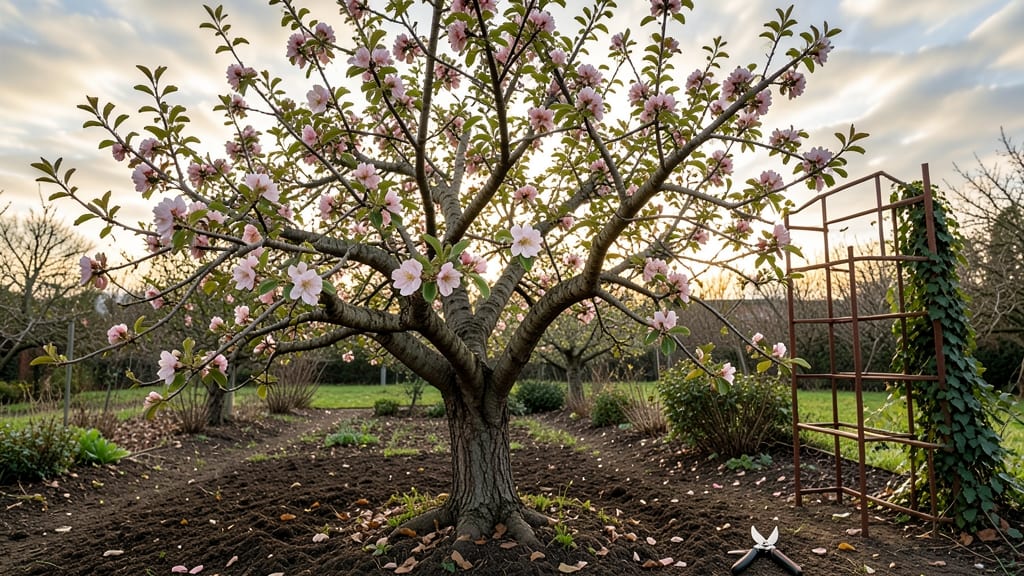
Spring is when your apple tree wakes up from winter, and those four strategic cuts are what turn a sleepy branch into a fruit-bearing powerhouse. 🌱 I’ve pruned my orchard trees for over a decade, and I can tell you—skipping spring pruning means smaller harvests, weaker wood, and more disease pressure by summer.
The goal isn’t just to shape the tree; it’s to set it up for stronger growth and better fruit production all year.
You’ll need sharp pruners, a ladder (for taller trees), and about 30-60 minutes depending on the tree’s size.
The real magic happens when you remove dead wood, thin crowded branches, and open the center for airflow—this isn’t just about looks, it’s about preventing fungal diseases like apple scab and giving your tree room to breathe.
I’ve seen trees go from struggling to thriving in just one season after a proper spring prune.
By summer, you’ll notice thicker branches, fewer suckers at the base, and—if you’re lucky—tiny apple blossoms forming. The tree’s energy shifts from repairing winter damage to growing fruit, and that’s when you’ll see the payoff.
Plus, fewer branches mean easier harvesting come fall. Think of spring pruning as a reset button for your tree’s entire growing season.
Works for young saplings and mature orchard trees alike, though the cuts vary slightly. Whether you’re dealing with frost-damaged tips or early signs of codling moth activity, this is the foundation for a healthy tree. Let’s get those branches trimmed right—your future harvest depends on it.
📚 In This Guide
- What you need
- Instructions
- Tips and common mistakes
- Wrapping up and next steps
What you need
- ● Pruning shears (bypass or anvil type) – Choose sharp, high-quality shears (e.g., Felco #2 or #8) for clean cuts.
- ● Loppers (for thicker branches) – 16- to 24-inch loppers with a long handle for reach and leverage.
- ● Pruning saw (for large limbs) – Curved-tooth saw for clean, splinter-free cuts (e.g., Fiskars X7).
- ● Gloves (cut-resistant) – Heavy-duty leather gloves to protect hands from thorns and rough bark.
- ● Disinfectant (70% isopropyl alcohol or bleach solution) – 1 part bleach to 9 parts water to sterilize tools between cuts.
- ○ Tree wound paint (optional but recommended) – Pruning sealant to prevent disease entry (e.g., Tanglefoot Tree Wound Pruning Seal).
- ● Ladder or step stool – Sturdy, extendable ladder for high branches (ensure it’s rated for your weight + tools!).
- ● Tarp or drop cloth – To collect fallen branches and debris.
- ● Dry, sunny day – Avoid pruning after rain or in wet conditions to reduce disease risk.
- ● Pruning plan (sketch or notes) – Map out cuts before starting (see our 4-step guide for inspiration!).
- ● Safety gear – Safety glasses and long sleeves to protect from debris and sap.
- ● Rake or broom – For clearing branches and debris after pruning.
- ● Extension pole for loppers/saw – For hard-to-reach branches without a ladder.
- ● Pruning rope or zip ties – To secure large branches temporarily during cuts.
- ● Camera or phone – Document your tree’s progress before/after for future reference!
- ● Compost bin or bag – For small branches (chopped into mulch) or larger debris (for composting).
Step-by-step guide to pruning your apple tree in spring
Spring is the perfect time to shape your apple tree for better fruit and stronger growth.
✂️ Step 1: Remove Dead, Diseased, or Damaged Branches
Start with your pruning shears and scan the tree from top to bottom. Look for branches that are brown, brittle, or hollow—these won’t produce fruit and may harbor pests. Cut these back to the main trunk or a healthy lateral branch. You’ll know a branch is dead if it snaps easily when bent or has no green bark underneath.
Real talk: Don’t leave any questionable branches. Even if they look mostly alive, diseased wood spreads. Make clean cuts at a 45-degree angle, about ¼ inch above a bud or lateral branch. This prevents water from pooling and rotting the wound. If you’re unsure, cut it out—your tree will thank you with healthier growth later.
✂️ Step 2: Thin Out Crowded or Rubbing Branches
Next, focus on branches that cross or rub against each other. These create wounds where bacteria and fungi can enter. Use your pruning shears to remove the smaller of the two branches at its point of origin. You’re aiming for an open center—about 6-8 inches of space between branches at the trunk level—to allow sunlight and air to circulate.
Here’s the thing—thinning isn’t about removing leaves or small twigs. Target branches that are at least ½ inch thick. If you’re unsure which to cut, imagine sunlight streaming through the center of the tree. That’s your goal: a well-ventilated, open canopy. This reduces disease risk and improves fruit quality.
✂️ Step 3: Prune for Structure and Fruit Production
Now, shape the tree by cutting back branches that grow inward or downward. These rarely produce fruit and block light from reaching the center. Aim to keep the strongest, outward-facing branches—these will bear the most apples. For each cut, leave a bud or lateral branch facing the direction you want new growth to go.
Pay attention to the scaffold branches (the main limbs forming the tree’s structure). These should be spaced 8-12 inches apart along the trunk. If you see a branch growing straight up from a scaffold, cut it back to a lateral bud. This encourages a more horizontal, fruit-bearing branch system. Think of it as training the tree to grow like a natural, open umbrella.
✂️ Step 4: Lightly Trim for Airflow and Sunlight
Finally, do a light pass to remove any excess growth that’s shading the center of the tree. Focus on the outer third of the canopy—this is where most of the fruit will form. Cut back any branches that are growing too densely or blocking sunlight from reaching the interior. You’re not trying to drastically reduce the tree’s size; just open it up for better airflow and light penetration.
Watch for water sprouts—those fast-growing, vertical shoots. These steal energy from fruit production, so snip them off at the base. A good rule of thumb: If a branch is growing faster than 12 inches per year, it’s likely a water sprout. Remove it to redirect the tree’s energy into stronger, fruit-bearing branches.
Tips & tricks for perfect apple tree pruning in spring
Spring pruning transforms your apple tree—here’s how to avoid common mistakes and get pro results.
Tool Prep: Sharpen your pruning shears before you start—dull blades crush branches instead of making clean cuts. I always test them on a small twig first to check the edge. Using clean, sharp tools prevents tearing bark and reduces disease entry points. For thicker branches over ½ inch, grab your pruning saw and make smooth cuts to avoid splintering.
Timing Secret: Prune on a dry day when temperatures are above 40°F but below 75°F—this prevents stress on the tree. Early spring, just as buds begin to swell, is ideal. Avoid pruning when sap is flowing heavily (late winter/early spring) as wounds take longer to heal. If you missed spring, wait until summer to remove only water sprouts and diseased branches.
Visual Cues Matter: In Step 2, when thinning branches, hold your hand about 6-8 inches from the trunk—this helps visualize the open center you’re aiming for. For scaffold branches in Step 3, imagine drawing an invisible "umbrella" shape with your tree’s structure. The strongest branches should form the spokes of that umbrella, all facing outward. This open framework lets sunlight reach the center where most fruit develops.
Healing Help: After making cuts, apply a thin layer of pruning sealant to wounds larger than ½ inch in diameter. I use a product with beeswax and tree resin—it creates a protective barrier that prevents disease while allowing the wound to heal naturally. For smaller cuts, no sealant is needed; the tree’s natural healing response works just fine. Always sterilize your tools between cuts with rubbing alcohol to prevent spreading pathogens.
Pro Tips for Apple Tree In Spring
- Spring pruning transforms your apple tree—here’s how to avoid common mistakes and get pro results.
- Tool Prep: Sharpen your pruning shears before you start—dull blades crush branches instead of making clean cuts.
- Timing Secret: Prune on a dry day when temperatures are above 40°F but below 75°F—this prevents stress on the tree.
Frequently asked questions
Got questions about pruning your apple tree in spring? You’re not alone! Here are some of the most common concerns—and their straightforward solutions—to help you get started with confidence.
When is the exact best time to prune an apple tree in spring?
The ideal window is late winter to early spring, right after the last frost but before buds swell (typically February–March in most U.S. zones). This timing balances safety (avoiding frost damage) with growth stimulation. If you miss it, late spring (after flowering) is the second-best option—but prioritize removing diseased branches immediately, regardless of season.
What if my apple tree is already blooming? Can I still prune it?
Yes, but be cautious! Prune only after 80–90% of the blossoms have fallen (usually 4–6 weeks post-bloom). Avoid heavy pruning now—focus on removing dead, diseased, or crossing branches to minimize stress. Heavy cuts this late can reduce next year’s fruit yield. Think of it as a light trim, not a major overhaul.
Will pruning in spring reduce my apple harvest this year?
Not if done correctly! Pruning encourages healthier growth and better fruit production in the long run. However, aggressive pruning (removing >25% of branches) can temporarily lower yields. Stick to the four cuts method (deadwood, water sprouts, crossing branches, and thinning for light) to balance health and harvest. Patience pays off—your tree will thank you next season!
How do I tell if my apple tree has pests or disease after pruning?
Watch for these red flags: holes in leaves (aphids, codling moths), black sooty mold (scale insects), or oozing cankers (fire blight). If you spot these, sterilize tools with rubbing alcohol between cuts, remove infected branches below the infection, and consider organic sprays like neem oil. Prevention tip: Prune during dry weather to reduce fungal spread!
Can I use the same pruning tools for my apple tree and other fruit trees?
Technically yes, but sterilize them first! Diseases like fire blight or apple scab can jump between trees. After pruning your apple tree, wipe blades with 70% isopropyl alcohol or a 10% bleach solution (1 part bleach to 9 parts water). For safety, color-code tools (e.g., a red band for apple trees) to avoid cross-contamination. Your peach tree will thank you!
Wrapping up and next steps
Spring is the perfect time to give your apple tree the care it deserves—pruning isn’t just about aesthetics, it’s about long-term health and abundance. 🌿 With just four strategic cuts, you’ll encourage stronger growth, better fruit production, and a tree that thrives year-round.
Now that you’re armed with the right tools, techniques, and timing, there’s no better moment to roll up your sleeves and get pruning!
Ready to see your apple tree flourish? Start small—pick one section of your tree to practice the cuts today, and watch as your efforts pay off in lush blooms and juicy apples. Happy pruning!