Pruning
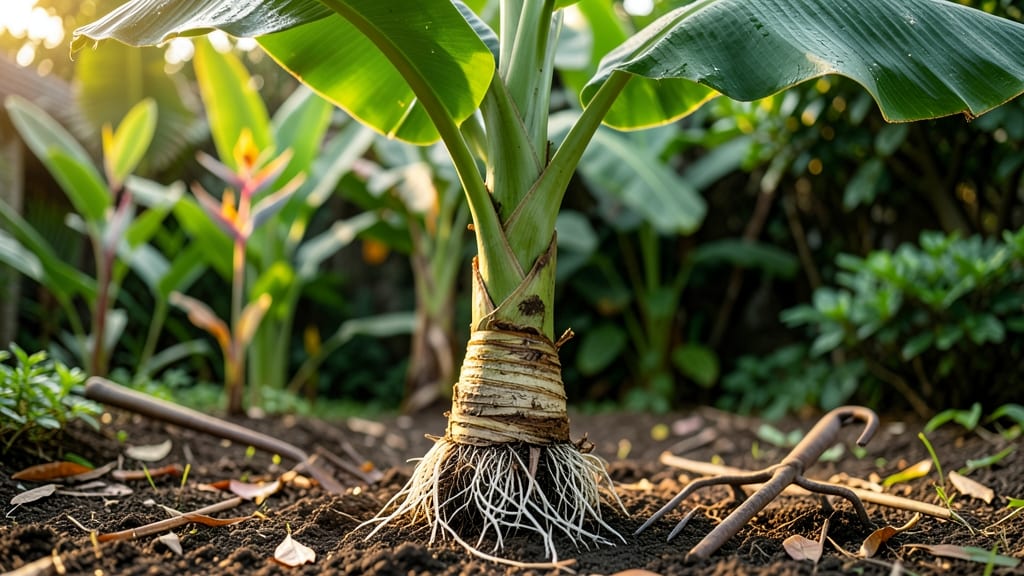
The banana tree corm is your ticket to growing tropical fruit even in cooler climates—if you know how to handle it right. 🌱 I’ve dug up these thick, starchy roots in Florida’s heat and replanted them in my backyard, and the secret lies in timing, soil prep, and patience.
That first harvest of sweet, creamy fruit makes every step worth it.
You’ll need a well-draining mix of sand and compost, a shovel, and a sunny spot that mimics the corm’s native tropical conditions. Planting too deep or in heavy clay?
That’s how you kill a corm before it even sprouts. The key is burying it just below the soil line—about 2-3 inches deep—where roots can spread without rotting.
Within 4-6 weeks, you’ll see shoots emerge, and by summer, your corm will reward you with broad, glossy leaves and eventually those coveted banana bunches. The trick is keeping the soil moist but not soggy—banana plants hate wet feet—and protecting young growth from late frosts.
This method works for dwarf varieties in pots or full-size trees in the ground, as long as you’re in USDA zones 9-11 or use containers you can winter indoors. Let’s get that corm planted before the next growing season slips away.
📚 In This Guide
- What you need
- Instructions
- Tips and common mistakes
- Wrapping up and next steps
What you need
- ● Banana tree (Musa spp.) – Ensure it’s mature (3+ years old) and has completed fruiting at least once.
- ● Sharp shovel or digging fork – A heavy-duty, stainless-steel tool (12–18 inches long) to minimize damage to the corm.
- ● Pruning shears or knife – For trimming excess foliage and roots (sterilized with rubbing alcohol).
- ● Gloves – Thick, cut-resistant gloves (e.g., gardening or work gloves) to protect hands from sharp edges.
- ● Watering can or hose – For post-harvest hydration (5+ gallons of water).
- ● Plastic sheeting or tarp – 4x6 ft minimum, to create a clean workspace.
- ○ Disinfectant (optional but recommended) – 1 part bleach to 9 parts water for cleaning tools.
- ● Perforated plastic bags – 2–3 gallon-sized bags with small holes for airflow (or breathable mesh bags).
- ● Wooden crate or ventilated box – For storing corms short-term (12–18 inches deep).
- ● Sand or coconut coir – 5–10 gallons of sterile, well-draining medium to bury corms during storage.
- ○ Humidity tray (optional) – A shallow tray with water and pebbles to maintain 60–70% humidity.
- ○ Thermometer (optional) – To monitor storage temps (ideal: 55–65°F).
- ● Timing: Harvest corms during the dry season or after the tree’s fruiting cycle (avoid rainy periods).
- ● Local regulations: Check if banana corms are restricted in your area (some regions prohibit propagation).
- ● Health check: Inspect the tree for pests (e.g., nematodes) or diseases before digging.
- ● Space: Ensure you have a dedicated storage area away from direct sunlight and freezing temps.
Step-by-Step guide to harvesting and storing banana tree corms
Here's how to handle these underground treasures like a pro.
🪴 Step 1: Identify and Prepare for Harvest Time
Banana corms are ready when the above-ground foliage yellows and dies back completely—this usually happens in late fall or winter. I wait until the first frost has blackened the leaves, but before the ground freezes solid. This ensures the corm has fully matured but hasn't started rotting from prolonged cold.
Gather your tools: a sharp spade or garden fork, work gloves, and a bucket of clean water. I like to work on a dry day when the soil is slightly damp but not muddy—this makes digging cleaner and easier. Mark the plant's location with a stake if you're harvesting multiple corms to avoid confusion later.
✂️ Step 2: Carefully Dig Up the Corms
Slice through the dead foliage at the base with pruning shears, leaving about 2 inches of stem attached to the corm. This prevents soil from entering the cut when you dig. Then, insert your spade about 12 inches away from the plant's center and dig in a wide arc to loosen the soil around the corm.
Gently lift the corm from the ground, being careful not to damage the thick, fleshy rhizome. You'll see the corm attached to the mother plant—this is normal. Use your hands to separate any smaller cormels (baby corms) that may have formed. If the corm feels heavy and firm, it's ready for storage. If it's soft or mushy, it's overripe and should be used immediately.
💧 Step 3: Clean and Cure the Harvested Corms
Rinse the corms gently under cool water to remove all soil, then let them air-dry completely in a shaded, well-ventilated area for about 24 hours. I place them on a wire rack or hang them by the stems to ensure airflow on all sides. This drying process prevents rot during storage and helps the corm develop a protective layer.
Once dry, inspect each corm for cuts, bruises, or signs of disease. Trim away any damaged areas with a sterile knife, but avoid removing too much—even small corms can regrow if given proper care. Store the trimmed pieces separately in a small container of damp sand if you plan to replant them later.
🪴 Step 4: Store Corms for Future Growth
Place the cured corms in a container filled with slightly moist (not soggy) sand or vermiculite. I use a shallow box lined with plastic to keep the moisture level consistent. Store the container in a cool, dark place with temperatures between 55-65°F—a garage, basement, or root cellar works well.
Check the corms every 4-6 weeks to ensure the sand remains lightly moist. If you notice any signs of mold or soft spots, remove the affected corm immediately. Properly stored corms can last 6-12 months, though they may begin sprouting earlier if kept in warmer conditions. When you're ready to replant, choose a corm that feels firm and shows no signs of decay.
Tips & tricks for perfect banana tree corm harvesting
Here's what nobody tells you about working with these delicate underground plants.
Timing is Everything: That first frost is your signal—but don't wait too long! If the ground freezes solid, the corms can crack. I've learned the hard way that harvesting just after the leaves blacken (but before hard frost) gives you the firmest, healthiest corms. The 24-hour drying period in Step 3 is non-negotiable—this isn't just about cleanliness, it's about creating that protective layer that prevents rot during storage.
Digging Technique: When you're loosening soil around the corm in Step 2, work that spade in a wide arc—not straight down. The rhizome system is delicate, and you want to avoid piercing it. I've seen people accidentally cut through the main corm while trying to dig too close. Also, that 2-inch stem stub isn't just for looks—it helps prevent soil from wicking up into the cut during storage.
Storage Environment: The 55-65°F range in Step 4 is ideal, but here's the secret: consistency matters more than exact temperature. A garage that fluctuates between 50°F and 70°F is better than a basement that's perfectly 65°F but has high humidity. I've had corms last 10 months in a slightly warmer garage where I could monitor moisture better than in a damp basement.
Sprout Management: If you notice sprouts starting before you're ready to replant, don't panic! Simply trim them back to about 1 inch and return the corm to storage. The energy redirecting to the sprout won't harm the main corm, and you can still replant it later. Just make sure to check for firmness before replanting—soft corms won't establish well.
Pro Tips for Banana Tree Corm
- Here's what nobody tells you about working with these delicate underground plants.
- Timing is Everything: That first frost is your signal—but don't wait too long! If the ground freezes solid, the corms...
- Digging Technique: When you're loosening soil around the corm in Step 2, work that spade in a wide arc—not straight d...
Frequently asked questions
Got questions about harvesting and storing banana tree corms? Here are some of the most common queries to help you navigate the process like a pro!
What’s the best time to harvest a banana tree corm?
The ideal time is after the banana fruit has fully ripened and fallen from the tree. This usually happens 6–12 months after flowering. Harvesting too early can reduce yield, while waiting too long may make the corm harder to dig up. Look for yellowing leaves and dried fruit stalks as key signs!
How do I know if a banana corm is still viable for replanting?
A healthy corm should be firm, plump, and free of rot or mold. Check for sprouts or buds—these indicate viability. If the corm feels soft, smells foul, or has dark spots, it’s best to discard it. Size matters too: Aim for corms at least 4–6 inches in diameter for better regrowth.
What’s the best way to store banana corms long-term?
Store corms in a cool, dry place (55–65°F) with good airflow to prevent rot. Wrap them in paper or burlap (not plastic!) and place them in a shady, ventilated container. Avoid refrigeration—cold temps can kill them. Check monthly for spoilage and replant within 3–6 months for best results.
Can I grow a new banana tree from a small corm piece?
Yes! Cut a corm into 2–3 inch sections, ensuring each piece has at least one healthy bud or "eye". Let the cuts dry for 1–2 days before planting. Smaller pieces may take longer to sprout but can still grow into full plants. Just be patient—consistent moisture is key during the early stages!
Why did my banana corm rot after planting?
Overwatering or poor drainage are the top culprits. Banana corms need well-draining soil and water only when the top 2 inches of soil are dry. If your soil is heavy clay, mix in sand or compost to improve airflow. Also, avoid planting too deep—1–2 inches below soil level is ideal.
Wrapping up and next steps
Harvesting and storing banana tree corms is a rewarding way to propagate your plants and ensure a steady supply of these tropical treasures. 🌱 By following the right techniques—like selecting mature corms, proper digging, and smart storage—you’ll set yourself up for success.
Whether you're a seasoned gardener or just starting, this process is simpler than it seems!
Ready to put your knowledge into action? Start by identifying a healthy corm in your garden and practice the steps outlined above. With patience and care, you’ll soon be enjoying lush banana trees (or even delicious bananas!) year after year. Happy growing! 🌿