Blooming
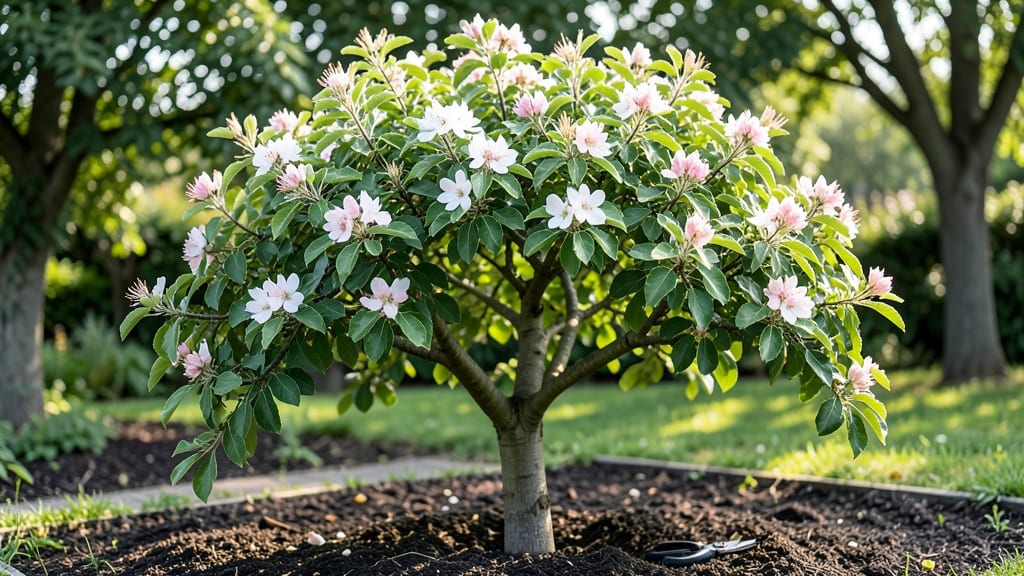
The blooming pear tree in my backyard taught me that winter doesn’t have to mean dormant branches—with the right care, those delicate white blossoms can return year after year. 🌸 There’s nothing like the scent of spring blooms on a cold-resistant variety, especially when you’ve chosen the perfect spot and pruned at the right time.
Cold-hardy varieties like ‘Seckel’ or ‘Bartlett’ thrive in zones 5-9, and their secret lies in three key habits: winter mulching, late-winter pruning, and spring feeding.
Most gardeners skip the mulch, but that’s what protects roots from freeze-thaw cycles. I’ve seen trees with mulch bloom two weeks earlier than their neglected neighbors.
By summer’s end, you’ll see buds forming for next spring’s show—thousands of tiny blossoms that attract bees and fill the air with fragrance. The trade-off? Some fruit production drops, but the floral display makes up for it.
Even my black-thumb neighbor got hooked after seeing his tree’s second spring of blooms.
This approach works for both ornamental pears (like ‘Chanticleer’) and fruiting varieties—just adjust pruning timing slightly. The biggest mistake? Over-fertilizing in fall, which delays dormancy. Let’s get those branches ready for another spectacular spring.
📚 In This Guide
- What you need
- Instructions
- Tips and common mistakes
- Wrapping up and next steps
What you need
- ● Pear Tree: Choose a cold-hardy variety like Pyrus calleryana (Callery Pear) or Pyrus communis (European Pear). Ensure it’s disease-resistant (e.g., fire blight-free). Quantity: 1 (bare-root or potted sapling).
- ● Soil: Well-draining, slightly acidic soil (pH 6.0–7.0). Mix 50% native soil, 30% compost, and 20% perlite/sand for optimal aeration.
- ● Fertilizer: Balanced fertilizer (10-10-10) for planting (1 lb per tree).
- ● Slow-release granular fertilizer (e.g., 12-4-8) for spring (½ lb per year of tree age).
- ● Mulch: Organic mulch (e.g., wood chips or straw) 2–3 inches deep, keeping it 6 inches away from the trunk.
- ● Shovel (for digging holes 3x wider and slightly shallower than the root ball).
- ● Garden fork (to loosen compacted soil).
- ● Pruning shears (sterilized with rubbing alcohol) for shaping and deadwood removal.
- ● Watering can/hose with a gentle spray nozzle (avoid high pressure).
- ● pH testing kit (to monitor soil acidity).
- ○ Tree stakes & ties (optional) for young trees in windy areas.
- ● Location: Full sun (6+ hours/day) and protection from strong winds. Avoid low-lying areas prone to frost pockets.
- ● Spacing: Plant trees 20–30 feet apart (or per variety guidelines).
- ● Season: Best planted in early spring or fall (avoid extreme heat/cold).
- ● Water Access: Ensure a drip irrigation system or hose is nearby for deep watering (1–2 inches/week).
- ● Local Regulations: Check for tree planting permits or restrictions in urban areas.
- ● Root stimulator (e.g., Mycorrhizal fungi) to boost early growth.
- ● Tree guard (to protect from rodents/deer in winter).
- ● Soil conditioner (e.g., worm castings for nutrient-rich soil).
- ● Bloom enhancer (e.g., phosphorus-rich fertilizer in late winter).
Step-by-Step guide to cultivating a thriving cold-hardy pear tree
Here’s how to nurture a pear tree that blooms reliably year after year, even in chilly climates.
🌱 Step 1: Select and Prepare the Planting Site
Choose a location with full sun exposure (6-8 hours daily) and well-draining soil. Pear trees thrive in slightly acidic to neutral soil with a pH of 6.0–7.0. If your soil is heavy clay, amend it with 3–4 inches of compost before planting to improve drainage and aeration.
Dig a hole twice as wide as the root ball but no deeper. This encourages roots to spread horizontally rather than settling too low, which can lead to waterlogging. Gently loosen the roots if they’re circling tightly—this prevents root-bound stress later.
☀️ Step 2: Plant and Support Early Growth
Place the tree in the hole so the graft union (the swollen area near the base) sits 2–3 inches above soil level. This protects against moisture rot and ensures the tree develops a strong root system. Backfill with native soil, tamping lightly to remove air pockets.
Water deeply immediately after planting to settle the soil and eliminate air gaps. Mulch around the base with 2–3 inches of organic mulch, keeping it 6 inches away from the trunk to prevent moisture buildup. A young pear tree benefits from a stake and tie system to support its upright growth, especially in windy areas.
💧 Step 3: Water and Fertilize for Cold Resilience
Water deeply once a week during the first growing season, ensuring moisture reaches 12–18 inches deep. Shallow watering encourages weak roots. In winter, reduce watering but keep the soil slightly moist—dry soil can stress the tree during dormancy.
Apply a balanced fertilizer (10-10-10) in early spring before buds swell, then again after harvest. Avoid high-nitrogen fertilizers in late summer, as new growth won’t harden off before winter. Cold-hardy varieties like ‘Seckel’ or ‘Moonglow’ handle fertilizer well but respond best to slow-release nutrients.
✂️ Step 4: Prune for Winter Hardiness and Bloom Health
Prune in late winter or early spring before buds break to remove dead, crossing, or diseased branches. Open the canopy slightly to improve airflow, which reduces fungal risks. Cut back 1/3 of the weakest branches to redirect energy to stronger growth.
Never prune in fall—this stimulates tender new growth that won’t survive winter. Thin out clusters of fruit to 6–8 inches apart to prevent overburdening, which weakens the tree’s cold resistance. Seal larger cuts with pruning sealant to prevent disease entry.
⏰ Step 5: Protect During Winter and Encourage Year-Round Blooms
Wrap the trunk with tree guard in late fall to shield against rodent damage and temperature fluctuations. For young trees in Zone 5 or colder, mound 12–18 inches of mulch around the base for insulation. Avoid heavy mulch piles against the trunk, as this can cause rot.
In early spring, remove protective wraps and mulch gradually to avoid shocking the tree. Apply dormant oil spray in late winter to control pests before they emerge. Cold-hardy pear trees often bloom earlier than other fruit trees—watch for pink buds in late winter as a sign to prepare for pollination.
Tips & tricks for cultivating a thriving cold-hardy pear tree
Real talk: The difference between a struggling pear tree and one that thrives year after year often comes down to these small but critical details.
Soil Preparation Insight: Before planting, test your soil's pH—most garden centers offer cheap test kits. If your soil falls outside the 6.0–7.0 range, amend it with pelletized lime to raise pH or sulfur to lower it. I learned this the hard way after planting in slightly alkaline soil that locked out essential nutrients, stunting my tree's growth for two seasons. The 3–4 inches of compost mentioned in Step 1 should be well-aged—fresh compost can burn tender roots.
Root System Strategy: When loosening circling roots in Step 1, focus on the outer edges rather than cutting through them. This encourages outward growth rather than creating wounds. For container-grown trees, gently tease apart the root ball along its natural seams—never force it. I've seen gardeners accidentally sever major roots during this step, which takes years to recover from.
Winter Protection Pro Tip: The 12–18 inches of mulch for Zone 5 trees in Step 5 should be applied after the ground freezes. This prevents heat loss while allowing cold air to circulate around the roots. For extra insurance in extreme winters, wrap the lower trunk with burlap after applying tree guard—this creates an insulating air pocket that protects against temperature swings.
Pruning Timing Nuance: That late winter/early spring pruning window in Step 4 is crucial for cold resistance. If you must prune in fall, do so at least 6 weeks before your first hard frost date. The tree needs time to seal the wounds before winter dormancy begins. I've seen trees develop cankers from fall pruning because the cuts didn't have time to callus over before cold weather set in.
Pro Tips for Blooming Pear Tree
- Real talk: The difference between a struggling pear tree and one that thrives year after year often comes down to these small but critical details.
- Soil Preparation Insight: Before planting, test your soil's pH—most garden centers offer cheap test kits.
- Root System Strategy: When loosening circling roots in Step 1, focus on the outer edges rather than cutting through them.
Frequently asked questions
Got questions about nurturing a blooming pear tree? You’re not alone! Here are answers to the most common queries—from timing tips to troubleshooting tricks—to keep your tree thriving year-round.
When is the best time to plant a blooming pear tree?
Plant your tree in early spring or fall when temperatures are mild (50–70°F). This gives roots time to establish before extreme heat or cold. Avoid planting in summer—heat stress can stunt growth. If you’re in a colder zone, wait until after the last frost to ensure survival.
How cold-hardy are blooming pear trees?
Most varieties handle USDA Zones 5–8, meaning they tolerate winters down to -20°F. For extra protection, mulch the base with 2–3 inches of organic matter (like wood chips) and water deeply before the first freeze. Young trees may need winter wraps or burlap shields for added safety.
Will my blooming pear tree produce fruit, or is it purely ornamental?
Some varieties (like Pyrus calleryana) are ornamental-only, prized for their spring blossoms and fall color. Others, such as Pyrus communis, yield edible pears—but they may need a second tree for cross-pollination. Check the tag! If fruit isn’t your goal, focus on pruning to encourage vibrant blooms.
Why aren’t my pear tree’s flowers opening this spring?
Several factors could be at play:
- Late frost: Delicate buds may freeze. Use frost cloth if frost is forecasted during bloom time.
- Poor pollination: Bees or wind might be scarce. Hand-pollinate with a soft brush if needed.
- Nutrient deficiency: Yellowing leaves? Test soil and amend with balanced fertilizer (10-10-10) in early spring.
- Over-pruning: Cutting back too aggressively reduces next year’s buds. Prune after blooming.
What’s a low-maintenance alternative to a blooming pear tree?
If you want year-round interest with less fuss, consider:
- Serviceberry (Amelanchier): White spring blooms, edible berries, and fiery fall foliage. Thrives in Zones 4–8.
- Crabapple (Malus): Disease-resistant, with stunning flowers and compact size. Great for small yards!
- Japanese Maple (Acer palmatum): No fruit, but dramatic seasonal color and minimal pruning needs.
Wrapping up and next steps
Your blooming pear tree isn’t just a seasonal spectacle—it’s a year-round masterpiece waiting to unfold with the right care! 🌸 From cold-hardy roots to vibrant blossoms, this tree rewards patience and attention with stunning beauty and resilience.
Whether you’re a novice gardener or a seasoned green thumb, the key is consistency: prune with purpose, protect in winter, and nurture its soil.
Ready to watch your tree thrive? Start small: pick one tip from this guide—like mulching or monitoring pests—and build from there. Before you know it, your backyard will be the talk of the neighborhood, blooming with pearly perfection every season. Happy gardening! 🌱