Propagation
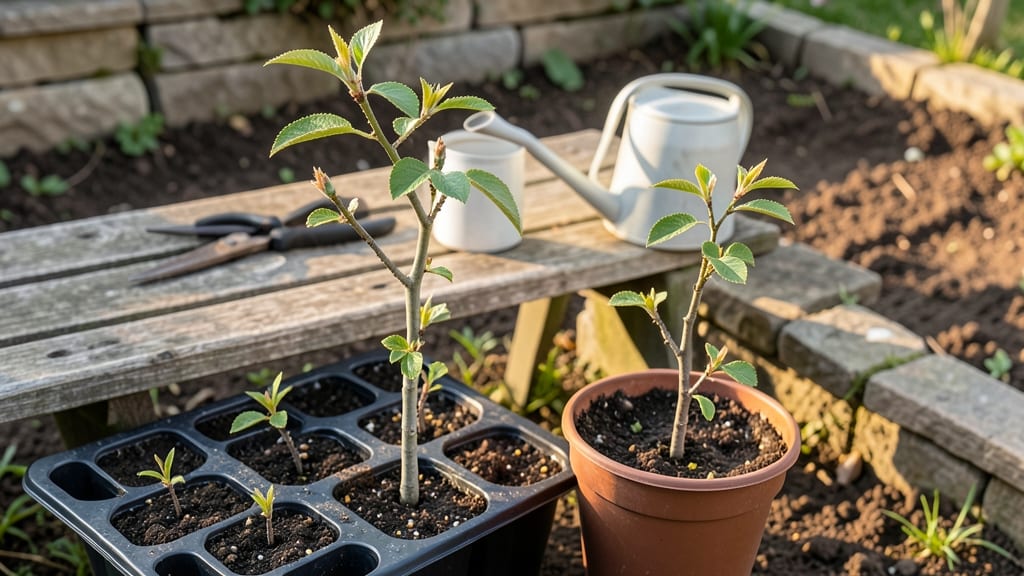
Growing a cherry tree from seed is a three-year patience test—but the reward of watching a tree you nurtured from scratch bear fruit makes every step worth it. 🌱 The catch? Most seed-grown cherries won’t taste like the sweet varieties from the grocery store.
Instead, you’ll likely end up with a wild-type tree, tart and small-fruited, but with a fascinating genetic story to tell.
Here’s the good news: the process itself is straightforward. You’ll need a fresh cherry pit, a cold stratification period to mimic winter, and a pot of well-draining soil to start.
The real magic happens in the first few months, when that tiny seed transforms into a sprout with its first true leaves. It’s a slow burn, but the journey is half the joy.
By year three, you’ll have a sturdy sapling ready for the ground. While it may not produce store-bought-quality fruit for another five to ten years, the tree itself will be a conversation piece—tall, sturdy, and full of potential.
The key is managing expectations: this isn’t a fast food crop, but a long-term investment in a living legacy.
If you’re okay with the wait, this method teaches more about tree biology than buying a grafted sapling ever could. You’ll learn about root systems, seasonal growth patterns, and the quiet resilience of nature. Ready to plant that pit and start the countdown?
📚 In This Guide
- What you need
- Instructions
- Tips and common mistakes
- Wrapping up and next steps
What you need
- ● Cherry seeds: 5–10 fresh, plump seeds (harvested from ripe, organic cherries—avoid store-bought if treated with chemicals).
- ○ Small pots or seed trays: 2–3 (4–6 inches deep) with drainage holes. Optional: Biodegradable peat pots for easy transplanting.
- ● Well-draining potting mix: 2–3 bags (sterilized, seed-starting mix or a 50/50 blend of peat moss and perlite).
- ● Spray bottle: For gentle watering (avoid over-saturating seeds).
- ● Plastic wrap or humidity dome: To create a mini greenhouse effect.
- ● Heat mat or warm location: (70–85°F) for germination (e.g., windowsill, greenhouse, or near a heater).
- ● Fertilizer: Balanced, water-soluble (5-10-5 ratio) for seedlings after sprouting.
- ● Sunlight: Full sun (6+ hours daily) once transplanted outdoors.
- ● Water: Consistent moisture (1–2 inches per week), drought-tolerant once established.
- ● Soil: Well-draining, slightly acidic (pH 6.0–6.5), rich in organic matter.
- ● Pruning tools: Sharp bypass pruners and loppers (sterilized with rubbing alcohol).
- ● Pest control: Neem oil or insecticidal soap (for aphids, mites, or borers).
- ● 💡 Seed prep: Scarify seeds by nicking the pit with a file or soaking in warm water for 24 hours to speed up germination.
- ● 🌡️ Temperature hack: Place pots on a heat mat or in a warm spot—cherry seeds germinate best in warmth!
- ● 🎯 Patience payoff: Seedlings may take 6–12 months to sprout—stay consistent with care!
Step-by-step instructions for growing a cherry tree from seed
Here's how to start your own cherry tree from scratch—it takes patience, but the reward is unbeatable.
🌱 Step 1: Harvest and Prepare Cherry Seeds
Pick fully ripe cherries from a healthy tree and remove the pits. Rinse them thoroughly to remove all fruit flesh, then let them dry completely at room temperature for 3-5 days. This prevents mold and ensures proper stratification later.
Once dry, place the pits in a sealed container with slightly damp sand (or a mix of sand and peat moss). Store this container in the refrigerator for 90-120 days. This cold stratification mimics winter conditions and breaks seed dormancy—critical for germination.
I like to check the sand mixture weekly. It should feel like a damp sponge, not dripping water. If it's too wet, the seeds will rot. If too dry, germination won't happen. The right balance is key here.
🌱 Step 2: Plant Stratified Seeds in a Germination Medium
After stratification, plant the seeds ½ inch deep in a sterile seed-starting mix (not garden soil). Use small pots or a seed tray—each seed needs its own space to avoid competition. I prefer 2-3 inch deep containers because cherry seedlings need room to develop strong roots.
Keep the soil consistently moist but never soggy. A spray bottle works best—water just enough to keep the surface damp. Place the pots in a warm spot (65-75°F) with bright, indirect light. You'll see sprouts in 4-8 weeks, though some seeds may take longer.
Here's the thing—cherry seeds are notoriously slow to germinate. Don't give up if nothing happens in 6 weeks. Patience is everything with these trees. Once you spot the first green shoot, move the pot to a sunny windowsill or under a grow light.
☀️ Step 3: Transplant Seedlings to Larger Pots
When seedlings reach 4-6 inches tall (usually after 6-12 months), transplant them into 5-gallon pots with well-draining potting mix. Cherry trees need deep roots, so choose containers that are at least 12 inches deep. This prevents root-bound stress later on.
Hardening off is crucial before moving outdoors. Start by placing seedlings outside in partial shade for 1-2 hours the first day, then gradually increase exposure over 2 weeks. Full sun can scorch tender new leaves if introduced too quickly.
I always mark the pot with the transplant date. This helps track growth milestones—cherry trees grow slowly from seed, so every inch counts. Keep the soil moist but well-drained, and fertilize lightly with a balanced 10-10-10 formula every 6 weeks during the growing season.
🌿 Step 4: Prepare for Outdoor Planting After 2 Years
Cherry trees grown from seed take 3-5 years to bear fruit, but proper outdoor planting at the right time sets them up for success. Choose a sunny, sheltered spot with well-draining soil—cherry trees hate soggy roots. The best time to transplant is early spring, when the soil is workable but before new growth starts.
Dig a hole twice as wide as the root ball but no deeper. Gently remove the seedling from its pot and loosen any circling roots. Place it in the hole so the top of the root ball sits 1 inch above ground level. This prevents stem rot from sitting water.
Backfill with native soil, tamp lightly, and water deeply. Mulch around the base with 2-3 inches of organic mulch (like wood chips) to retain moisture and regulate soil temperature. Avoid piling mulch against the trunk—keep it 3 inches away to prevent rot.
⏰ Step 5: Prune and Care for Long-Term Growth
In the first year after transplanting, focus on structural pruning. Remove any dead, crossing, or weak branches to encourage a strong framework. Cherry trees benefit from open-center pruning, which improves air circulation and reduces disease risk.
Water deeply once a week during dry spells, but reduce frequency as the tree matures. Overwatering is the biggest mistake I see—cherry trees are surprisingly drought-tolerant once established. Fertilize in early spring with a low-nitrogen formula (like 5-10-10) to promote fruiting.
Real talk: Your tree won't produce fruit for 3-5 years, but the journey is worth it. The first blossoms are a magical moment—just don't expect them to be sweet like grocery-store cherries. Seed-grown trees often take longer to fruit and may have different flavors, but the satisfaction of growing your own is unmatched.
Tips & tricks for growing a cherry tree from seed
Growing a cherry tree from seed is a rewarding long-term project—here's how to set yourself up for success from the very beginning.
Seed Selection: Choose pits from the ripest, healthiest cherries you can find. The flavor and vigor of your tree start with this first step. I always pick cherries that are deep red and slightly soft to the touch—these indicate full ripeness and better germination potential. Avoid cherries with bruises or signs of disease, as these can carry problems to your young tree.
Stratification Success: The 90-120 day cold stratification period is non-negotiable for breaking dormancy. I like to label my containers with the start date so I don't forget about them. Place a small piece of paper with the date inside the container before sealing it—this way, you won't accidentally toss it when you're cleaning out the fridge. The consistent dampness is crucial: if you see condensation forming on the inside of the container, it's too wet.
Germination Patience: Those first 6 weeks can feel like an eternity, but resist the urge to check constantly. Cherry seeds are slow to germinate, and peeking too often can disturb the process. Once you see the first green shoot, move the pot to a sunny windowsill immediately—this is when your seedling needs the most light to establish strong growth. I've found that placing pots on a heat mat set to 70°F can speed up germination by a few weeks, especially in cooler homes.
Transplant Timing: When your seedlings reach 4-6 inches tall, they're ready for their first transplant to 5-gallon pots. This is where many beginners make mistakes by using containers that are too small. Remember, cherry trees develop deep root systems—those 12-inch deep pots give them room to grow without becoming root-bound. Mark your calendar when you transplant to track growth milestones, as cherry trees grow slowly from seed.
Pro Tips for Grow Cherry Fruit Tree From Seed
- Growing a cherry tree from seed is a rewarding long-term project—here's how to set yourself up for success from the very beginning.
- Seed Selection: Choose pits from the ripest, healthiest cherries you can find.
- Stratification Success: The 90-120 day cold stratification period is non-negotiable for breaking dormancy.
Frequently asked questions
Got questions about growing a cherry tree from seed? Here are answers to the most common ones—because patience and persistence pay off with sweet rewards!
How long does it take for a cherry seed to sprout?
A cherry seed typically sprouts in 4–8 weeks after planting, but some may take longer—especially if stratification (cold treatment) wasn’t done properly. Keep the soil moist and warm (around 70°F) to speed things up. Pro tip: If nothing happens after 10 weeks, gently check for rot or mold.
Will a cherry tree grown from seed produce fruit?
Yes, but it may take 5–10 years (or longer) for a seedling to bear fruit—and even then, the quality and flavor might differ from the parent tree. Seedlings are not guaranteed to be true to type (e.g., sweet vs. tart). For faster, reliable fruit, consider grafting or buying a young tree.
Do cherry seeds need cold stratification?
Absolutely!
Cherry seeds require stratification (a cold, moist period) to break dormancy. Mix seeds with damp sand or peat moss, then refrigerate for 8–12 weeks before planting. Skipping this step often results in no germination—don’t skip the chill!
Can I grow a cherry tree indoors from seed?
While possible, it’s challenging indoors. Seedlings need plenty of light (6+ hours/day) and a sunny window or grow lights. Once sprouted, transplant outdoors as soon as possible (after the last frost) for healthy growth. Indoor cherry trees rarely thrive long-term without outdoor conditions.
Why are my cherry seedlings dying?
Common culprits include:
- Overwatering (root rot is deadly—keep soil moist but not soggy)
- Poor drainage (use a mix of potting soil + perlite)
- Pests (aphids or fungus gnats—inspect leaves regularly)
- Temperature stress (keep seeds warm 70–75°F during germination)
If leaves yellow or wilt, act fast—adjust care and monitor closely!
What’s the best cherry variety to grow from seed?
Most sweet cherries (like Bing or Rainier) are not ideal for seed-growing—they’re often grafted hybrids. Better bets:
- Tart cherries (e.g., Montmorency—hardier and more reliable)
- Wild or Prunus avium seeds (from fresh, organic cherries)
Save seeds from organic, untreated fruit for the best results!
Wrapping up and next steps
Growing a cherry tree from seed is a rewarding journey that blends patience with the joy of nurturing life from scratch!
While it may take 3-5 years to see fruit, every step—from soaking seeds to transplanting seedlings—teaches you the art of gardening. Celebrate the process! Once your tree is thriving, consider grafting for faster fruit production or simply enjoy the beauty of your new tree as it grows.
🌱 Next Steps:
- Monitor your seedling’s growth and adjust care as needed.
- Research local cherry varieties to plan future additions.
- Share your progress with fellow gardeners—inspiration spreads!