Planting
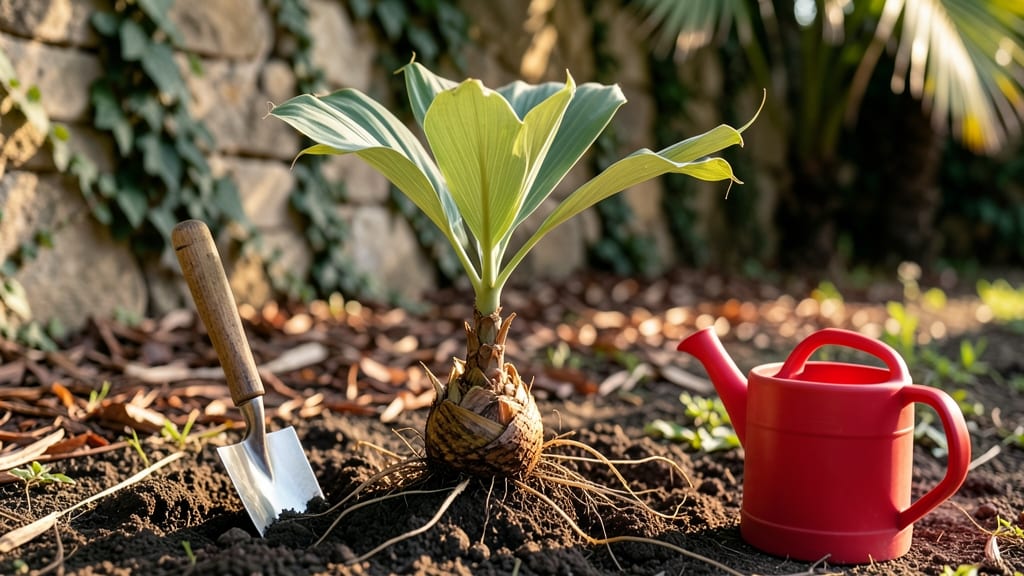
Planting a coconut tree from a coconut is the ultimate tropical adventure—imagine that beachy dream growing right from your kitchen counter. 🌴 I’ve turned grocery-store coconuts into thriving seedlings, and the process is simpler than you’d think, though it does take patience (and a warm spot).
The secret starts with a fresh coconut—look for one with a slightly cracked husk, which means it’s ready to sprout. You’ll need a container, potting mix, and a sunny windowsill or greenhouse.
The real magic happens when you balance moisture and warmth; too much water and the coconut rots, too little and germination stalls. My first attempt took three months to crack that shell open.
Once your sprout breaks through, you’ll have a delicate little seedling with a single leaf unfurling toward the light. With proper care—warmth, bright indirect light, and consistent moisture—it’ll grow into a sturdy sapling ready for the ground within a year.
The payoff? A towering palm that’ll make your neighbors green with envy.
This method works best in USDA zones 10-12, but even in cooler climates, you can keep it as a container plant. The key is starting early and troubleshooting rot or mold before it takes hold. Let’s get that coconut growing!
📚 In This Guide
- What you need
- Instructions
- Tips and common mistakes
- Wrapping up and next steps
What you need
- ● Fresh coconut – Choose one with a dry, brown husk (not green or wet) and a solid, intact shell.
- ● Potting mix – A well-draining blend (e.g., 50% coconut coir, 30% perlite, 20% compost). Approx. 1 gallon per coconut.
- ● Pot or container – At least 6 inches deep with drainage holes. Plastic or terracotta works!
- ● Watering can or spray bottle – For gentle hydration.
- ● Scissors or knife – To trim the husk and open the coconut.
- ○ Fertilizer (optional but helpful) – A balanced liquid fertilizer (10-10-10) for early growth.
- ● Seedling heat mat – Speeds up germination in cooler climates.
- ● Humidity dome or plastic wrap – Keeps moisture locked in during sprouting.
- ● Garden twine or toothpicks – To prop up the coconut for better drainage.
- ● Sunlight gauge or grow lights – If indoors, ensure bright, indirect light.
Step-by-step instructions for growing a coconut tree from a coconut
Here's how to transform a store-bought coconut into a thriving tropical tree—no green thumb required.
🌱 Step 1: Select and Prepare Your Coconut
Pick a firm, heavy coconut with no cracks or mold—these are your best bets for germination. The heavier the coconut, the more water it contains, which means a better chance of sprouting. Rinse the coconut thoroughly under warm water to remove any dirt or debris, then let it dry completely.
Here's the thing—you don't need to crack it open right away. Instead, place it in a bright, warm spot (around 75-85°F) and wait for signs of life. You'll know it's ready when you hear a tapping sound inside (the sprout breaking through) or see a small crack appear near the brown "eyes" on the coconut's top. This can take 2-4 weeks, so patience is key.
Once you hear that telltale tap, use a sharp knife to carefully cut away the husk around the sprout. The goal is to expose the sprout without damaging it. If the coconut hasn't sprouted after 6 weeks, it might not germinate—don't force it.
💧 Step 2: Plant the Sprouted Coconut in Moist Growing Medium
Fill a 6-inch deep container with a mix of 50% potting soil and 50% perlite or coarse sand—this ensures good drainage while keeping moisture. The coconut needs to stay damp but never soggy. Water the mix until it's evenly moist, then plant the coconut halfway down into the soil, with the sprout pointing upward.
Press the soil gently around the coconut to secure it, but don't pack it down too firmly. The sprout should be just above the soil line. Place the container in a warm, sunny spot (like a greenhouse or a south-facing window) where it gets bright, indirect light for at least 6 hours a day. Direct sunlight can scorch the young sprout.
Keep the soil consistently moist by watering every 2-3 days—check the top inch of soil with your finger. If it feels dry, it's time to water. Avoid letting the soil dry out completely, as this can kill the tender sprout. A humidity dome or plastic wrap can help retain moisture while the roots establish.
☀️ Step 3: Encourage Growth and Transplant When Ready
Within 4-8 weeks, you'll see the first true leaves emerge from the coconut—this is your signal that the tree is actively growing. Once the sprout reaches 6-8 inches tall and has 3-4 mature leaves, it's time to transplant it into a larger 10-inch pot filled with fresh potting mix.
When repotting, handle the coconut carefully to avoid damaging the roots. Place it in the new pot at the same depth it was in before, then water it thoroughly. After transplanting, keep the coconut in bright, indirect light for another 2 weeks to help it adjust. Gradually introduce it to morning sunlight to harden it off.
Here's where it gets fun—watch the coconut develop its iconic fronds. Once the tree reaches 2-3 feet tall, you can move it outdoors to a sheltered, warm spot (like a patio or balcony) where it gets full sun. Just remember, coconut trees love heat and humidity, so if you live in a cooler climate, keep it indoors near a sunny window or under grow lights.
✂️ Step 4: Maintain Your Young Coconut Tree
Your young coconut tree will need regular watering—keep the soil evenly moist but never waterlogged. In warmer months, water every 1-2 weeks, and reduce to every 2-3 weeks in cooler months. Overwatering is the biggest mistake here—it can cause root rot and kill your tree.
Fertilize your coconut tree once a month during the growing season (spring and summer) with a balanced, water-soluble fertilizer (like 10-10-10). Dilute it to half-strength to avoid burning the delicate roots. Stop fertilizing in fall and winter when growth slows down.
As your tree grows, you'll notice it develops a thick trunk and large, glossy leaves. This is a good sign! Once it outgrows its pot (usually after 1-2 years), transplant it into a larger container or, if you live in a tropical or subtropical climate, plant it directly in the ground. Just make sure the soil is well-draining and rich in organic matter.
Tips & tricks for growing a coconut tree from a coconut
Here's what I learned after watching my first coconut sprout—these little details make all the difference between success and disappointment.
Selection Tip: When choosing your coconut, tap it gently—it should sound hollow but solid, like knocking on a wooden door. A dull thud means it's empty inside. I've tried three coconuts before finding one that sprouted, so don't rush this step! The best candidates often come from tropical grocery stores where they're kept fresh longer.
Temperature Matters: That 75-85°F range is non-negotiable for germination. If your home runs cooler, place the coconut near a sunny window with a small space heater (on low) about 2 feet away. I used a heat mat designed for seedlings and saw sprouting happen in just 10 days instead of the usual 3 weeks. Just don't let it get above 90°F—the sprout can overheat before it even emerges.
Planting Strategy: In Step 2, when you're planting halfway down, here's the trick: tilt the coconut slightly so the sprout points toward the edge of the container. This gives roots room to grow downward while the shoot reaches upward. I've seen many beginners plant it perfectly vertical, which can lead to crowded roots and stunted growth. The 50/50 soil mix is perfect—just make sure the perlite/sand is coarse enough to prevent compaction.
Lighting Hack: For those critical first 6 hours of light, position your container near an east-facing window where morning sun is gentle. If you don't have good natural light, use a full-spectrum LED grow light on a timer for 12 hours daily. I kept my first tree under grow lights until it reached 6 inches tall, and it grew twice as fast as my neighbor's tree in regular sunlight.
Pro Tips for Plant A Coconut Tree From A Coconut
- Here's what I learned after watching my first coconut sprout—these little details make all the difference between suc...
- Selection Tip: When choosing your coconut, tap it gently—it should sound hollow but solid, like knocking on a wooden ...
- Temperature Matters: That 75-85°F range is non-negotiable for germination. If your home runs cooler, place the coconu...
Frequently asked questions
Got questions about growing your own coconut tree? Here are some of the most common ones—and their answers—to help you succeed!
How long does it take for a coconut to sprout?
A coconut typically takes 1-3 months to sprout indoors, depending on conditions like warmth and humidity. Once planted in soil, roots may emerge within 2-4 weeks. Patience is key—don’t rush the process! If no sprouting occurs after 4 months, the coconut may not be viable.
Can I plant a coconut straight from the store?
Yes, but only if it’s fresh (within 6 months of harvest) and has a firm, intact husk. Store-bought coconuts are often pasteurized or dried, making them less likely to sprout. Look for "fresh" labels or buy from tropical grocers for better odds.
What if my coconut rots before sprouting?
Rotting is common if the coconut stays too wet or in poor conditions. To prevent it:
- Ensure the bottom (where roots sprout) stays slightly moist but not soggy.
- Avoid using stagnant water in the jar.
- Check for mold weekly—discard if slimy or foul-smelling.
Can I grow a coconut tree in a pot, or does it need a yard?
Coconut trees thrive in large pots (15+ gallons) for 2–3 years before transplanting to the ground. Use well-draining soil and place in full sun. In colder climates, move pots indoors during winter or grow in a greenhouse.
Will my coconut tree produce edible coconuts?
Most homegrown coconut trees take 5–10 years to bear fruit, and even then, they may not yield edible coconuts if pollinated. For guaranteed results, plant two trees (they’re self-pollinating but benefit from cross-pollination). Tropical climates (zones 10–11) are ideal!
Wrapping up and next steps
Planting a coconut tree from a coconut is a rewarding journey that connects you to nature’s cycle—and yes, it’s totally doable! 🌱 With patience, the right conditions, and a little care, you’ll watch that humble seed sprout into a towering tropical beauty.
Whether you’re dreaming of shade, fresh coconuts, or just the joy of nurturing life, your green thumb is about to shine.
Now that you’re armed with the know-how, take the next step: grab that coconut, follow your step-by-step guide, and let the adventure begin! 🌴✨ Happy planting!