Pruning
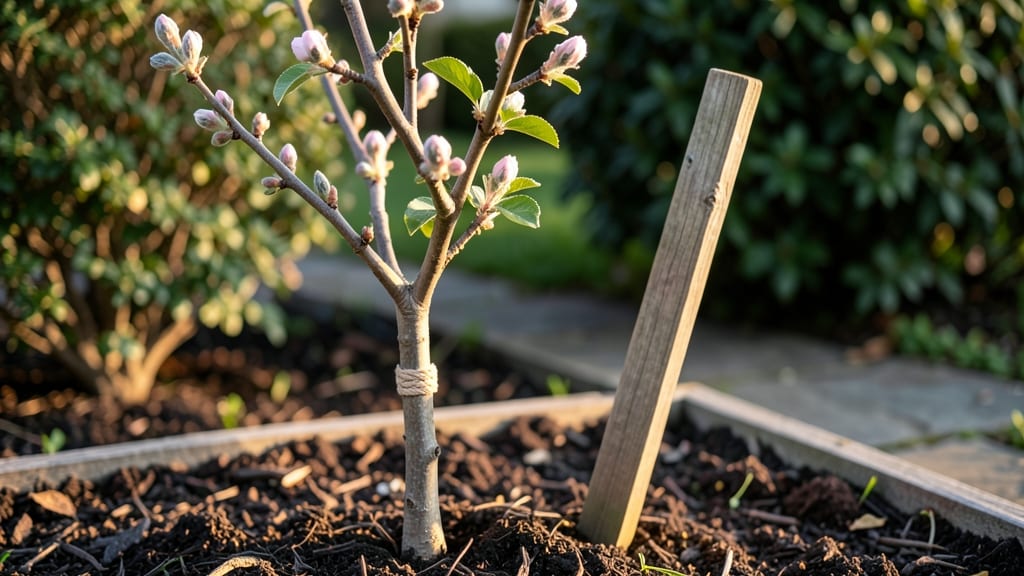
Learn how to stake a tree without damaging it—or watch its trunk choke under tight metal or wire, stunting growth before it even begins. 🌳 I’ve seen too many young trees with bark girdled by stakes or ties, their trunks struggling against too-tight support.
The key is balance: enough stability to keep it upright, but never so much that you stunt its natural strength.
You’ll need soft tree ties or wide fabric strips, a flexible stake (not metal), and a little patience. The stakes should go just outside the root flare, angled slightly away from the trunk, while ties should never cut into the bark—even when wet.
This method works for newly planted trees, wind-prone varieties, or even mature trees recovering from storms, as long as you adjust the approach.
What you’ll end up with is a tree that stands tall without a struggle—its roots free to grow strong beneath the soil. The ties will loosen over time as the tree gains stability, and you’ll know it’s ready to be freed when it sways naturally in the breeze without toppling.
No more damaged trunks or stunted growth from poor support.
Works for everything from delicate fruit trees to sturdy oaks, though smaller trees need gentler materials. Here’s exactly how to do it without causing a single scratch—or a lifetime of damage.
📚 In This Guide
- What you need
- Instructions
- Tips and common mistakes
- Wrapping up and next steps
What you need
- ● Stakes: 3–4 wooden, plastic, or metal stakes (1–2 inches in diameter, 4–6 feet tall). Pro tip: Avoid metal stakes if your soil is rocky—they can damage roots!
- ● Tree Tie or Soft Strap: 2–3 pieces of wide, flexible material (e.g., tree tie straps, fabric strips, or old T-shirts cut into strips). Width matters! Aim for 1–2 inches to prevent digging into the bark.
- ● Trowel or Spade: A small hand trowel to create shallow holes for stakes (avoid deep digging—roots need room to breathe!).
- ● Measuring Tape: To ensure stakes are placed at the correct distance from the tree trunk (typically 18–24 inches away).
- ● Water & Hose: To keep the tree hydrated before, during, and after staking.
- ● Mulch: A 2–3 inch layer of organic mulch (wood chips, straw) around the base to retain moisture and protect roots.
- ● Pruning Shears: For trimming any low-hanging branches that might interfere with staking.
- ● Gloves: To keep your hands clean and protected while handling stakes or soil.
- ● Stake Anchor or Bungee Cord: If your area is windy, these can provide extra support without tightness.
Step-by-Step instructions for staking a tree safely
Here's how to support young trees without smothering their growth.
🪴 Step 1: Choose the Right Stakes and Ties
Use flexible fiber stakes (not rigid metal) that are 1/4 to 1/2 inch wide and 2-3 feet tall. These bend slightly to absorb wind without stressing the trunk. I avoid metal or plastic because they can cut into bark as the tree grows.
For ties, grab soft tree tie material (not wire or zip ties). The best options are cotton or nylon webbing or rubber tree straps. These stretch slightly to accommodate trunk swelling and won't dig into the bark. If you're using webbing, cut 2-3 feet per tree.
🌱 Step 2: Position Stakes at the Perfect Angle
Drive stakes 4-6 inches away from the trunk—never right next to it. The goal is to create a triangle of support, not a straight line that could bend the tree sideways. Angle stakes 30 degrees outward from the trunk to mimic natural wind resistance.
Here's the thing—bury stakes 1/3 of their length into the soil. You want enough stability that they don't wobble in wind, but not so deep they become permanent obstacles. Tap them in gently with a mallet or your boot heel until firm.
💧 Step 3: Secure the Tree Without Restricting Growth
Loop the tie around the trunk first, then around the stake, creating a loose figure-eight pattern. The tie should have 1-2 inches of slack—you should be able to fit two fingers between the tie and the trunk. Too tight, and you'll restrict circulation; too loose, and the tree won't get proper support.
Adjust the tie so it's 6-12 inches above the soil line. This prevents moisture from pooling against the trunk (which causes rot) while still stabilizing the tree. If you're using webbing, tie it in a simple overhand knot that you can easily adjust as the tree grows.
✂️ Step 4: Check and Adjust Regularly
Inspect stakes and ties every 2-4 weeks during the first year. Trees grow surprisingly fast, and what fits now might strangle the trunk in a month. Look for signs of restriction: bark indentations, leaves wilting on one side, or the tie digging into the trunk.
If the tie feels too tight, loosen it immediately. If the tree has outgrown its support, remove one stake and let the tree lean naturally against the remaining one. Most trees only need staking for 1-2 years—after that, their roots will handle wind on their own.
☀️ Step 5: Remove Stakes Before They Become a Problem
Here's where most people go wrong—they leave stakes in too long. Remove them when the tree can stand upright without leaning, usually by late summer of the second year. You'll know it's time when the trunk is as thick as your thumb and the root ball is firmly established.
To remove stakes, cut the ties first, then gently wiggle the stake out of the soil. If you pull too hard, you might damage emerging roots. After removal, give the tree a final check—no indentations, no leaning, and it should be ready to grow freely.
Tips & tricks for gentle tree staking
Real talk: Even the best-intentioned staking can backfire if you miss these small details.
Material Matters: I learned this the hard way after ruining three saplings with metal stakes—always use flexible fiber stakes that won't cut into bark as the tree grows. For ties, cotton webbing or rubber straps are your best friends because they stretch with the trunk. Between us, I've seen zip ties actually slice through bark like a hot knife through butter.
Angle is Everything: That 30-degree outward angle in Step 2 isn't arbitrary—it mimics how trees naturally sway in wind. If you place stakes straight up, you'll create a rigid structure that actually teaches the tree to lean against it instead of developing strong roots. Think of it like teaching a toddler to walk: you want them to wobble a little, not lean against your hand.
Slack is Safety: The 1-2 inches of slack in your tie might seem like nothing, but it's what prevents those ugly bark indentations. I always test by slipping two fingers between the tie and trunk—if it's tighter than that, you're basically putting a tourniquet on your tree. And trust me on this: you can always add more slack later, but you can't undo damage once it's there.
Seasonal Adjustments: Spring planting? You'll likely need to check ties every 2-3 weeks—they loosen as the tree grows. Fall planting? Extend that to 3-4 weeks since growth slows. I've seen people forget this and end up with trees that look like they've been strangled by Christmas lights.
Pro Tips for Stake A Tree Without Damaging It
- Real talk: Even the best-intentioned staking can backfire if you miss these small details.
- Material Matters: I learned this the hard way after ruining three saplings with metal stakes—always use flexible fibe...
- Angle is Everything: That 30-degree outward angle in Step 2 isn't arbitrary—it mimics how trees naturally sway in win...
Frequently asked questions
Got questions about staking trees the right way? You’re not alone—many gardeners want to support their young trees without risking harm. Here are answers to the most common concerns, so you can stake with confidence!
When is the best time to stake a tree?
The ideal time to stake a tree is immediately after planting (if it’s windy or unstable) or during early spring before new growth starts. Avoid staking in late summer or fall, as this can restrict root development. If your tree’s already planted and stable, skip staking—roots need to strengthen naturally!
How long should I leave stakes in place?
Most trees only need stakes for 1–2 years, or until the root system is strong enough to stand alone. Check annually: if the tree sways less than 10 degrees when gently pushed, it’s time to remove the stakes. Leaving them too long can weaken the trunk over time.
What’s the best alternative if I don’t have stakes?
If stakes aren’t an option, try these gentle supports:
- Tree ties + branches: Weave nearby branches into a natural windbreak.
- Burlap windbreaks: Temporarily place burlap or mesh on the windward side.
- Mulch berms: Pile soil or mulch in a low mound around the base to anchor roots.
Why is my tree leaning even after staking?
Leaning can happen if:
- The stakes are too short (bury them 1/3 of the tree’s height deep).
- The ties are too tight (use rubber or fabric ties with room to grow).
- Roots aren’t established yet (wait 6–12 months before expecting full stability).
Can I stake a mature tree that’s already leaning?
Staking a mature tree is risky—it’s better to train it gradually over years. For slight leans (<15 degrees), use flexible ties and monitor closely. Severe leans may need professional help, as forcing correction can girdle the trunk or damage roots. Focus on improving soil health instead!
Wrapping up and next steps
Staking a tree the right way ensures its growth without harm—just like giving it a supportive hug! 🌳 By using the right materials, gentle techniques, and proper timing, you’ll help your tree thrive while keeping its roots strong.
Remember, less is more: remove stakes as soon as the tree can stand on its own.
Now that you’re ready to stake like a pro, pick your next tree and get planting! Whether it’s a sapling or a young transplant, your careful support will pay off with a healthier, happier tree for years to come. 🌱✨