Pruning
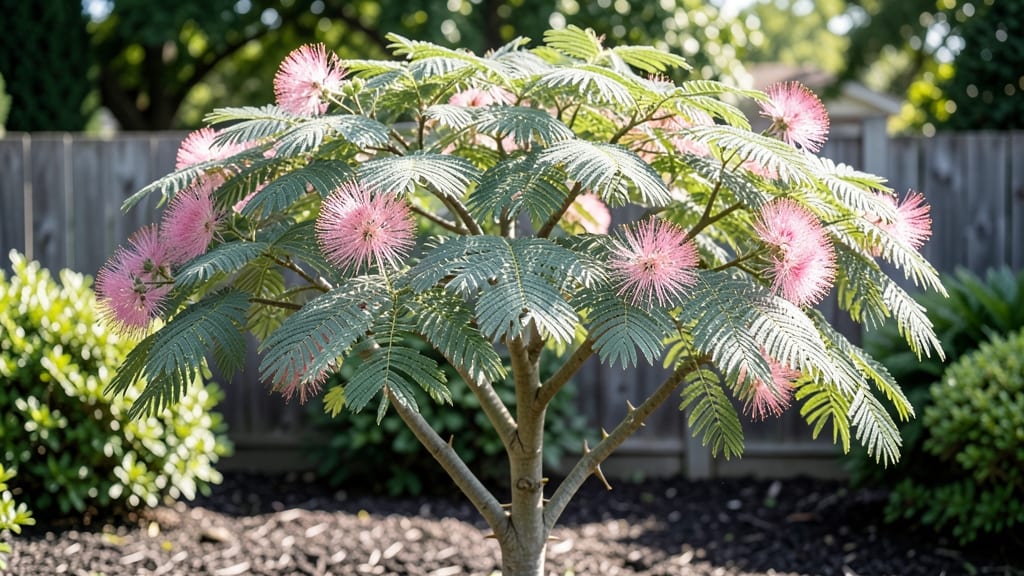
Pruning a mimosa tree can feel like solving a puzzle—especially when you're dealing with leaf drop, pests, or fungal stress. 🌿 I've spent years helping gardeners save their mimosa trees from common problems, and the key is timing, technique, and knowing what to look for.
Most people wait too long or cut too aggressively, which only makes things worse. The right approach keeps your tree healthy year-round, not just during the growing season.
First, gather your tools: sharp pruning shears, gloves, and a clean bucket for trimmings. Focus on removing dead, diseased, or crossing branches first—this opens up airflow and sunlight, which prevents fungal issues like powdery mildew.
Spider mites love crowded branches, so thinning out the canopy is a game-changer. The goal is to shape the tree without overdoing it, especially in late winter or early spring before new growth starts.
You’ll notice a difference within weeks: fewer yellowing leaves, stronger new growth, and a tree that looks fuller and more vibrant. Regular pruning also reduces the risk of pests and diseases, so it’s not just about looks—it’s about long-term health.
Once you master the basics, you can tackle more advanced techniques like rejuvenation pruning for older trees.
This method works for mimosa trees in containers or large landscapes, and it’s beginner-friendly once you understand the principles. Let’s get your tree back to thriving—no guesswork required.
📚 In This Guide
- What you need
- Instructions
- Tips and common mistakes
- Wrapping up and next steps
What you need
- ● Pruning shears: Bypass pruners (sharp, clean, and 6- to 8-inch blades) for small branches. 1 pair is sufficient for most jobs.
- ● Loppers: Heavy-duty, 18- to 24-inch loppers for thicker branches (½ to 1.5 inches in diameter). 1 pair recommended.
- ● Pruning saw: A folding handsaw or bow saw for branches over 1.5 inches thick. 1 unit needed.
- ● Gloves: Heavy-duty, gardening gloves (cut-resistant) to protect hands from thorns and sap. 1 pair.
- ● Ladder or step stool: Sturdy, extension ladder (12+ feet) or stable step stool for hard-to-reach branches. 1 unit.
- ● Disinfectant: Rubbing alcohol (70%+) or bleach solution (1:9 ratio) to sterilize tools and prevent disease spread.
- ● Trash bags: Heavy-duty contractor bags (10+ gallons) for debris disposal. 2-3 bags.
- ● Safety gear: Safety glasses and long sleeves/pants to shield from thorns and sap.
- ● Pruning sealant: For larger cuts (over ½ inch) to prevent disease entry.
- ● Work gloves with grip: If your hands get sweaty while climbing.
- ● Tree wound dressing: (Controversial but useful for some gardeners—research first!)
- ● Extension pole saw: For high branches without a ladder (12+ feet reach).
- ● Notebook & pen: To jot down pruning notes or track growth patterns.
Step-by-step instructions for pruning mimosa trees
Here's the precise method I use to keep mimosas thriving with minimal stress.
✂️ Step 1: Time Your Pruning for Optimal Growth
Late winter or early spring—just as new buds begin swelling—is the perfect window. This aligns with the tree's natural dormancy break, encouraging robust regrowth. Avoid pruning in fall or during active blooming periods, as you'll sacrifice next season's stunning pink flowers.
Check for swollen buds along the branches. These look like small, plump knobs where leaves and flowers will emerge. Once you see 30-40% of buds swelling, it's time. If you prune too early, you'll cut back growth that hasn't started yet. If you wait too long, you risk removing flower buds already set for spring.
✂️ Step 2: Remove Dead or Damaged Wood First
Start by identifying branches that are completely brown, brittle, or showing no signs of life. Mimosa wood is naturally thin, so dead branches often snap easily when bent. Use clean, sharp pruning shears to make a 45-degree cut just outside the branch collar—the swollen area where the branch meets the trunk.
Never leave stubs. A proper cut heals faster and prevents disease entry. If a branch is larger than 1 inch in diameter, use a pruning saw instead. Work from the bottom up, removing smaller branches first to avoid damaging larger limbs you still want to keep.
✂️ Step 3: Thin the Canopy for Airflow and Light
Mimosa trees grow fast and can become dense, which invites pests and fungal issues. Focus on removing crossing branches first—these rub against each other, creating wounds. Next, target branches growing inward toward the center of the tree, allowing light to reach the inner canopy.
Leave 2-3 main scaffold branches evenly spaced around the trunk. These should be sturdy and spaced 12-18 inches apart. For each branch you remove, cut back to a healthy outward-facing bud or lateral branch. This ensures the tree grows outward rather than inward.
☀️ Step 4: Shape for Balance and Structural Integrity
Step back and assess the tree's shape. Mimosa trees naturally grow in an open, vase-like form, so avoid heavy pruning that turns it into a dense ball. Remove any water sprouts—fast-growing, vertical shoots that appear along the trunk or branches. These saplings drain energy from the main structure.
For larger branches, make your cut just above a bud or lateral branch that faces outward. If you're unsure which way to cut, imagine the branch growing in the direction of the bud. Avoid leaving large stubs or cutting flush with the trunk, as this can damage the branch collar and slow healing.
💧 Step 5: Clean Up and Monitor Recovery
After pruning, sterilize your tools with 70% rubbing alcohol to prevent spreading disease. Collect and dispose of all pruned branches—never leave them on the ground beneath the tree, as they can harbor pests and fungi. A light application of fungicide (optional but helpful in humid climates) can protect fresh cuts.
Water the tree deeply after pruning to help it recover. Mimosa trees are drought-tolerant once established, but pruning creates new growth points that need moisture. Watch for new leaf buds within 4-6 weeks—this is your sign the tree is healing well. If you see yellowing leaves or oozing sap at pruning sites, the cuts may have been too aggressive.
Tips & tricks for perfect mimosa tree pruning
Real talk: Mimosa trees reward precision pruning with years of vibrant blooms. Here's how to avoid common pitfalls and elevate your technique.
Timing Secret: The 30-40% bud swelling guideline is your golden window—don't guess! On chilly mornings, buds swell slower, so check again in 24 hours if you're unsure. I've learned this the hard way after accidentally pruning too early and losing potential spring flowers. The key is patience: wait until at least 30% of buds show that plump, ready-to-burst appearance before touching your shears.
Cutting Technique: That 45-degree angle outside the branch collar isn't just aesthetic—it's critical for healing. Imagine the cut follows the natural slope of the branch as it meets the trunk. For branches over 1 inch thick, take your time: a clean cut prevents tearing that invites disease. I keep a small notepad by my tools to sketch the perfect angle before making each cut—it's worth the extra 30 seconds per branch.
Scaffold Branch Strategy: Those 2-3 main scaffold branches should form an even triangle around the trunk. Use a tape measure to verify their 12-18 inch spacing—uneven spacing creates weak structural points. Pro tip: Mark your target branch locations with painter's tape before making any cuts. This visual guide prevents over-pruning and ensures balanced growth. I've seen mimosas develop lopsided canopies because of uneven branch spacing, so don't skip this step!
Recovery Monitoring: The 4-6 week window for new leaf buds isn't just a timeline—it's your progress report. After pruning, circle the tree with a garden hose and gently spray the base weekly. This light misting mimics natural dew and signals the tree to focus energy on healing rather than drought response. If you see yellowing leaves after 6 weeks, it's not too late—just apply a balanced fertilizer (10-10-10 ratio) and monitor for 2 more weeks.
Pro Tips for Mimosa Tree The Help
- Real talk: Mimosa trees reward precision pruning with years of vibrant blooms. Here's how to avoid common pitfalls an...
- Timing Secret: The 30-40% bud swelling guideline is your golden window—don't guess! On chilly mornings, buds swell sl...
- Cutting Technique: That 45-degree angle outside the branch collar isn't just aesthetic—it's critical for healing. Ima...
Frequently asked questions
Got questions about pruning your mimosa tree for long-term health?
Here are answers to the most common concerns—from timing to tools and troubleshooting—so you can keep your tree thriving effortlessly.
When is the best time to prune a mimosa tree?
The ideal time is late winter or early spring (before new growth starts) to avoid stressing the tree. Avoid pruning in fall or winter when the tree is dormant, as this can weaken it. Pro tip: If you must prune outside this window, do so in mild weather to reduce shock.
Can I prune a mimosa tree in summer?
While you can prune in summer, it’s not ideal—especially during extreme heat. If necessary, prune early morning or late evening to minimize stress. Heavy summer pruning can stunt flowering and weaken the tree. Stick to light shaping if you must work outside the ideal window.
How much can I trim back a mimosa tree?
Never remove more than 25-30% of the tree’s foliage in one session. Mimosa trees are resilient but can struggle with over-pruning. Focus on thinning out dense branches and removing dead or crossing limbs first. Pro tip: Use the “third cut” method for large branches to avoid tearing the bark.
Will pruning my mimosa tree affect its flowers or seed pods?
Pruning correctly won’t harm flowering—it can even encourage more blooms by improving airflow! However, heavy pruning right before flowering season (late winter) may reduce spring blooms. If you prune for shape, do so after flowering (late spring/early summer) to preserve next year’s flowers.
What should I do if my mimosa tree looks sick after pruning?
If leaves yellow (chlorosis) or wilt, it may be root stress or fungal issues. Ensure you’ve sterilized tools and avoided over-pruning. Water deeply after pruning and monitor for pests. If symptoms persist, check for mimosa wilt disease or nutrient deficiencies (like iron). Act fast: Apply a balanced fertilizer if needed.
Wrapping up and next steps
Pruning your mimosa tree doesn’t have to be a daunting task—it’s all about timing, technique, and a little love! 🌿 With the right tools, seasonal care, and patience, you’ll keep your tree thriving year-round while enjoying its stunning blooms and lush foliage.
Whether you’re tackling dead branches or shaping for aesthetics, every snip brings your mimosa one step closer to peak health.
Ready to roll up your sleeves? Start small—pick one pruning session this weekend and build confidence. Before you know it, your mimosa will be the star of your garden, and you’ll be the proud gardener behind it! 🌟 Grab your pruners and get growing!