Trees
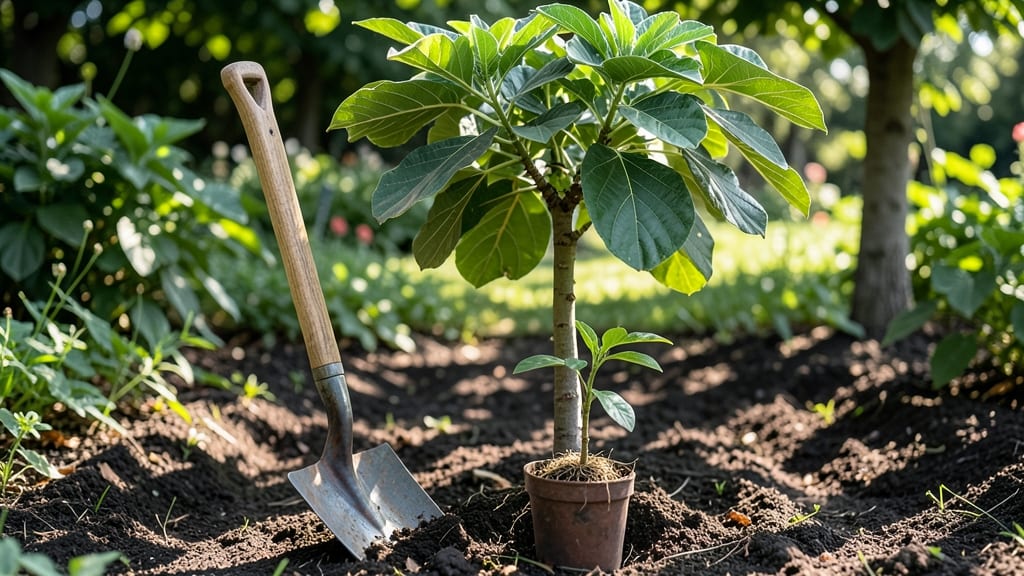
Planting pawpaw trees (Asimina triloba) in your yard means homegrown tropical-tasting fruit that thrives in chilly climates where citrus fails. 🌿 I’ve grown them in Zone 5 for years—they’re the only native fruit tree that handles our winters without fuss.
The secret starts with soil that drains well but holds moisture, and a spot with morning sun and afternoon shade to mimic their woodland origins.
You’ll need a 5-gallon container for nursery plants or a 1-inch-deep planting hole for bare-root trees, plus a 5-foot radius of loose soil to encourage root spread. Pawpaws grow slowly but steadily, so spacing them 15–20 feet apart prevents overcrowding and improves fruit production.
The key is patience—they take 3–5 years to bear fruit, but once they do, you’ll have creamy, custard-like fruit that’s worth the wait.
After planting, water deeply to settle the soil, then keep it consistently moist (not soggy) for the first 6–8 weeks. Mulch with 2–3 inches of wood chips to retain moisture and protect roots from temperature swings.
By late summer, you’ll see vigorous new growth—a sure sign your pawpaw is settling in for decades of harvests.
Whether you start with seeds (slower but rewarding) or nursery plants (faster fruiting), pawpaws adapt to Zones 5–9 and even urban backyards with partial shade. The only real challenge? Waiting for those first fruits. But trust me, the first taste of a homegrown pawpaw makes every step worthwhile.
📚 In This Guide
- What you need
- Instructions
- Tips and common mistakes
- Wrapping up and next steps
What you need
- ● Pawpaw tree saplings: 1–3 (choose cold-hardy varieties like Sunflower or Pennsylvania Golden for best results).
- ● Well-draining soil: Mix of loamy soil + compost (pH 6.0–7.0).
- ● Organic mulch: 2–3 inches of wood chips or straw (retains moisture).
- ● Watering can or hose: 1–2 gallons per tree (or a drip irrigation system for efficiency).
- ● Garden gloves: 1 pair (to protect hands while planting).
- ● Shovel or trowel: 1 medium-sized (for digging holes 12–18 inches deep).
- ● Pruning shears: 1 pair (for trimming dead branches post-planting).
- ● Soil pH test kit: Ensures optimal growing conditions.
- ● Tree stakes + ties: 2–4 (for young trees in windy areas).
- ● Fertilizer (low-nitrogen): 1 bag (e.g., 5-10-10 blend, sparingly).
- ● Pest control (neem oil or diatomaceous earth): For aphid/borer prevention.
- ● Wheelbarrow: 1 (for mixing soil amendments).
Step-by-step instructions for planting cold-hardy pawpaw trees
Here's the straightforward method I've used to establish thriving pawpaw orchards in cooler climates.
🌱 Step 1: Select and Prepare the Planting Site
Pawpaws thrive in rich, well-draining soil with partial shade to full sun (at least 6 hours of sunlight daily). They tolerate cold better than most tropical fruits but need protection from late spring frosts. Choose a site with shelter from strong winds—young trees are particularly vulnerable.
Test your soil's drainage by digging a 12-inch deep hole. If water pools after 24 hours, amend the site with 2-3 inches of compost mixed into the top 12 inches of soil. Pawpaws prefer slightly acidic to neutral soil (pH 6.0-7.0). A simple soil test kit will confirm your pH before planting.
Here's the thing—pawpaws grow best where they won't compete with aggressive roots. Keep them at least 20 feet away from large trees or shrubs. Mark the planting spot with a stake to avoid disturbing the soil later.
🪴 Step 3: Plant Bare-Root Trees at the Right Time
Plant bare-root pawpaw trees in early spring (as soon as the ground is workable) or late fall (before the first hard frost). This gives roots time to establish before summer heat or winter cold stress. If planting in containers, do it anytime roots fill the pot.
Dig a hole twice as wide as the root ball but no deeper—pawpaws hate having their crown buried. Gently loosen the roots if they're circling and position the tree so the graft union (if present) sits 2-3 inches above soil level. This prevents rot and ensures proper growth.
Backfill with native soil (don't add fertilizer yet—it burns tender roots). Water deeply until the soil settles, then create a 4-inch high berm around the hole to direct water to the roots. Mulch with 2-3 inches of organic mulch (like wood chips) to retain moisture and regulate soil temperature.
☀️ Step 4: Provide Care and Monitor Growth
Water newly planted pawpaws deeply once a week for the first two months, then taper to every 10-14 days once established. Pawpaws are drought-tolerant but fruit better with consistent moisture. You'll know it's right when the soil feels damp 2 inches down but not soggy.
Fertilize lightly in early spring with a balanced 10-10-10 fertilizer (about 1/2 cup per tree). Avoid high-nitrogen fertilizers—they encourage leafy growth at the expense of fruit. Pawpaws are slow to mature, so don't expect fruit until 5-7 years after planting.
Watch for pawpaw moth caterpillars in summer—they can defoliate trees. Handpick larvae or use row covers early in the season. Prune out dead or crossing branches in late winter to improve airflow and sunlight penetration.
Tips & tricks for planting cold-hardy pawpaw trees
Let me save you from the common mistakes I made when first planting pawpaws—these tricks will help your trees thrive from day one.
Soil Testing Secret: That 24-hour drainage test in Step 1 is non-negotiable. I learned this the hard way after planting in heavy clay soil that stayed waterlogged. If water pools after 24 hours, mix in 2-3 inches of compost and consider adding sand or perlite for better aeration. Pawpaws hate soggy roots, and this simple test prevents years of struggle.
Planting Timing Tip: Early spring planting gives roots a full growing season to establish before winter, but don't rush—wait until the ground is workable (around 50°F
Mulching Mastery: That 2-3 inches of organic mulch around your tree isn't just decoration—it's insulation. Spread it out to the 4-inch berm you create, but keep it 2 inches away from the trunk to prevent rot. Wood chips work best because they break down slowly, feeding your tree over time while regulating soil temperature. Watering Wisdom: Those first two months of weekly watering are critical, but don't drown your tree. Water deeply until the soil is damp 2 inches down—you'll know it's right when water runs through the hole you dug earlier. Overwatering is just as harmful as underwatering, especially in cooler climates where drainage matters most.
Pro Tips for Planting Pawpaw Trees
- Let me save you from the common mistakes I made when first planting pawpaws—these tricks will help your trees thrive from day one.
- Soil Testing Secret: That 24-hour drainage test in Step 1 is non-negotiable.
- Planting Timing Tip: Early spring planting gives roots a full growing season to establish before winter, but don't rush—wait until the ground is workable (around 50°F
Frequently asked questions
Got questions about growing pawpaws? You’re not alone—these unique trees spark curiosity! Here are answers to the most common queries to help you plant with confidence.
When is the best time to plant pawpaw trees?
Plant pawpaws in early spring (after the last frost) or fall (4-6 weeks before the first frost). Avoid planting in extreme heat or cold, as young roots are sensitive. Spring planting gives roots time to establish before summer’s heat, while fall planting lets them settle before winter dormancy.
How long does it take for pawpaw trees to bear fruit?
Patience is key! Pawpaws typically take 3–5 years to produce fruit, though some vigorous trees may fruit earlier. They also require at least two trees (or one self-pollinating variety) for cross-pollination. Choose a location with good airflow to reduce disease risks and boost fruit production.
Why aren’t my pawpaw trees fruiting?
Common culprits include:
- Lack of pollinators: Pawpaws rely on beetles for pollination—plant near wildflowers or attract native insects.
- Improper spacing: Trees need 20–30 feet apart for airflow and sunlight.
- Young age: Trees under 5 years old may not fruit yet.
- Environmental stress: Overwatering, poor soil, or frost damage can delay fruiting.
Can I grow pawpaws in containers or small spaces?
Pawpaws prefer deep, well-draining soil and struggle in containers long-term. However, you can try large pots (15+ gallons) for small yards, ensuring they get full sun (6+ hours/day) and regular watering. Transplant to the ground within 2–3 years for best growth.
Are pawpaws prone to pests or diseases?
Yes, but most issues are manageable:
- Pawpaw beetles (good!) and fruit flies (bad) can damage fruit—use row covers or organic sprays if needed.
- Fungal diseases (like anthracnose) thrive in wet conditions. Prune for airflow and avoid overhead watering.
- Deer and rabbits may nibble young trees—use tree guards until established.
Wrapping up and next steps
Planting pawpaw trees is a rewarding way to grow a delicious, cold-hardy fruit with minimal fuss—perfect for backyard gardeners and homesteaders alike! 🌱 By choosing the right location, preparing the soil, and providing consistent care, you’ll soon enjoy homegrown pawpaws packed with tropical flavor.
Whether you’re a beginner or a seasoned gardener, this easy guide makes success almost guaranteed.
Ready to take the next step? Mark your calendar for early spring or fall, grab your tools, and start digging! And if you’re eager to learn more, explore local pawpaw growers’ groups or check out USDA planting zones for tailored advice. Happy planting—your future fruit harvest awaits! 🍈✨