Pruning
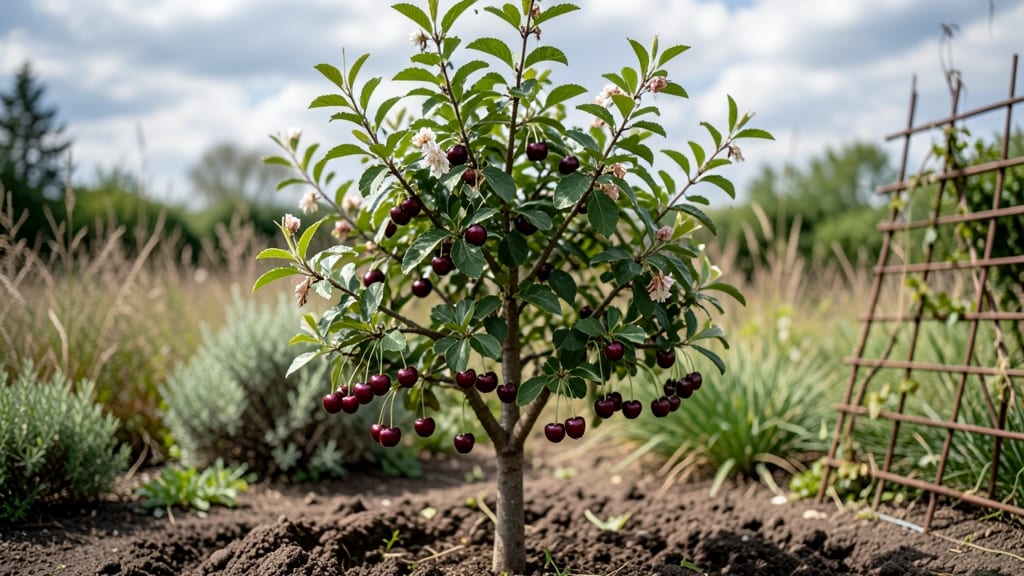
Growing a small cherry-like fruit tree in the Pacific Northwest means you can finally enjoy sweet, homegrown cherries without the space or maintenance of a full-sized tree. 🌿 After years of struggling with overgrown trees that produced sparse fruit, I discovered the perfect compact varieties that thrive in our cool, wet climate—and they’re easier to prune than you’d think.
The right dwarf cherry tree fits neatly in any yard, patio, or even a large container. You’ll need well-draining soil, 6+ hours of sunlight daily, and regular pruning to keep it healthy and productive.
Varieties like ‘Stella’ or ‘Comet’ are cold-hardy, disease-resistant, and perfect for small spaces, producing fruit in just 2-3 years after planting.
With proper care, you’ll harvest dozens of sweet cherries each summer, and the tree will stay manageable year after year. The key is pruning in late winter or early spring—removing dead wood and shaping the tree to encourage strong growth.
It’s simpler than you’d expect, and the payoff is worth every minute.
Whether you’re a beginner or a seasoned gardener, these trees are a game-changer for small gardens. They’re low-maintenance, productive, and bring a touch of orchard charm to any space. Let’s get yours growing strong!
📚 In This Guide
- What you need
- Instructions
- Tips and common mistakes
- Wrapping up and next steps
What you need
- ● Pruning shears: Bypass pruners (4-6" blade) for clean cuts on small branches.
- ● Loppers: 18-24" for thicker branches (up to 2" diameter).
- ● Pruning saw: Curved-tooth saw for branches 2-4" thick (avoid jagged cuts!).
- ● Gloves: Heavy-duty, cut-resistant gloves (e.g., Mechanix or Filson).
- ● Disinfectant: 70% rubbing alcohol or 10% bleach solution (1 part bleach to 9 parts water) to sterilize tools between cuts.
- ○ Pruning sealant: Optional but helpful for sealing large wounds (e.g., Tanglefoot Tree Wound Pruning Sealer).
- ● Ladder or step stool: Sturdy, non-slip (e.g., Little Giant or Werner models) for hard-to-reach branches.
- ● Sharpie or tape: For marking branches to remove (if planning ahead).
- ● Extension pole saw: For high branches without a ladder (e.g., Fiskars 10" pole saw).
- ● Safety glasses: Protect your eyes from debris (e.g., DeWalt safety goggles).
- ● Work apron: With pockets to hold small tools and gloves.
- ● Tree bag or tarp: To collect and dispose of pruned branches neatly.
- ● Notebook & pen: For jotting down notes on cuts or tree health observations.
Step-by-step pruning guide for Pacific Northwest cherry-like trees
Cold-hardy cherry trees thrive with strategic pruning—here’s how to shape them for health and fruit.
🌿 Step 1: Time Pruning for Dormancy or Early Spring
Prune your cherry-like tree during late winter or early spring while it’s still dormant but buds are swelling. This timing prevents disease spread and encourages strong new growth. Avoid pruning in fall—wet conditions invite fungal infections like silver leaf disease, which can devastate trees.
If you must prune in summer, do so immediately after harvest to redirect energy into next year’s fruit production. Never prune during active flowering, as it removes potential fruit buds. I always mark the last frost date on my calendar and schedule pruning 2-3 weeks before buds break—this gives the tree time to heal before spring growth surges.
✂️ Step 2: Remove Dead, Diseased, and Crossing Branches First
Start by eliminating dead wood—branches that snap easily, have no bark, or ooze sap when cut. Next, remove any branches showing signs of disease: discolored cankers, fungal growth, or excessive gumming. Use clean, sharp pruners to make cuts at a 45-degree angle, just outside the branch collar where it meets the trunk.
Next, address crossing branches—where limbs rub together, creating wounds that invite infection. Remove the weaker of the two, cutting back to a healthy lateral branch or bud. I like to step back every few cuts to visualize the tree’s structure. The goal is an open center that allows sunlight to reach all branches—this prevents rot and improves fruit quality.
☀️ Step 3: Thin the Canopy for Light Penetration
Cherry-like trees need 6-8 hours of sunlight daily for optimal fruit set. Thin the canopy by removing up to 25% of the tree’s branches, focusing on those growing inward or upward. Prioritize branches that don’t contribute to the tree’s natural vase shape—these are often the ones blocking light from the center.
Use the "third cut" method for larger branches: First, make an undercut on the underside of the branch, then an overcut on top, and finally sever the branch just outside the branch collar. This prevents tearing. After thinning, step back again—you’ll notice how much more light reaches the interior. This step is critical for preventing fungal issues and ensuring even ripening of fruit.
🪴 Step 4: Shape for Airflow and Fruit Production
Encourage an open-center form by selectively pruning to create a rounded, slightly vase-like shape. Remove suckers (vigorous shoots at the base) and water sprouts (vertical shoots with no lateral branches) immediately—they drain energy from fruit production. For horizontal branches, cut back to a bud facing outward to promote fruit-bearing wood.
If your tree is young, focus on establishing a strong scaffold. For mature trees, prune to renewal branches—older wood often produces fewer cherries, so cutting back to younger, more vigorous growth boosts yields. I always leave 3-5 main branches spaced evenly around the trunk, each with its own smaller branches forming a tiered structure. This mimics the tree’s natural growth pattern and makes future pruning easier.
⏰ Step 5: Clean Up and Monitor for Recovery
After pruning, sterilize your tools with rubbing alcohol or a 10% bleach solution to prevent disease spread. Remove all prunings from the site—burning or chipping them reduces the risk of reinfecting the tree. Water the base deeply to help the tree recover, especially if you’ve made large cuts.
Monitor the tree for 3-4 weeks post-pruning. You’ll see new growth emerge from the buds you left behind—that’s your signal everything is working. If you notice excessive weeping (sap oozing from cuts), the cuts may have been too large. In that case, apply a pruning sealant to larger wounds over 1.5 inches in diameter, but skip it for smaller cuts—it’s not necessary and can trap moisture.
Tips & tricks for perfect Pacific Northwest cherry-like tree pruning
Here's how to elevate your pruning game and ensure your cold-hardy cherry tree thrives for years to come.
Timing Precision: Those 2-3 weeks before buds break are critical—this window gives the tree time to seal cuts before spring growth begins. I check bud development weekly starting in February and mark my calendar when they're just starting to swell. If you're unsure, look for plump, slightly elongated buds that haven't yet opened. Pruning too early leaves wounds vulnerable to cold damage, while waiting too long risks removing next year's fruit buds.
Branch Collar Technique: Never cut flush with the trunk—always leave the branch collar intact. This raised area contains healing tissues that prevent decay. When making your 45-degree angle cuts, visualize the collar as your guide: the cut should end just outside it, about 1/8 inch away. I use a pencil to mark this spot before cutting, especially on larger branches where the collar might be harder to see.
Light Penetration Strategy: After removing up to 25% of branches in Step 3, step back and observe the tree's silhouette. You're aiming for sunlight to reach all the way to the center—this creates even fruit ripening and prevents fungal issues. I like to use a flashlight to shine through the canopy from different angles. If you see dark spots where light can't penetrate, those branches need to go. This is where most pruning mistakes happen—people remove branches but forget to check their work.
Post-Pruning Care: That 3-4 week recovery period is when your tree does most of its healing. During this time, I water deeply every 7-10 days (about 1-1.5 gallons per inch of trunk diameter) to support new growth. Watch for fresh green shoots emerging from the buds you left behind—this is your confirmation that everything is working. If you see excessive weeping from cuts, it means you went too far into the branch collar or made the cuts too large.
Pro Tips for Small Cherry Like Fruit Tree
- Here's how to elevate your pruning game and ensure your cold-hardy cherry tree thrives for years to come.
- Timing Precision: Those 2-3 weeks before buds break are critical—this window gives the tree time to seal cuts before spring growth begins.
- Branch Collar Technique: Never cut flush with the trunk—always leave the branch collar intact.
Frequently asked questions
Got questions about pruning your small cherry-like fruit tree?
You’re not alone! Here are answers to the most common concerns—from timing to troubleshooting—so you can keep your tree thriving in the Pacific Northwest’s climate.
When is the best time to prune my cherry-like fruit tree?
Prune your tree during late winter or early spring (before buds break) to avoid disease spread and encourage strong growth. For PNW’s cold-hardy varieties like Prunus avium or Prunus cerasus, avoid pruning in fall—it can leave wounds vulnerable to fungal infections. Pro tip: If you must prune in summer, do it after harvest to reduce stress.
How do I protect my tree from PNW’s harsh winters?
Cold-hardy cherry-like trees (like Montmorency tart cherries) handle frost well, but young trees or grafted varieties need extra care. Apply a 2–3 inch layer of mulch around the base (but not touching the trunk) to insulate roots. Wrap the trunk with tree guard or burlap if temps drop below -10°F. Avoid pruning in late winter if a hard freeze is forecasted.
What if my tree isn’t producing fruit?
Lack of fruit can stem from poor pollination, over-pruning, or nutrient deficiencies. Ensure your tree has a compatible pollinator nearby (many cherry-like trees are self-unfruitful). Prune to open the canopy for sunlight and air flow, and fertilize with balanced 10-10-10 in early spring. Watch for: sparse blooms (thin branches), small leaves (nitrogen deficiency), or no buds (dormancy issues).
Can I prune my cherry-like tree the same way I do an apple tree?
Not exactly! Cherry-like trees (especially Prunus species) are more susceptible to silver leaf disease if pruned incorrectly. Avoid topping or heavy heading cuts—these create large wounds that invite pathogens. Instead, use 3-point cuts and sterilize tools between cuts. Apple trees can handle heavier pruning; cherries thrive with selective, open-center shaping.
Why are my leaves curling or spotted after pruning?
Curling or spotting often signals fungal infections (like leaf spot or powdery mildew) or pest damage (aphids, mites). If you pruned during wet weather, spores may have spread. Act fast: Remove infected leaves, apply copper fungicide, and improve air circulation by pruning outward-facing branches. For pests, spray with neem oil or introduce ladybugs.
Still stumped? Snap a photo of your tree’s issues and tag #PNWCherryCare—local experts love helping!
Wrapping up and next steps
Growing a small, cold-hardy cherry-like fruit tree in the Pacific Northwest is not just rewarding—it’s empowering! 🌱 With the right pruning techniques, you’ll ensure a thriving tree that produces delicious fruit year after year.
Whether you’re a seasoned gardener or just starting out, taking these steps will set you up for success.
Ready to transform your backyard? Start by marking your calendar for your next pruning session—spring or late winter is the perfect time to begin. Grab your tools, roll up your sleeves, and watch your tree flourish!