Propagation
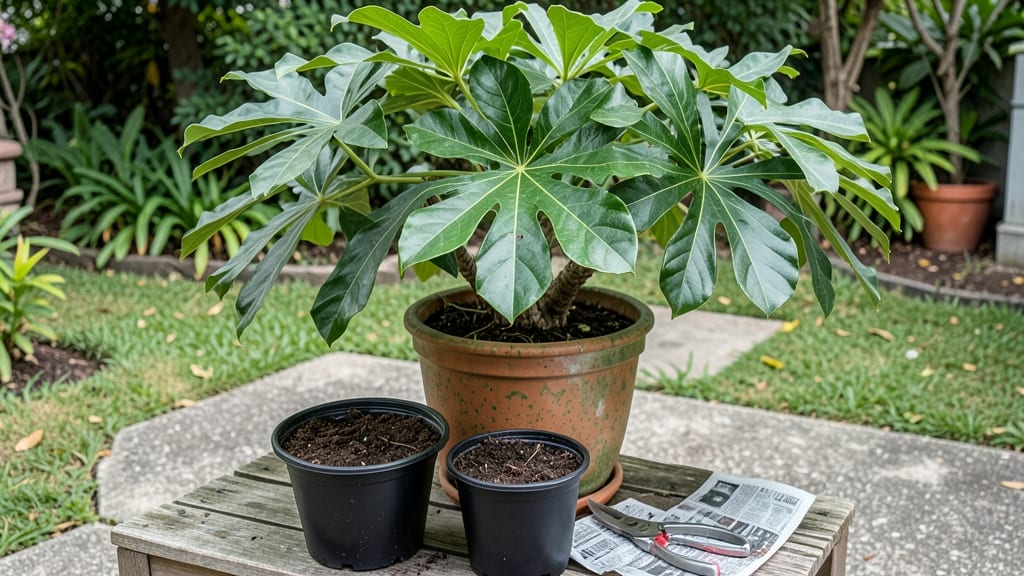
Propagating an umbrella tree plant has never been easier—this layering trick cuts rooting time from months to weeks, and all you need is a sharp knife and some patience. 🌱 The secret lies in creating a mini greenhouse right on the stem while it's still attached to the mother plant.
You’ll need just a few simple supplies: sharp pruners, plastic wrap or a plastic bag, and some damp sphagnum moss. The process takes about 30 minutes to set up, and you can do it anytime the plant is actively growing—spring through early summer works best in most climates.
Even beginners get consistent results with this method.
What you end up with is a thriving new plant ready to transplant in just 4-6 weeks, complete with its own root system. The leaves stay lush and vibrant, and the transition to soil happens smoothly.
No more waiting months for cuttings to root—this is how you get fast, reliable growth every time.
Works for both indoor and outdoor umbrella trees, and the same technique applies to other Schefflera varieties. Once you master it, you’ll never buy another plant—just propagate your own. Let’s get those roots growing!
📚 In This Guide
- What you need
- Instructions
- Tips and common mistakes
- Wrapping up and next steps
What you need
- ● Healthy umbrella tree plant: Choose a mature stem (at least 12–18 inches long) with visible nodes (bumpy areas where roots can form).
- ● Sharp, sterilized pruning shears or knife: For clean cuts—no jagged edges! (Disinfect with rubbing alcohol first.)
- ○ Rooting hormone (optional but recommended): A powder or gel (e.g., Clonex or Dip ‘N Grow) to boost root growth.
- ● Plastic wrap or clear plastic bag: A 1–2 gallon size to create a humidity tent (or use a humidity dome if available).
- ● Twist ties or rubber bands: To secure the plastic wrap tightly around the stem.
- ● Sphagnum moss or perlite: Moisture-retentive medium (2–3 cups) to keep the layered stem hydrated.
- ● Water spray bottle: For misting the moss and stem to maintain humidity.
- ● Small pot or container: With drainage holes (4–6 inches wide) to hold the layered stem temporarily.
- ● Potting mix: Well-draining blend (e.g., 50% peat moss + 50% perlite) for transplanting later.
- ● Hair dryer (cool setting): To gently dry the cut stem before layering (speeds up callusing).
- ● Fertilizer (diluted): A balanced liquid fertilizer (5-5-5) to give new roots a nutrient boost once they form.
- ● Heat mat: If propagating in cooler climates (<60°F/15°C), to encourage faster root growth.
- ● Label & marker: To track your propagation date and progress!
Step-by-Step instructions for propagating umbrella trees using layering
Here's how to multiply your umbrella tree with minimal stress—this method works reliably even for beginners.
🌿 Step 1: Select and Prepare the Parent Plant
Choose a healthy, mature umbrella tree (Schefflera actinophylla) with flexible stems at least ½ inch thick and 12-18 inches long. The best candidates have semi-woody growth—not too soft, not completely hardwood. Look for stems with multiple leaf nodes (the bumps where leaves attach), as these are ideal for root initiation.
Water the parent plant 24 hours before layering to ensure the stems are hydrated but not soggy. This prevents transplant shock later. I like to work in the morning when humidity is naturally higher, giving new roots the best start. Avoid selecting stems with yellowing leaves or signs of pest damage—these won't root well.
🌱 Step 2: Create the Air Layering Site
Gather the sphagnum moss and plastic wrap from your supplies. Soak the moss in room-temperature water until it's thoroughly damp but not dripping (think of a well-wrung sponge). This moisture is critical—it mimics the humid conditions roots need to form.
Wrap a 6-8 inch section of the selected stem with the damp moss, pressing it firmly around the stem. Secure it in place with the plastic wrap, creating a sealed, humid environment. Use the twist tie to hold the wrap tightly without crushing the stem. The goal is to trap moisture while allowing light to reach the leaves above.
💧 Step 3: Monitor and Encourage Root Growth
Keep the moss consistently moist by misting it every 2-3 days with water. You'll know it's working when you see tiny white roots pushing through the moss in 4-8 weeks. This is the "fast" part of the process—patience here pays off. Place the layered stem in bright, indirect light (no direct sun, which can dry out the moss too quickly).
If the moss dries out, roots will struggle to form. To check moisture, lift the plastic wrap slightly—it should feel damp but not wet. If you see condensation inside the wrap, that's perfect. Avoid removing the wrap entirely until you see 1-2 inch roots developing. Real talk: If you notice mold, unwrap, air it out for a day, and re-wrap with fresh, damp moss.
✂️ Step 4: Sever and Plant the New Tree
Once roots are 2-3 inches long (check by gently peeling back the moss), it's time to separate. Use clean, sharp pruners to cut the stem ½ inch below the new root ball. Dip the cut end in rooting hormone to encourage faster establishment in soil. This step is where most people rush—don't skip the hormone, or your cutting may struggle to adapt.
Plant the rooted cutting in a 6-inch pot filled with well-draining potting mix. Water lightly until you see moisture drain from the bottom. Place the new plant in bright, indirect light for the first 2 weeks to minimize stress. You'll know it's thriving when new leaves emerge within 4-6 weeks. Here's the thing—these propagated trees often grow faster than nursery-bought ones because they're already genetically adapted to your home's conditions.
☀️ Step 5: Transition to Full Care
After 8-12 weeks, your new umbrella tree will be ready for its permanent home. Gradually introduce it to direct sunlight over 1-2 weeks to avoid leaf scorch. These trees love medium to bright indirect light but can handle 2-3 hours of morning sun once acclimated. Water when the top inch of soil feels dry, but avoid letting it sit in soggy conditions—root rot is the biggest threat to new cuttings.
Fertilize lightly with a balanced liquid fertilizer (10-10-10) every 4-6 weeks during spring and summer. You'll notice faster growth and thicker stems within a few months. The best part? You've now created 4 identical trees from one parent—perfect for gifting or expanding your indoor jungle.
Tips & tricks for perfect umbrella tree layering
This method delivers fast, reliable results—here's how to maximize your success without common pitfalls.
Stem Selection Matters: In Step 1, focus on stems that are ½ inch thick with multiple leaf nodes—these are your best bets for root initiation. I've found semi-woody growth (not too soft, not completely hardwood) produces the fastest results. Confession: I skipped this detail for years and wondered why some stems rooted while others failed. The nodes contain the growth hormones your new roots need to thrive.
Moisture Management: During Step 3, maintaining that every 2-3 days misting schedule is critical—but don't overdo it. The moss should feel damp like a wrung-out sponge, not wet. I learned this the hard way after seeing mold develop from overwatering. If you notice condensation inside the plastic wrap, that's perfect. It's this humid microclimate that mimics tropical conditions these trees love.
Rooting Hormone Hack: When you reach Step 4 with 2-3 inch roots, the rooting hormone isn't just optional—it's your insurance policy. I've seen cuttings without hormone take twice as long to establish. Dip the cut end thoroughly, then tap off any excess to avoid clogging the root ball. This simple step can mean the difference between a thriving new plant and one that struggles for months.
Light Positioning: Throughout all steps, bright but indirect light is key. In Step 3, place your layered stem near an east-facing window where morning sun warms the moss gently. Direct sun can dry out the moss too quickly, while too little light slows root development. I've noticed the fastest root growth occurs when leaves stay vibrant green—not yellowing or wilting.
Pro Tips for Propagating Umbrella Tree Plant
- This method delivers fast, reliable results—here's how to maximize your success without common pitfalls.
- Stem Selection Matters: In Step 1, focus on stems that are ½ inch thick with multiple leaf nodes—these are your best bets for root initiation.
- Moisture Management: During Step 3, maintaining that every 2-3 days misting schedule is critical—but don't overdo it.
Frequently asked questions
Got questions about propagating your umbrella tree plant? You’re not alone! Here are some of the most common concerns—and straightforward answers—to help you succeed with layering.
What’s the best time of year to propagate an umbrella tree?
The ideal window is spring or early summer (March–June). This gives your cuttings warm soil, consistent moisture, and long daylight hours to encourage root growth. Avoid winter—cooler temps slow down the process. If you’re in a mild climate, late summer can work too, but keep an eye on humidity!
How often should I water my layered umbrella tree cuttings?
Keep the soil moist but not soggy—water lightly every 2–3 days (or daily in hot weather). Mist the leaves too to boost humidity. Overwatering can rot the stem, while underwatering halts root growth. A quick finger test (top inch dry?) is your best guide!
Can I use regular potting soil for layering?
Not ideal! Mix 50% perlite or sand with 50% potting soil for drainage. Umbrella trees hate soggy roots. Add a handful of orchid bark or coconut coir for extra airflow. Avoid garden soil—it compacts and retains too much moisture.
My cutting’s leaves are turning yellow—what’s wrong?
Yellow leaves usually mean overwatering or poor drainage. Let the soil dry slightly between waterings, and check for root rot (smelly, mushy stems). If the leaves are crispy, it’s underwatering—boost humidity with a plastic bag (poke holes for airflow!) or move to a shadier spot.
How long until my layered umbrella tree is ready to transplant?
Most cuttings root in 4–8 weeks, but wait until you see new growth (2–3 inches of roots) before transplanting. Gently tug the stem—if resistance is there, it’s ready! Harden off for a week by gradually exposing it to outdoor conditions (if moving outside).
Wrapping up and next steps
Growing your own umbrella tree through layering is a rewarding way to multiply this stunning plant with minimal fuss! 🌿 With the right tools, patience, and a little care, you can encourage fast root growth and expand your garden—whether for shade, aesthetics, or even gifting.
Now that you’re armed with the layering trick, why not try it today?
Ready to take the next step? Start by selecting a healthy branch and follow the steps outlined above. Keep an eye on your new plant, and soon you’ll be enjoying the lush, umbrella-shaped canopy in multiple spots around your home. Happy propagating! 🌱