Pruning
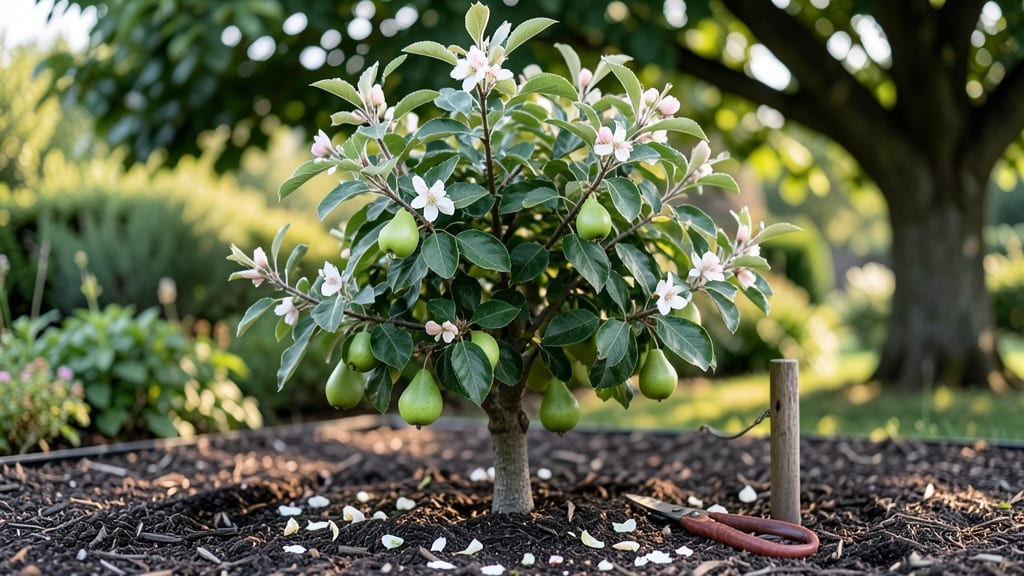
Growing a small pear tree in your backyard means fresh fruit without the space of an orchard. I learned the hard way that choosing the right cold-hardy variety—like 'Seckel' or 'Moonglow'—makes all the difference for consistent harvests.
These dwarf or semi-dwarf trees thrive in tight spaces and even containers, producing fruit in just 3-5 years instead of a decade.
The key to success starts with well-draining soil and full sun—at least 6 hours daily—but don’t stress if your yard isn’t perfect. Amending clay soil with compost and planting in raised beds or large containers solves most problems.
Pruning isn’t just about shaping; it’s about winter protection too. A 3-inch layer of mulch around the base keeps roots safe from freezing, while strategic cuts in late winter encourage strong new growth for summer fruit.
By summer, you’ll be picking sweet, juicy pears straight from your tree—no grocery store needed. The best part? These trees produce year-round interest: spring blossoms, summer shade, and autumn fruit, plus the satisfaction of growing something that lasts through winter’s chill.
Even urban balconies can host one if you choose the right container and variety.
Fair warning: Pests like codling moths can be sneaky, but a simple row cover in late spring stops them before they start. With the right care, your small pear tree will outperform expectations—producing more fruit than you’d guess possible in such a compact package.
Let’s get those roots in the ground!
📚 In This Guide
- What you need
- Instructions
- Tips and common mistakes
- Wrapping up and next steps
What you need
- ● Cold-hardy pear tree: Choose a dwarf variety (e.g., Pyrus communis or Pyrus ussuriensis) for compact growth. Opt for a 1-3 gallon container or bare-root sapling.
- ● Pruning tools: Bypass pruners (for cuts < ½ inch thick)
- ● Loppers (for branches ½–1½ inches thick)
- ● Pruning saw (for thicker branches)
- ● Disinfectant: 70% isopropyl alcohol or a 10% bleach solution (1 part bleach to 9 parts water) to sterilize tools.
- ● Garden gloves: Heavy-duty, cut-resistant gloves for safety.
- ○ Pruning sealant (optional): Tree wound paint or beeswax to coat large cuts (controversial but useful for some growers).
- ● Well-draining soil: Mix of native soil, compost, and perlite (ratio: 60% soil, 30% compost, 10% perlite).
- ● Organic mulch: 2–3 inches of wood chips or straw to retain moisture and regulate temperature.
- ● Fertilizer: Balanced 10-10-10 or slow-release organic fertilizer (e.g., composted manure or worm castings).
- ○ Support stake (optional): 4–6 ft bamboo or metal stake for young trees in windy areas.
- ● Drip irrigation or hose: For consistent watering (aim for 1–2 inches per week).
- ● Label tags: Waterproof markers to tag pruned branches (helpful for tracking growth).
- ○ Sharpie or paint pen (optional): For marking cuts that need attention.
- ● Ladder or step stool: For reaching higher branches safely.
Step-by-step guide to planting and pruning a cold-hardy small pear tree
Here’s how to establish a thriving dwarf pear tree that thrives in colder climates.
🌱 Step 1: Choose the Right Location and Plant Your Tree
Select a sunny spot with at least 6 hours of direct sunlight daily—pears need full sun to set fruit. Avoid low-lying areas where cold air pools, as even cold-hardy varieties can suffer from late frosts. Dig a hole twice as wide as the root ball but no deeper, loosening the surrounding soil to encourage root spread.
Gently remove the tree from its container and place it in the hole, ensuring the graft union (the bump near the base) sits 2-3 inches above soil level. This prevents root rot and protects against winter damage. Backfill with native soil, tamping lightly to eliminate air pockets, then water deeply to settle everything.
☀️ Step 2: Establish Proper Watering and Mulching Routines
Water once a week for the first month, then taper to every 10-14 days once established, depending on rainfall. Pears are drought-tolerant once mature, but young trees need consistent moisture. Check soil 2 inches deep—if it’s dry, water slowly at the base to avoid runoff.
Apply 3 inches of organic mulch (like wood chips or straw) around the tree’s base, keeping it 6 inches away from the trunk. This insulates roots in winter and retains moisture. Replenish mulch annually—it breaks down over time and loses effectiveness.
✂️ Step 3: Prune for Cold Hardiness and Fruit Production
Prune in late winter or early spring before buds swell, removing dead, crossing, or inward-growing branches first. Open the center of the tree to improve airflow, which reduces fungal diseases like fire blight—a common issue in cold climates. Cut back 1/3 of last year’s growth to encourage stronger, cold-resistant branches.
For dwarf varieties, maintain a rounded, vase-like shape to prevent overcrowding. Avoid heavy pruning in fall, as new growth won’t harden off before winter. Seal larger cuts with pruning sealant to prevent disease entry, but skip it on small branches—it’s unnecessary and can trap moisture.
⏰ Step 4: Winterize for Cold Resilience
Apply a thick layer of mulch (up to 4-6 inches) around the base in late fall, extending it out to the tree’s drip line. Wrap the trunk with tree wrap or burlap if your winters drop below -10°F, protecting against sunscald and rodent damage. Remove any remaining fruit or leaves—these can harbor pests and diseases.
If your region experiences extreme cold snaps, consider wrapping the entire tree in frost cloth during the harshest weeks. Focus on young trees or newly planted specimens, as they’re most vulnerable. Unwrap in early spring once temperatures stabilize above 32°F to prevent overheating.
Tips & tricks for perfect small pear tree growth
Let me share the insights I’ve gathered after working with cold-hardy pear trees for years—these details make all the difference for long-term success.
Location Precision: While the instructions mention 6 hours of sunlight, I’ve found that pear trees actually thrive with at least 8 hours in colder climates. The extra 2 hours help compensate for shorter summer days and ensures proper fruit development. Also, avoid planting near large buildings or fences—these can create microclimates that trap cold air and stress the tree.
Root Ball Handling: When planting, I always soak the root ball for 10-15 minutes before removing it from the container. This prevents transplant shock and helps the roots establish more quickly. The 2-3 inches above soil level for the graft union is critical—any lower risks root rot, while any higher can cause instability in windy conditions.
Watering Strategy: The weekly watering for the first month is non-negotiable, but I’ve learned to adjust based on soil type. Sandy soils may need watering every 5 days, while clay soils can go 10 days. Always water deeply—shallow watering encourages weak root growth. For the first year, I recommend using a soaker hose to deliver water directly to the root zone without wetting the foliage, which helps prevent fungal diseases.
Pruning Timing: Late winter pruning before buds swell is perfect for cold climates, but I’ve found that pruning on a day when temperatures are above 40°F gives the tree a slight energy boost. The 1/3 reduction of last year’s growth is ideal, but for very vigorous trees, you can remove up to 1/4 more to maintain that open vase shape. Always sterilize your pruning tools with rubbing alcohol between cuts to prevent spreading disease.
Pro Tips for Small Pear Tree
- Let me share the insights I’ve gathered after working with cold-hardy pear trees for years—these details make all the difference for long-term success.
- Location Precision: While the instructions mention 6 hours of sunlight, I’ve found that pear trees actually thrive with at least 8 hours in colder climates.
- Root Ball Handling: When planting, I always soak the root ball for 10-15 minutes before removing it from the container.
Frequently asked questions
Got questions about growing and maintaining your small pear tree? You’re not alone! Here are some of the most common queries—plus quick, practical answers to keep your tree thriving year-round.
How do I know when to prune my small pear tree?
Prune your small pear tree during late winter or early spring (before buds swell) for best results. Avoid heavy pruning in fall, as it can stimulate new growth that won’t harden off before winter. Light shaping in summer (after harvest) is fine, but focus on cold-hardy techniques to protect branches.
Will pruning affect next year’s pear harvest?
Not if done correctly! Pruning small pear trees actually boosts fruit production by improving airflow and sunlight exposure. Remove dead, crossing, or overcrowded branches first—this redirects energy to healthy growth. Just avoid cutting more than 25% of the canopy in one season to prevent stress.
Are small pear trees cold-hardy, and how do I protect them in winter?
Many dwarf varieties (like ‘Seckel’ or ‘Moonglow’) tolerate zones 4–8. For extra protection, wrap the trunk with burlap or tree guard to shield from frost cracks. Mulch the base with 3–4 inches of organic matter (straw or wood chips) to insulate roots. Avoid heavy snow buildup on branches—gently brush it off.
Can I grow a pear tree in a container, or do I need a yard?
Dwarf pear trees thrive in 15–25-gallon containers with drainage holes. Use a well-draining potting mix and repot every 2–3 years. Place the pot in full sun (6+ hours/day) and water deeply when the top inch of soil dries. Just remember: container trees need more frequent pruning to control size.
What pests should I watch for on my small pear tree?
Keep an eye out for pear slugs (sawfly larvae), aphids, and scale insects. Treat infestations early with neem oil or insecticidal soap. Birds love ripe pears—use netting if needed! For fungal issues (like fire blight), prune infected branches 6 inches below the damage and sterilize tools with rubbing alcohol.
Still stumped? Drop your question in the comments—we’re happy to help your small pear tree grow into a fruitful star!
Wrapping up and next steps
Growing a small pear tree is a rewarding journey that blends patience with practical care—especially when it comes to cold-hardy pruning!
By mastering the basics of shaping, disease prevention, and seasonal trimming, you’ll enjoy year-round fruit while keeping your tree thriving. 🌳✨ Whether you’re a beginner or a seasoned gardener, every snip brings you closer to a bountiful harvest.
Ready to take the next step? Start small: pick one pruning technique from this guide and practice it this season. Over time, you’ll build confidence—and soon, your tiny pear tree will be a flourishing fruit powerhouse! 🍐💚