Pruning
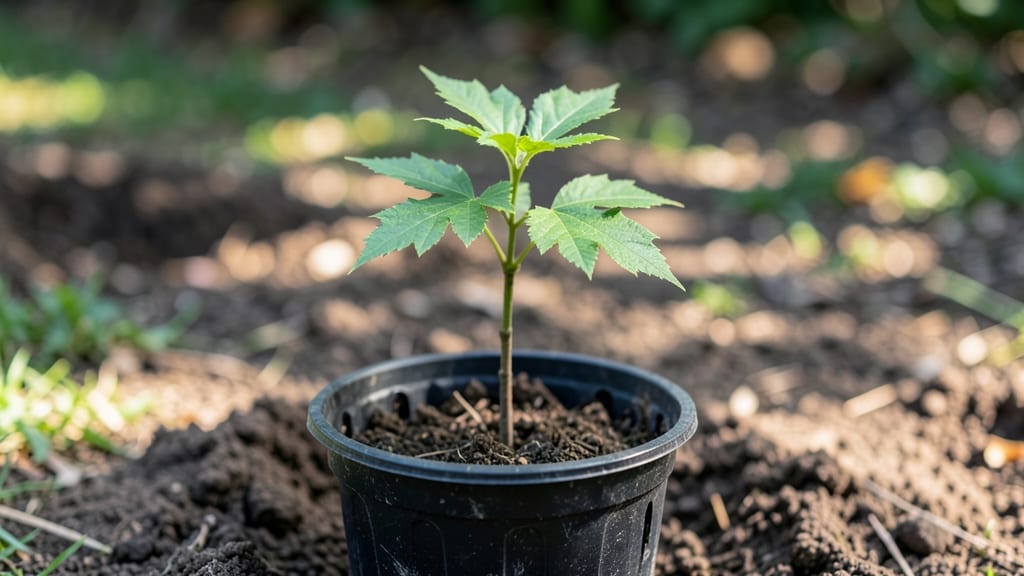
Growing sugar maple tree seedlings in the Pacific Northwest means you're planting for generations—not just seasons. 🌿 These hardy trees thrive in our cool, wet climate, but only if you start with the right soil prep, spacing, and early-care routine.
I've learned the hard way that rushing the process leads to weak, frost-sensitive saplings that struggle through their first winter.
The key to success lies in mimicking their natural forest habitat: well-draining, slightly acidic soil mixed with organic matter, and a spot that gets morning sun but afternoon shade.
Young seedlings need consistent moisture—think of it like keeping a sponge damp, not soggy—and mulch helps regulate soil temperature during our dramatic swings from rain to frost. Spacing them 8-10 feet apart gives their roots room to establish before they compete for nutrients.
By their second year, you'll see sturdy stems and vibrant green leaves that signal healthy growth. The real magic happens in winter when these seedlings, properly hardened off, stand tall through our frost while weaker competitors falter.
With patience and the right early care, you're not just growing a tree—you're creating a living legacy that will outlast you.
Whether you're starting from nursery stock or wild-collected seeds, the principles stay the same. The Pacific Northwest's climate gives us an advantage—these maples love our cool summers and mild winters—but only if we give them the right foundation. Let's get those seedlings off to the strongest possible start.
📚 In This Guide
- What you need
- Instructions
- Tips and common mistakes
- Wrapping up and next steps
What you need
- ● Sugar maple seedlings: 3–5 healthy, 1–2 ft tall seedlings (bare-root or container-grown). Look for Acer saccharum labeled for cold-hardy zones (5–6).
- ● Garden soil: 2–3 cubic yards of well-draining, slightly acidic soil (pH 5.0–6.5). Mix in compost (1 part compost to 3 parts soil) for nutrients.
- ● Mulch: 2–3 inches of wood chips or pine straw to protect roots from frost and retain moisture.
- ● Fertilizer: Slow-release 10-10-10 fertilizer (1 lb per seedling).
- ○ Optional: Mycorrhizal fungi (1 packet) to boost root health.
- ● Watering supplies: Hose with soaker nozzle or drip irrigation kit.
- ● Water storage (5–10 gallons) for consistent hydration.
- ● Planting tools: Trowel or d-handle transplant spade.
- ● Garden gloves (1 pair).
- ● Measuring tape (for spacing seedlings 10–15 ft apart).
- ● Frost cloth or row covers (for young seedlings during late frosts).
- ● Tree stakes & ties (if seedlings are tall or in windy areas).
- ● Soil pH tester to ensure optimal acidity levels.
- ● Organic pest control (e.g., neem oil spray for early aphid prevention).
Step-by-Step instructions for cultivating sugar maple seedlings in the Pacific Northwest
Here's how to grow hardy, frost-resistant sugar maple saplings that thrive in our cooler climates.
🌱 Step 1: Collect and Stratify Seeds Properly
Sugar maple seeds need a cold period to break dormancy. Collect winged samaras in late fall when they're brown and dry. Store them in a sealed container in your refrigerator for 90 days—this mimics winter stratification. I keep mine in a plastic bag with a damp paper towel to maintain moisture without rot.
After stratification, remove the seeds from the cold. They're ready when the wings separate easily from the seed. Here's the thing—don't rush this step. If you plant them too soon, they won't germinate properly and may rot in the soil.
🪴 Step 2: Prepare Containers and Planting Medium
Use 4-inch deep containers with drainage holes—plastic nursery pots work well. Fill them with a mix of 50% peat moss and 50% perlite to create a lightweight, well-draining medium that prevents root rot. I like to add a handful of coarse sand to improve drainage further.
Moisten the mix until it's damp but not soggy—think of a wrung-out sponge. Plant each seed ½ inch deep, about ¼ inch below the soil surface. The wing should point upward naturally. You'll see strong seedlings emerge from these properly positioned seeds.
☀️ Step 3: Provide Controlled Growing Conditions
Place containers in a location with bright, indirect light—a north-facing window or under 50% shade cloth works best. Sugar maples hate direct sun at this early stage. Maintain 60-65°F temperatures consistently. If your home runs cooler, a simple heat mat can help maintain warmth.
Water gently when the top inch of soil feels dry—about once every 5-7 days. Overwatering is the biggest killer of young seedlings. You'll notice healthy seedlings when the first true leaves appear after 4-6 weeks. These leaves will be broad and lobed, unlike the initial seed leaves.
⏰ Step 4: Transplant and Acclimate Seedlings
After 3-4 months, when seedlings reach 6-8 inches tall, it's time to move them outdoors. Choose a partially shaded spot in your garden—young sugar maples can't handle full sun yet. I dig holes twice as wide as the root ball but only as deep as the container.
Hardening off takes 10-14 days. Start by placing seedlings outside for 1-2 hours the first day, gradually increasing time. Watch for wilting—if you see it, they're not ready yet. Once they tolerate full outdoor conditions without stress, transplant them permanently in early spring before new growth begins.
🌿 Step 5: Maintain Frost-Resistant Growth
Water deeply once a week during the first growing season, ensuring moisture reaches 6 inches deep. Mulch with 2 inches of wood chips to protect roots from temperature swings. Sugar maples develop strong frost resistance when grown slowly—don't fertilize heavily in the first year.
You'll know your seedlings are thriving when they develop multiple sets of true leaves and show vigorous new growth in spring. By their third year, they'll be ready for their permanent location in your landscape, where they'll grow into majestic trees resistant to our Pacific Northwest winters.
Tips & tricks for perfect sugar maple seedling cultivation
Growing these hardy seedlings takes patience—but these tricks will help you avoid the most common pitfalls along the way.
Stratification Success: The 90-day cold period in Step 1 is non-negotiable for breaking dormancy. I label my containers with the start date and set a reminder—skipping this step means seeds that won't germinate. Place a damp paper towel inside with the seeds to maintain even moisture without creating soggy conditions.
Container Preparation: When mixing your 50% peat moss and 50% perlite in Step 2, add a handful of coarse sand to improve drainage. This prevents root rot, which is the #1 killer of young seedlings. I test the mix by squeezing it—it should hold shape but crumble when pressed, not stay damp like wet clay.
Lighting Strategy: Sugar maples need bright but indirect light during Step 3. If your north-facing window isn't bright enough, supplement with a grow light 12 inches above the seedlings for 10-12 hours daily. Direct sunlight will scorch the delicate leaves, so avoid south-facing windows entirely.
Transplant Timing: Wait until seedlings reach 6-8 inches tall (Step 4) before transplanting—smaller seedlings struggle to establish roots. I mark my calendar 3-4 months after planting to ensure I don't rush this critical stage. The gradual hardening process over 10-14 days is what builds their frost resistance.
Pro Tips for Sugar Maple Tree Seedlings
- Growing these hardy seedlings takes patience—but these tricks will help you avoid the most common pitfalls along the way.
- Stratification Success: The 90-day cold period in Step 1 is non-negotiable for breaking dormancy.
- Container Preparation: When mixing your 50% peat moss and 50% perlite in Step 2, add a handful of coarse sand to improve drainage.
Frequently asked questions
Got questions about growing sugar maple tree seedlings in the Pacific Northwest?
You’re not alone! Here are answers to the most common queries to help you nurture strong, frost-resistant saplings with confidence.
When is the best time to plant sugar maple seedlings in the PNW?
Plant your seedlings in early spring (March–April) or fall (September–October) for optimal success. Spring gives roots time to establish before summer heat, while fall planting avoids drought stress. Avoid winter planting—frost can damage tender roots!
How cold-hardy are sugar maple seedlings, and how do I protect them from frost?
Mature sugar maples thrive in USDA Zones 3–8, but seedlings need extra care in early years. Mulch heavily (3–4 inches) with wood chips or straw, and wrap the trunk with tree guard if temps drop below 10°F. Young roots are vulnerable—water deeply before frost hits to boost resilience!
Can I grow sugar maple seedlings from seed, or should I buy nursery stock?
While you can grow them from seed (it takes 10–15 years for saplings!), nursery-grown seedlings are faster and more reliable. Look for 1–2 foot tall specimens with healthy roots. Seedlings from reputable PNW nurseries adapt better to local soil and climate.
Why are my sugar maple seedlings turning yellow or dropping leaves?
Yellowing leaves often signal overwatering, nutrient deficiency, or transplant shock. Check soil moisture—seedlings need 1 inch of water weekly (more in summer). Amend soil with compost if leaves are pale. Dropping leaves post-planting? It’s normal for 2–3 weeks as they adjust.
How much space should I leave between sugar maple seedlings?
Space seedlings 10–15 feet apart for mature growth (they reach 40–60 feet tall). In tight spaces, prune aggressively to maintain size. If planting near structures, leave at least 20 feet to avoid root competition or damage to foundations.
Pro Tip:
Mulch isn’t just for frost protection—it locks in moisture and suppresses weeds, giving your seedlings a fighting chance. Replenish mulch annually to keep roots happy!
Wrapping up and next steps
Growing sugar maple tree seedlings in the Pacific Northwest is a rewarding journey—one that blends patience, care, and a deep connection to nature’s resilience. 🌱 With the right frost-resistant techniques, proper pruning, and attentive nurturing, you’re not just planting a tree; you’re cultivating a legacy for future generations.
Now that you’re armed with the knowledge, why not take the next step? Start small: gather your seedlings, prepare your soil, and watch as your green thumb transforms your yard into a thriving maple haven.
Ready to dive in? Your future shade—and the ecosystem’s—will thank you!