Pruning
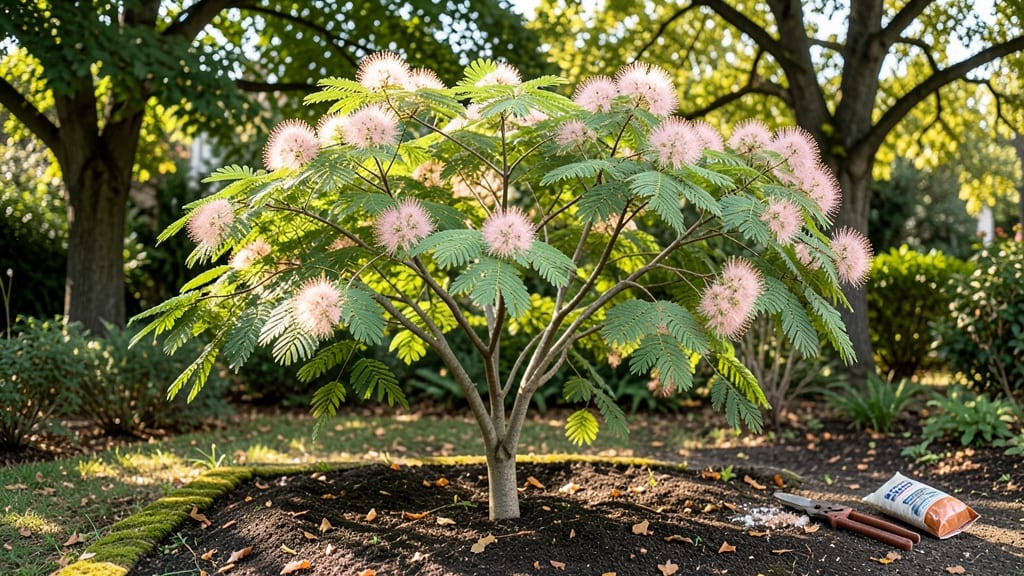
Your young mimosa tree is a fluffy, pink-blooming dream—if you prune it right. ✨ I’ve turned my own struggling sapling into a showstopper by learning when and how to trim, and the difference is night-and-day blooms.
The key isn’t just cutting branches; it’s shaping the tree to grow stronger, not just prettier.
Mimosas bloom best when pruned twice a year: once in late winter (before buds swell) and again after flowering. Grab your sharp bypass pruners and focus on removing dead wood, crossing branches, and thinning out crowded spots—never more than 25% of the foliage at once.
This keeps the tree’s signature feathery leaves lush and encourages those pink, pom-pom flowers to return every season.
What you’ll get is a tree that looks like it belongs in a botanical garden, not your backyard. The blooms stay longer and denser, the branches grow sturdier, and you’ll avoid the common mistake of over-pruning, which stresses young trees.
Plus, mimosas are drought-tolerant once established, so once you nail the pruning, they’re low-maintenance stars.
Works for mimosas in containers or ground, in zones 7-10, and even if you’ve never pruned before. The first cut is the hardest—after that, it’s just about timing and confidence. Let’s get those branches looking intentional!
📚 In This Guide
- What you need
- Instructions
- Tips and common mistakes
- Wrapping up and next steps
What you need
- ● Pruning shears: Sharp, bypass-style shears (4–6" blades) for clean cuts on small branches.
- ● Loppers: 8–10" loppers for thicker branches (up to 2" diameter).
- ● Hand pruners: Anvil-style for emergency cuts (avoid for healthy wood).
- ● Disinfectant: 70% isopropyl alcohol or bleach solution (1 part bleach to 9 parts water) to sterilize tools between cuts.
- ○ Gloves: Heavy-duty, cut-resistant gloves (optional but recommended for thorns!).
- ● Pruning saw: Bow saw or pruning saw for branches thicker than 2" (rare for young mimosas but good to have).
- ● Rag or paper towels: For wiping tools between cuts.
- ● Extension pole: For reaching high branches safely (6–10 ft, depending on tree height).
- ● Tree wound dressing: Pruning sealant (controversial—skip if unsure; mimosas heal well without it!).
- ● Notebook & pen: To jot down pruning notes or map out cuts for consistency.
- ● Safety goggles: Protect your eyes from debris (especially when using a saw).
- ● Ladder: Sturdy, 3-sided ladder (if tree exceeds 10 ft).
- ● Knowledge: Familiarize yourself with mimosa tree growth habits (e.g., avoid cutting into old wood—focus on new growth!).
- ● Timing: Prune during dormant season (late winter/early spring) or right after blooming for best results.
- ● Weather: Choose a dry, overcast day to prevent stress on the tree.
- ● Tree health: Inspect for pests/diseases before pruning (treat issues first if spotted).
How to prune a young mimosa tree for healthy, continuous blooms
This is the pruning method I’ve used to keep my mimosa trees flowering abundantly for years—no guesswork, just strategic cuts.
✂️ Step 1: Prune in Late Winter to Early Spring for New Growth
Start your mimosa pruning 2-4 weeks before your last frost date when the tree is still dormant. This timing ensures you remove dead wood while stimulating fresh, vigorous growth that will support heavy blooms. Use clean, sharp pruners to make cuts just above a leaf node or outward-facing bud—never leave stubs, as they invite disease.
Focus on removing dead, diseased, or crossing branches first. These compete with healthy growth and weaken the tree’s energy. I always start at the top and work my way down, so I don’t miss any hidden damage. If you see branches growing inward, cut them back—this opens the tree’s canopy to better airflow and sunlight, which is critical for mimosas.
☀️ Step 2: Thin the Canopy in Late Spring to Improve Airflow
After the first flush of blooms appears in late spring, it’s time to thin the canopy. Mimosa trees naturally grow dense, so pruning 20-30% of the foliage at this stage prevents overcrowding. Look for branches that are rubbing against each other or growing too close together—these should be the first to go. A well-thinned tree will have sunlight reaching all the way to the inner branches, which encourages more blooms along the entire tree.
Make your cuts just above a bud that faces outward. This ensures new growth will fill in the gaps naturally. Avoid heavy pruning now—you’re not shaping the tree, just creating space. If you notice any branches with yellowing leaves or weak growth, remove them entirely to redirect the tree’s energy to stronger, healthier limbs.
⏰ Step 3: Light Maintenance Pruning After Each Bloom Cycle
Mimosa trees bloom in waves, so after each major flush of flowers fades, do a quick check for spent blooms and leggy growth. Deadhead faded flowers by cutting back to the nearest leaf node—this prevents seed pods from forming and encourages the tree to produce more blooms. I like to do this in early summer and again in early fall, just before the tree enters dormancy.
If you see any branches growing too long or leggy, trim them back by one-third to encourage bushier growth. The key here is light, strategic cuts—never remove more than 25% of the tree’s foliage at once. Over-pruning stresses mimosas and can reduce next year’s blooms. Watch for new shoots forming at the base of the tree; these are a sign your pruning is working and the tree is putting energy into fresh growth.
✂️ Step 4: Shape and Clean Up in Early Fall for Winter Readiness
As temperatures drop in early fall, do a final shaping prune to prepare the tree for winter. Remove any weak, crossing, or diseased branches one last time, and trim back any growth that looks overcrowded. This isn’t about heavy pruning—think of it as tidying up so the tree enters dormancy in the best possible shape. Mimosa trees are hardy, but a well-pruned tree will bounce back stronger in spring.
Clean your pruners with rubbing alcohol after each cut to prevent spreading disease. I also like to apply a light layer of organic mulch around the base of the tree to protect the roots from freezing temperatures. Avoid heavy pruning now—you want the tree to focus on storing energy for next year’s blooms, not recovering from aggressive cuts.
Tips & tricks for perfect mimosa tree pruning
These strategic insights will help you transform your mimosa tree into a blooming powerhouse—without the guesswork.
Timing is Everything: The 2-4 weeks before your last frost date is your window for Step 1 pruning, but don't wait until the last minute. Cold snaps can damage fresh cuts, so aim for mid-to-late winter when temperatures consistently stay above freezing. I've learned this the hard way after seeing new growth freeze in early spring—better to be early than late. Use your local extension service's frost date calculator if you're unsure.
Tool Technique: Your pruners are your most important tool, so treat them right. Sterilize them with rubbing alcohol after each cut to prevent disease spread—this is especially critical when working with mimosas, which are prone to fungal issues. I keep a small spray bottle of diluted alcohol handy for quick clean-ups between branches. Also, make sure your blades are sharp; dull tools crush wood fibers, creating larger wounds that invite infection.
Canopy Strategy: When thinning in Step 2, focus on creating a balanced silhouette rather than just removing branches. Look for the "scaffold branches"—the main structural limbs—and prioritize keeping these while removing smaller branches that grow between them. This creates an open framework that lets sunlight penetrate deeper into the tree, which is key for those signature mimosa blooms. Think of it like creating a natural trellis system for your tree's energy.
Seasonal Maintenance: The early summer and early fall pruning in Step 3 are about encouraging bushier growth, not just tidying up. When you see those leggy branches, trim them back by one-third—but here's the secret: make your cuts just above a leaf node that's facing outward. This simple technique ensures new growth emerges in the right direction, filling in those gaps naturally. I've seen trees go from sparse to lush just by paying attention to this detail.
Pro Tips for Young Mimosa Tree
- These strategic insights will help you transform your mimosa tree into a blooming powerhouse—without the guesswork.
- Timing is Everything: The 2-4 weeks before your last frost date is your window for Step 1 pruning, but don't wait until the last minute.
- Tool Technique: Your pruners are your most important tool, so treat them right.
Frequently asked questions
Got questions about keeping your young mimosa tree thriving?
Here are some of the most common ones—and their answers—to help you master pruning for year-round blooms!
When is the best time to prune a young mimosa tree?
The ideal time to prune a young mimosa tree is late winter or early spring (before new growth begins). This encourages healthy blooming while avoiding winter stress. Light trimming can also happen in summer to shape the tree, but avoid heavy cuts during the blooming season (spring).
How much can I trim off a young mimosa tree?
For young mimosa trees, never remove more than 25% of the foliage in one session. Focus on dead, crossing, or overcrowded branches first. If you’re shaping, aim for a balanced canopy—think of it like giving your tree a gentle haircut, not a buzz cut!
Will pruning stop my mimosa tree from blooming?
No—pruning actually encourages more blooms! Mimosa trees bloom on new wood, so strategic trimming removes old growth and stimulates fresh, flower-laden branches. Just avoid over-pruning in late summer/fall, as this can reduce next year’s flowers.
What should I do if my mimosa tree looks sad after pruning?
If your tree appears stressed (yellowing leaves, sparse growth), it might be over-pruned or lacking nutrients. Water deeply, apply a balanced fertilizer, and avoid heavy cuts for 6–8 weeks. Mimosa trees are resilient—give it time to recover!
Are there alternatives to mimosa trees for low-maintenance blooms?
Yes! If mimosa’s thorns or pruning needs feel overwhelming, consider crape myrtle (drought-tolerant, colorful bark) or Japanese lilac (fragrant, easy to shape). Both offer stunning blooms with less fuss—just check your climate zone first!
Wrapping up and next steps
Growing a thriving young mimosa tree with vibrant, year-round blooms is all about timing, technique, and a little patience! 🌸 By mastering the art of strategic pruning—whether it’s light shaping in spring or rejuvenating cuts in late winter—you’ll encourage lush foliage and stunning flowers while keeping your tree healthy.
Remember, consistency is key, so make pruning a seasonal habit.
Now that you’re armed with the know-how, roll up your sleeves and give your mimosa tree the care it deserves! Start by grabbing your tools and scheduling your first trim—your tree (and your neighbors!) will thank you for the burst of color. 🌿✨